A4 Mk2
| Removing and installing differential |

| Special tools and workshop equipment required |
| t | Multi-purpose tool -VW 771- |
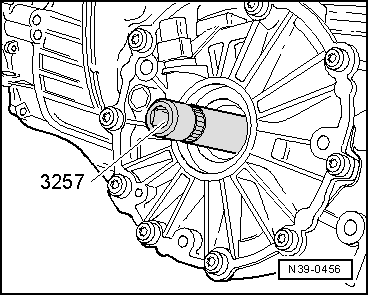
| t | Socket (27 mm) -3257- |
| t | Torque wrench -V.A.G 1331- |
| t | -1-Internal puller -Kukko 21/3- |
 Note
Note| t | Removing and installing is possible with the gearbox installed. |
| t | The differential can be removed and installed without removing the selector mechanism, input shaft, pinion shaft and gearbox cover. These components must be removed if the differential needs to be adjusted. |
| t | Inspect polygon bearings for visible damage. |
| t | The polygon bearings can only be renewed together with the flange shaft. |
| t | If the polygon bearings do not run smoothly with the flange shaft removed, this does not necessarily indicate that the bearings are defective. A test for noisy bearings can only be performed with the bearings installed. |
| t | A spacer ring is fitted between the polygon bearing and the differential sun wheel on flange shafts with 30 mm spline diameter → Fig.. |
| t | Adjustment work is required when renewing the parts marked with 1) → Chapter. |

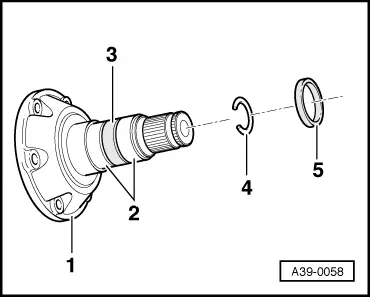
| 1 - | Gearbox housing 1) |
| 2 - | Oil seal |
| q | Renewing → Chapter |
| 3 - | Circlip |
| q | Renew |
| q | Removing and installing → Fig. |
| 4 - | Spacer ring |
| q | Is only fitted on flange shafts with polygon bearings and a spline diameter of 30 mm |
| q | Removing → Fig. |
| q | Installing → Fig. |
| 5 - | Flange shaft |
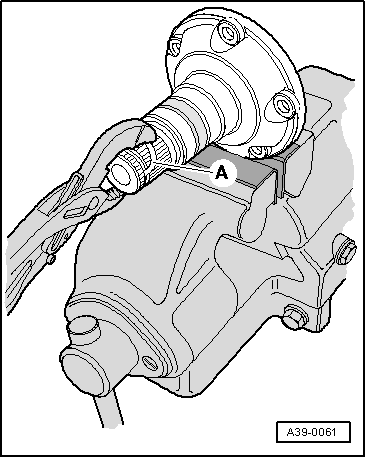
| q | Removing and installing → Chapter |
| q | Flange shaft assembly → Fig. |
| 6 - | Differential with crown wheel 1) |
| q | Can be removed without removing gearbox |
| q | Dismantling and assembling → Chapter |
| 7 - | Cover for final drive 1) |
| q | Coat sealing surfaces lightly with sealing paste -AMV 188 001 02- |
| 8 - | TORX bolt |
| q | 25 Nm |
| 9 - | Speedometer drive wheel |
| q | Removing and installing → Chapter |
| q | Fit the drive wheel carefully onto the differential, making sure that it is kept straight. Do not use force; the drive wheel can break easily. |
| q | Not fitted from 07.02 onwards |
|
|
|
|
|
|