audi Workshop Repair Guides

Audi Workshop Service and Repair Manuals

Transporting gearbox > < Removing gearbox on vehicles with 2.7 ltr. TDI engine
Installing gearbox on vehicles with 2.7 ltr. TDI engine
l  Tightening torques → Chapter, → Anchor
  Note
t  Before fitting a replacement gearbox, always clean the ATF pipes and ATF cooler → Chapter and renew the additional ATF filter → Chapter.
t  Observe all repair instructions → Chapter
t  Clean gearbox input shaft splines and damper unit splines on flywheel. Remove corrosion and apply only a very thin coating of grease -G 000 100- to the splines. It is important to remove excess grease.
t  Secure all hose connections with the correct hose clips (as original equipment); refer to → Parts catalogue.
t  Re-attach all cable ties at the same locations when re-installing.
–  Check that dowel sleeves for centralising engine/gearbox are in the cylinder block; install if necessary.
–  Before installing gearbox, tie electrical wiring off to one side so that it cannot be trapped between the engine and the gearbox.
–  Attach intermediate plate or spacer plate onto dowel sleeves.
–  Lift gearbox high enough to be able to install selector lever cable.
  Note
   
t  Do not bend or kink the selector lever cable.
t  Before installing, lightly lubricate ball socket on selector lever cable with polycarbamide grease -G 052 142 A2-.
–  Press selector shaft lever -A- at gearbox to rear as far as it will go -arrow- until parking lock engages.
  A37-0410
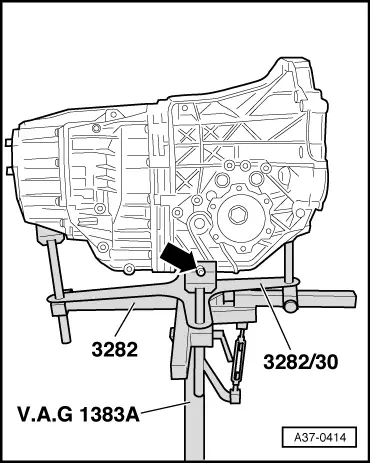
–  Raise gearbox carefully and move to installation position using gearbox support -3282-.
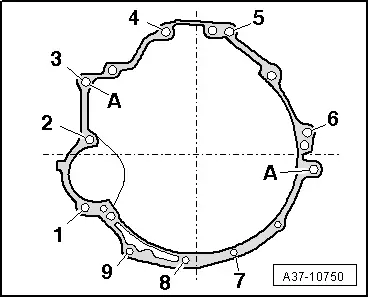
–  Bolt gearbox onto engine with new bolts.
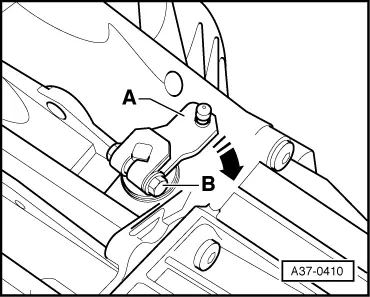
–  Raise gearbox slightly at rear to install lower bolts for securing gearbox to engine.
The remaining installation steps are carried out in reverse sequence; note the following:
–  Install gearbox support → Chapter.
–  Install tunnel cross member with subframe → Rep. Gr.40.
  Caution
There is a risk of damage to the gearbox due to inadequate ATF cooling.
All plugs inserted in ATF pipes and gearbox when dismantling must be removed.
–  Install ATF pipes with new O-rings → Chapter.
–  Install front exhaust pipe → Rep. Gr.26.
–  Bolt drive shafts to gearbox flanges → Rep. Gr.40.
–  Electrical connections and routing → Current flow diagrams, Electrical fault finding and Fitting locations.
–  Follow the steps required after connecting the battery → Rep. Gr.27.
–  Check selector lever cable adjustment → Chapter.
–  Check gear oil level in front final drive → Chapter.
–  Check and top up ATF level → Chapter.
Tightening torques
  Note
t  Tightening torques apply only to lightly greased, oiled, phosphated or black-finished nuts and bolts.
t  Additional lubricant such as engine or gearbox oil may be used, but do not use graphite lubricant.
t  Do not use parts which have been degreased.
t  Tolerance for tightening torques ±15%.
  A37-0414
Engine/gearbox securing bolts
  A37-10750
ItemBolt 1Nm
1 2)M10x8065
2 2)M10x10065
3, 4, 5, 6M12x10065
7, 8, 9M10x8045
ADowel sleeves for centralising
l  1) Renew bolts for securing gearbox to engine.
l  2) Bolt strength rating 10.9

   
ComponentNm
Bolts/nutsM69
 M820
 M1040
 M1265
Except for the following: 
Heat shield for drive shaft to gearbox23


Transporting gearbox > < Removing gearbox on vehicles with 2.7 ltr. TDI engine