
Removing and installing vibration damper in A4 Mk2 power unit engine
 Note
Note |
|
|
Note
|
|
|
|
| Component | Nm |
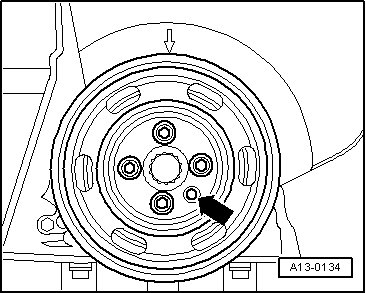
| Vibration damper/pulley to crankshaft | 10 + 90° → Remark → Remark |
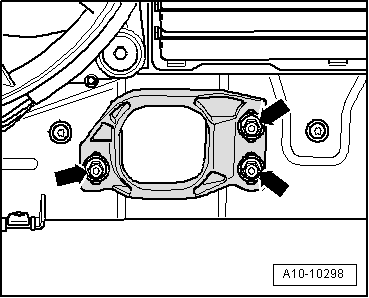
| Stop for torque reaction support to lock carrier | 28 |
|