Removing and installing 4-position relay carrier in plenum chamber electronics box
Removing and installing 4-position relay carrier in plenum chamber electronics box
Removing and installing 4-position relay carrier in plenum chamber electronics box
Removing
–
Switch off ignition and take out ignition key.
–
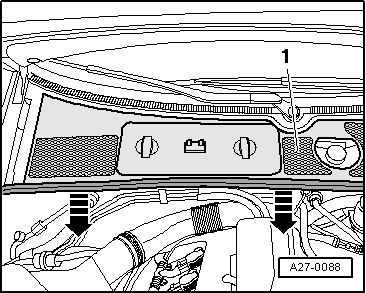
Detach rubber seal of plenum chamber cover in direction of -arrow-.
–
Remove plenum chamber cover -1- to front.
–
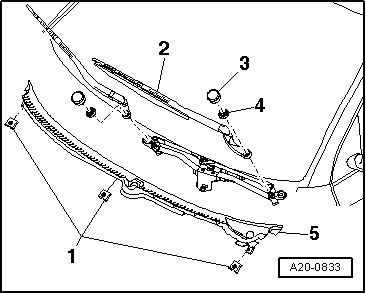
Remove wiper arms -2- and -items 3 and 4- → Chapter.
Caution
To stop the cowl panel grille -5- being torn on removal, apply a small quantity of soap solution to the transition between the windscreen and cowl panel grille and pull the cowl panel grille vertically upwards out of the fastening strip, starting at the edge of the windscreen.
–
Pull off retaining clips -1- and detach cowl panel grille -5-.
–
Remove cover for electronics box in plenum chamber -arrows-.
–
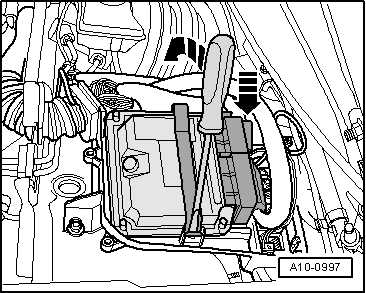
Use screwdriver to pry off retaining strap -arrows-.
–
Lay aside engine control unit with wires attached.
–
If fitted, release the retaining clip for the gearbox control unit.
–
Lay aside gearbox control unit with wires attached.
–
Release retaining clips -arrows- and lift auxiliary relay carrier out of electronics box.
–
Unclip the fuse carriers at the 4-position relay carrier.
–
Detach relays and control units and then unclip appropriate relay carrier.
 Caution
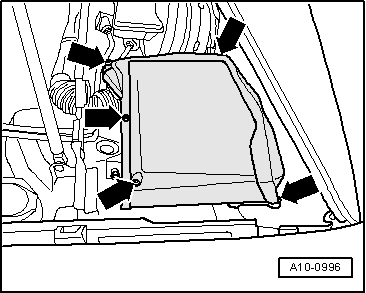
 Note
Note
