audi Workshop Repair Guides

Audi Workshop Service and Repair Manuals

Servicing suspension strut and mounting bracket > < Exploded view of suspension strut with mounting bracket, shock absorber fork, upper links, body brace
Removing and installing suspension strut with mounting bracket
Special tools and workshop equipment required
   
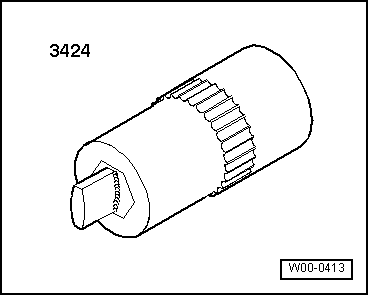
t  Spreader -3424-
  W00-0413
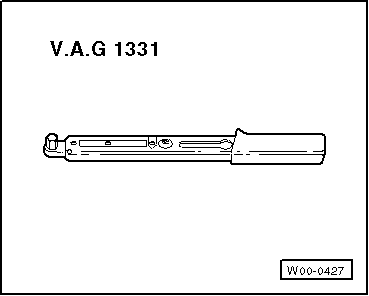
t  Torque wrench -V.A.G 1331-
  W00-0427
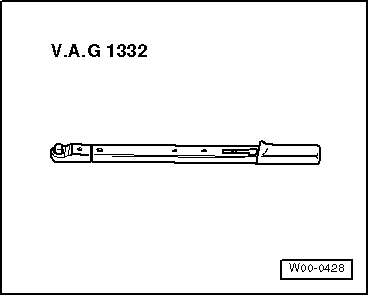
t  Torque wrench -V.A.G 1332-
  W00-0428
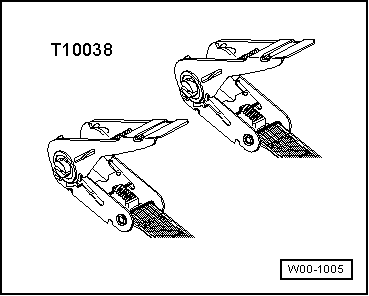
t  Tensioning strap -T10038-
Removing
–  Remove wheel.
  W00-1005
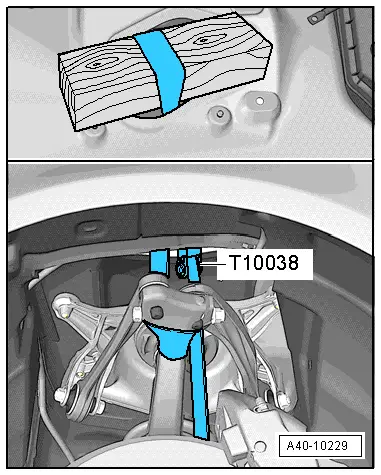
–  Tie up wheel bearing housing with tensioning strap -T10038- as shown in illustration.
  A40-10229
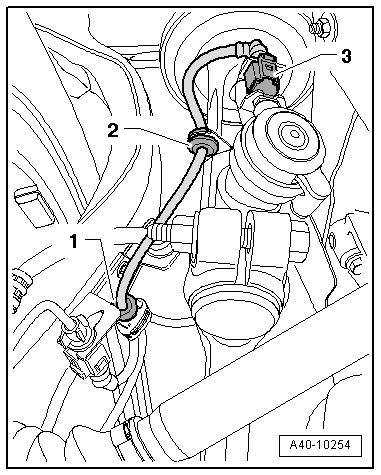
Vehicles with electronic damping control:
–  Release and unplug connector -3-.
–  Remove retainers -1- and -2-.
All vehicles (continued):
Remove shock absorber fork → Chapter.
  A40-10254
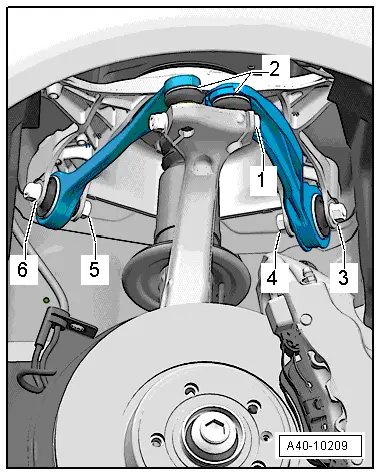
–  Detach bolt connection -1-.
–  Take both joint pins of upper links -2- out of wheel bearing housing.
Do not attempt to enlarge slots in wheel bearing housing using a chisel or similar.
  A40-10209
Left side of vehicle:
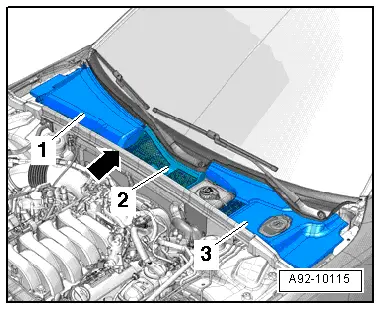
–  Unclip and detach plenum chamber cover -3-.
  A92-10115
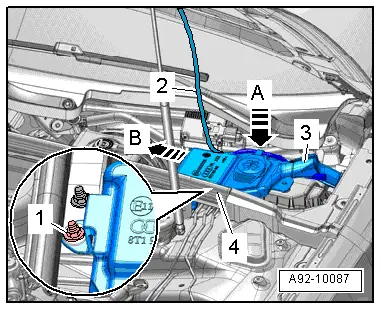
–  Unscrew nut -1-.
–  Take filler neck -3- with filler pipe out of washer fluid reservoir and out through body opening -arrow B-.
  A92-10087
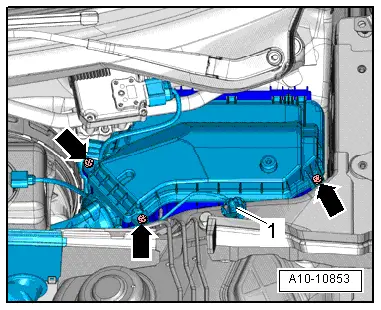
–  Remove bolts -arrows- and detach lid of electronics box (left-side).
  A10-10853
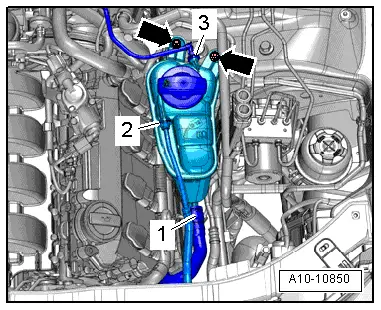
–  Unscrew nuts -arrows-, lift out coolant expansion tank and place aside.
  A10-10850
Right side of vehicle:
–  Unclip and detach plenum chamber cover -1-.
  A92-10115
Both sides of vehicle:
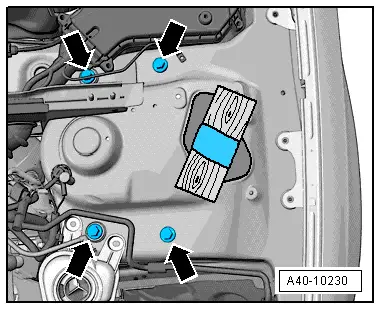
–  Remove bolts -arrows- and take out suspension strut with mounting bracket.
  A40-10230
Installing
Installation is carried out in the reverse sequence. Note the following points:
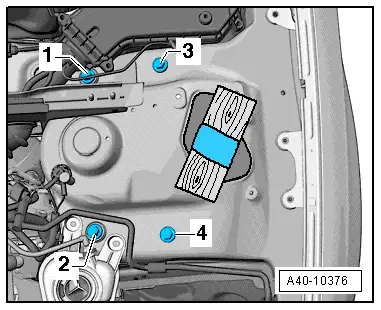
Fit bolts shown in illustration in sequence -1, 2, 3- and -4- and tighten.
  Note
Observe correct sequence for tightening bolts securing mounting bracket and suspension strut to suspension turret.
Tightening torques → Chapter „Exploded view of subframe, cross brace, anti-roll bar, coupling rod, subframe shield“
Tightening torques → Chapter „Exploded view of suspension strut with mounting bracket, shock absorber fork, upper links, body brace“
Tightening torques → Chapter „Exploded view of track control link, swivel joint, guide link, vehicle level sender“
Tightening torques → Chapter „Exploded view of wheel bearing housing, wheel bearing unit“
  A40-10376
  Note
Press down upper links as far as possible while tightening nut.
–  Tighten bolt connection -1- to specified torque.
  Note
  A40-10209
When fitting, ensure T-bolt -arrow- engages in groove of shock absorber fork.
  Note
Bonded rubber bushes can only be turned to a limited extent. The suspension mountings must therefore only be tightened when the suspension is in the unladen position or reference position.
–  Lifting suspension to unladen position → Chapter „Lifting suspension to unladen position (vehicles with coil springs)“
–  On vehicles with automatic headlight range control, carry out basic adjustment of headlights → Rep. gr.94.
–  If the vehicle level sender has been removed and refitted or the linkage detached, the reference position must be re-adapted on vehicles with electronic damping control → Chapter → Vehicle diagnostic, testing and information system VAS 5051.
–  If the reference position has been re-adapted on vehicles with lane departure warning, the lane departure warning control unit -J759- must be recalibrated → Chapter.
Install shock absorber fork → Chapter.
–  Secure wheel → Wheels and tyres; Rep. gr.44.
–  Wheel alignment must be checked and adjusted, see chart → Chapter.
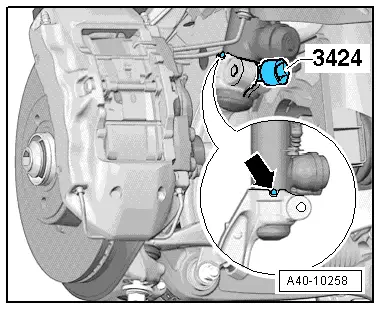
  A40-10258

Servicing suspension strut and mounting bracket > < Exploded view of suspension strut with mounting bracket, shock absorber fork, upper links, body brace