audi Workshop Repair Guides

Audi Workshop Service and Repair Manuals

Removing and installing CAN isolating connector (interior)T46i > < Removing and installing mounting for relay and fuse carrier with onboard supply control unitJ519
Removing and installing 6-position connector point, A-pillar, driver's side
   
Removing
–  With ignition switched off, disconnect earth cable at battery → Chapter.
–  Remove A-pillar trim (bottom left) → Rep. gr.70.
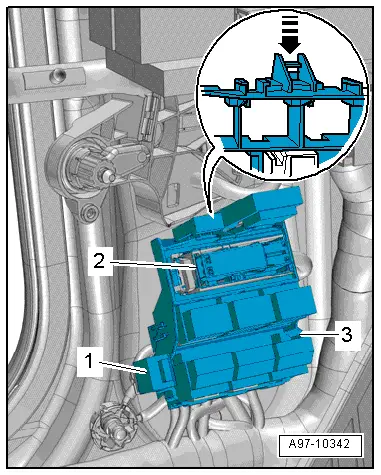
–  Press retaining clip in direction of -arrow- and detach connector point -3- from A-pillar.
–  Unclip fuse holder at connector point.
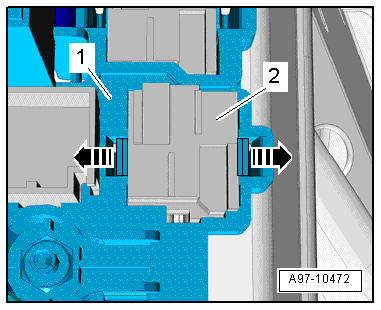
–  Unplug electrical connector -1- for airbag → Rep. gr.69.
–  Remove mounting -2- for CAN isolating connector (interior) -T46i- → Chapter.
  A97-10342
–  Pull out relays and control units.
–  Release retaining clips -arrows- and press relay carrier -2- towards rear out of holder -1-.
  Note
The exact contact assignment for the 6-position connector point in the A-pillar (driver's side) can be found in the applicable current flow diagram → Current flow diagrams, Electrical fault finding and Fitting locations.
Installing
Installation is carried out in the reverse order; note the following:
–  Install mounting for CAN isolating connector (interior) -T46i- → Chapter.
–  Plug in electrical connector for airbag → Rep. gr.69.
–  Install A-pillar trim (bottom left) → Rep. gr.70.
–  Connect battery. Steps required → Anchor.
  A97-10472

Removing and installing CAN isolating connector (interior)T46i > < Removing and installing mounting for relay and fuse carrier with onboard supply control unitJ519