
3 Series E46 318Ci (N46) CONVER
3
Primer coat
C
1.5
±
0.5 mm (spacing from 1 to 5)
4
Application point of glue bead
D
17 mm (width of primer trace)
5
Rubber frame
E
0 mm (spacing from 3 to 5)
F
300 mm (spacing from 4 to 5)
Attach special tool 51 3 010 twice to tool trolley. Moisten suction surfaces and secure to rear window from outside.
If reusing removed rear window, remove residual adhesive down to 0.5 mm.
Install rubber frame (5).
Almost vertical part (B) of cement bead (1) must be facing window edge.
Spread adhesive bead with special tool 00 9 322 .
Note:
Adhesive area for plastic adhesive tapes (1) must be free from
grease and dust.
Carefully working on rear window with special tool 51 3 010 :
-
position at top at distance (A) to hard top edge
-
align sides evenly
-
insert at bottom and press down
-
if necessary, press rear window upwards and adjust gap
dimension (A)
-
secure in terms of height in this position at top with yellow
plastic adhesive tape (1)
A = 5
±
1 mm
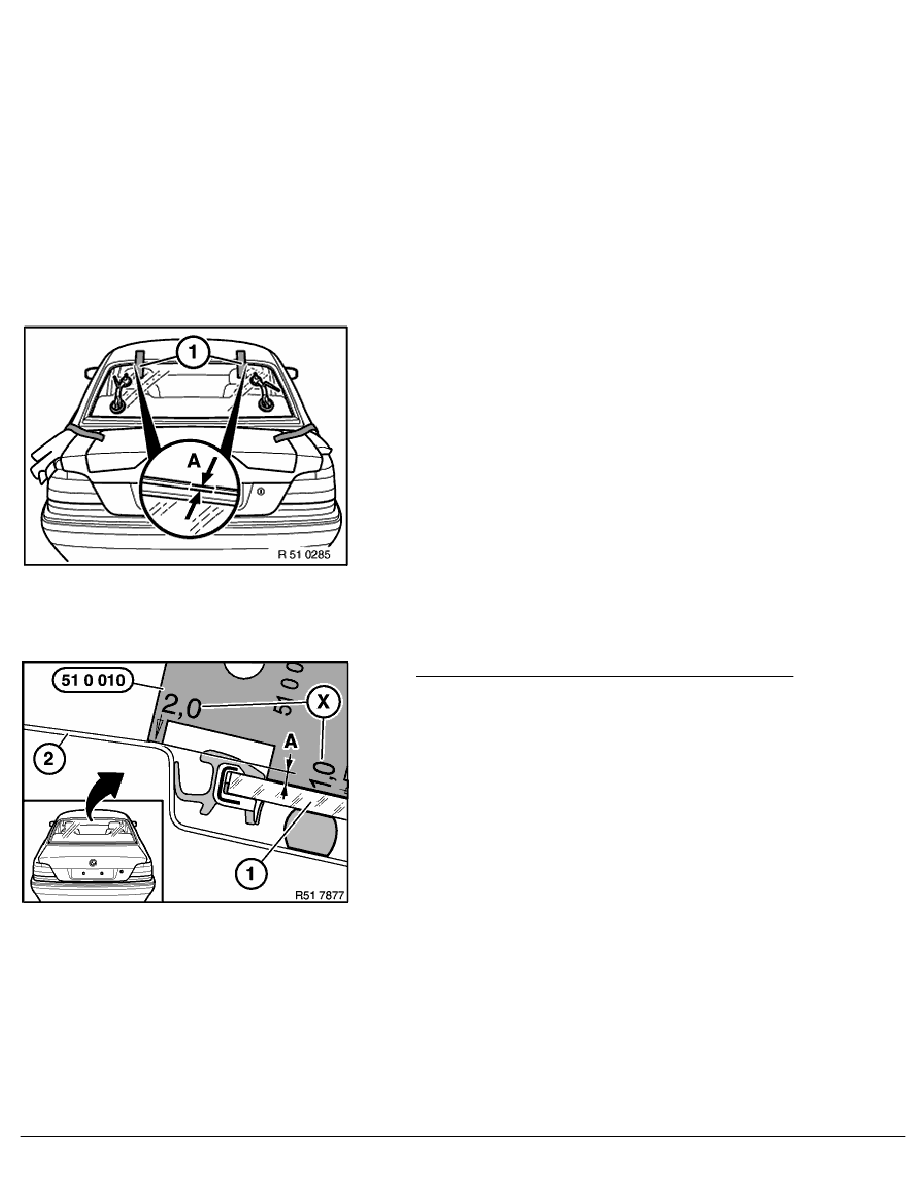
Preload on top of windscreen to prevent wind noise:
Rear window (1) must be lower than hard top outer skin (2). This
is the only way to prevent wind noises.
Position special tool 51 0 010 in middle of vehicle depending
on measurement (A) and check underprotrusion of rear
window (1).
Rear window underprotrusion (A):
A = 3.0
±
0.5 mm
X = Measurement stages 1... 4 mm
RA Removing and installing/replacing rear window for hard top
BMW AG - TIS
06.02.2013 11:07
Issue status (12/2007) Valid only until next DVD is issued
Copyright
Page - 3 -