
5 Series E39 530d (M57) SAL
Remove exhaust system.
Remove heat shield.
Remove propeller shaft from final drive.
Release screws on left and right and tie back output shafts.
Tightening torque, 33 21 1AZ.
Installation:
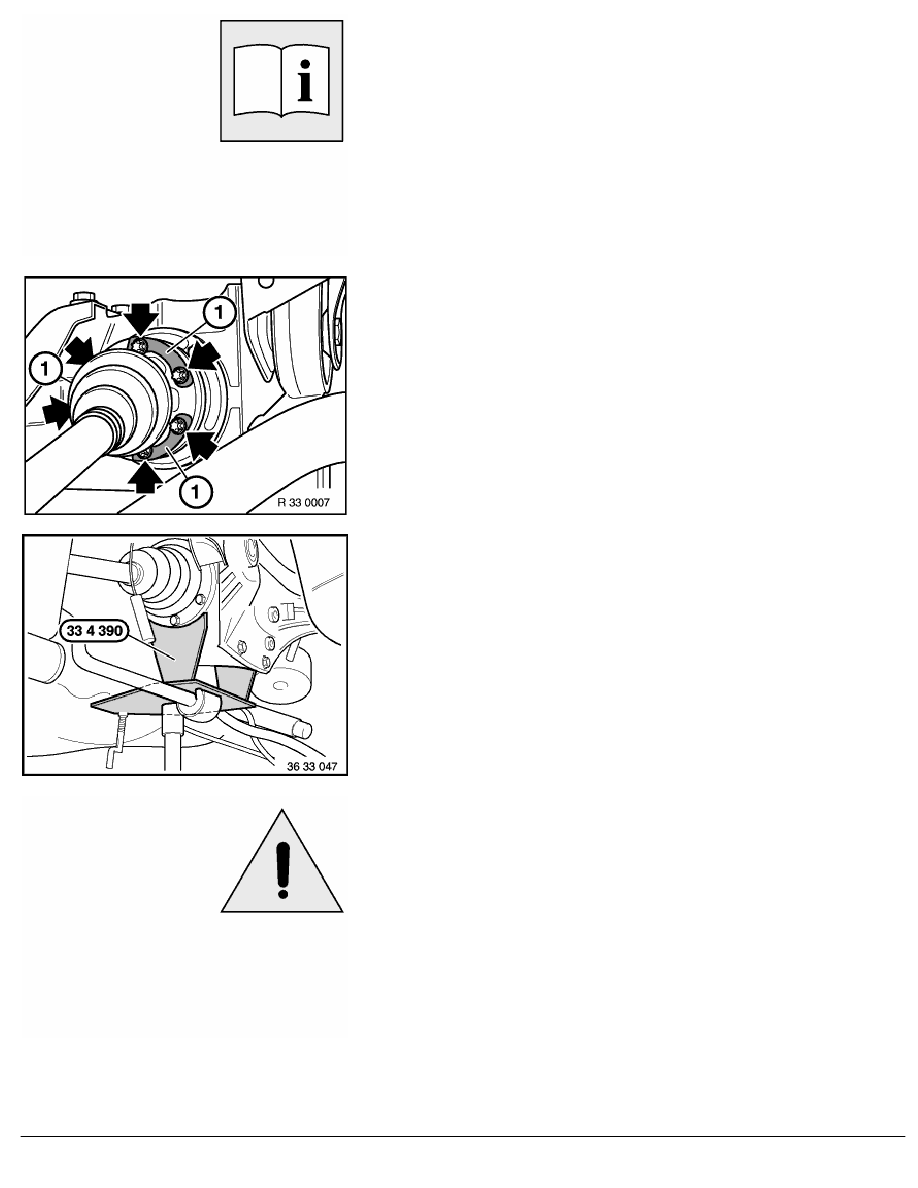
Fit shims (1).
Support final drive with special tool 00 2 030 (workshop hoist)
and special tool 33 4 390.
Caution!
Comply with following installation sequence in order to
prevent torsion stress on final drive during installation and
thus avoid complaints about noise:
-
Install final drive with lifter.
-
Install retaining screws (do not tighten down).
-
Remove lifter.
-
Tightening sequence:
•
Tighten both rear screws.
Tightening torque, 33 17 1AZ.
•
Tighten front screw.
Tightening torque, 33 17 1AZ.
RA Removing and installing or replacing final drive (HIGH)
BMW AG - TIS
20.02.2013 15:47
Issue status (12/2007) Valid only until next DVD is issued
Copyright
Page - 2 -