
5 Series E39 M5 (S62) SAL
Installation
The installation of the VANOS adjustment unit is described
separately from the removal. The assembly sequence for
installation and removal is different.
Caution!
Risk of mixing up parts.
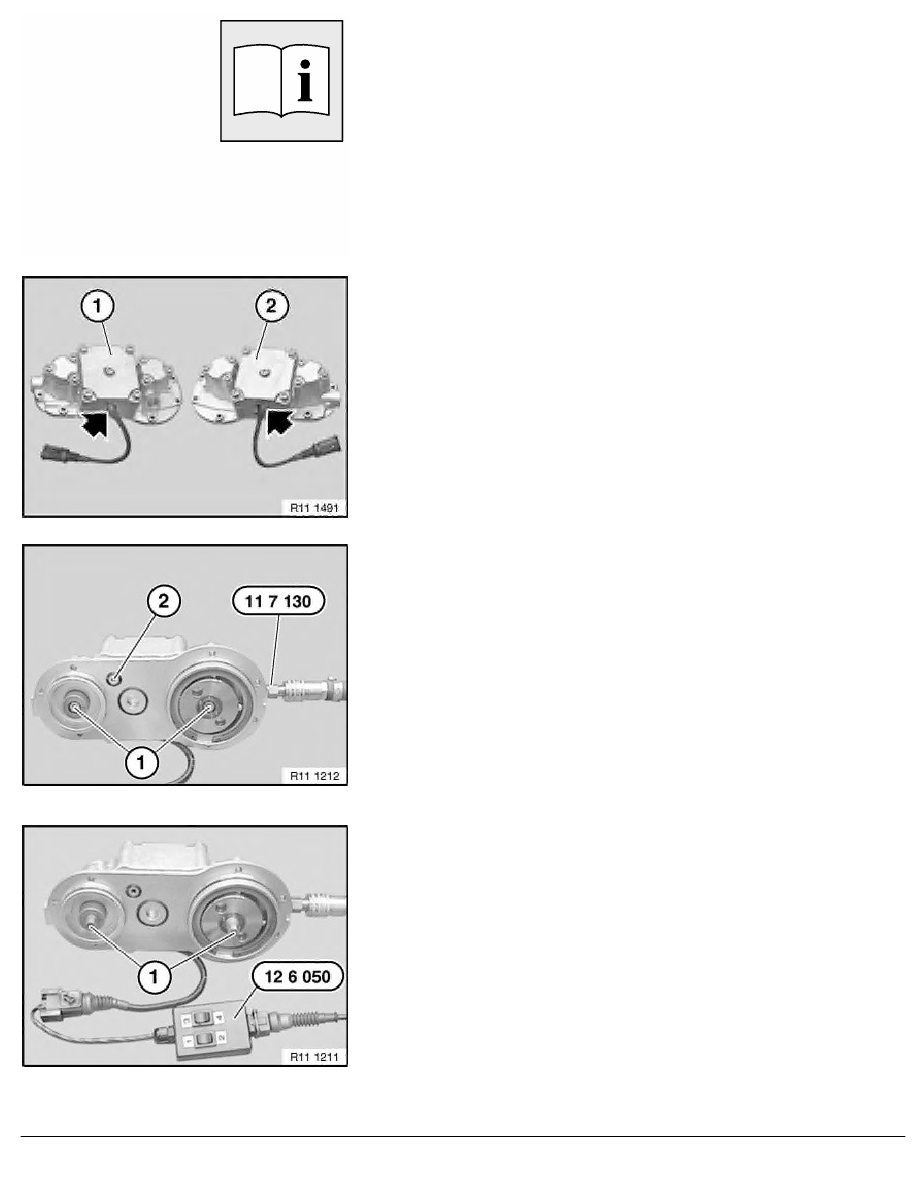
The VANOS adjustment units of cylinder banks 1 to 4 and
5 to 8 are different.
1)
Cylinder bank 1 to 4
2)
Cylinder bank 5 to 8
Note:
Install VANOS adjustment unit so that cables of solenoid valves
are at bottom.
Note:
Procedure for replacement or new parts:
When delivered, the hydraulic pistons (1) of the VANOS
adjustment unit are "retracted" and the hexagon heads are not
accessible.
Fit special tool 11 7 130 to VANOS adjustment unit.
Caution!
Oil is sprayed when compressed air is connected.
Cover bore (2) with a cloth.
Connect compressed air (2 to 8 bar).
Connect special tool 12 6 050 in conjunction with special tool
12 6 411 to solenoid valves of VANOS adjustment unit.
Connect special tool 12 6 411 to correct terminals on car
battery.
Press buttons 1 and 3 on special tool
12 6 050
simultaneously. The solenoid valves are activated and the oil
chamber of the hydraulic piston is ventilated. The hydraulic
pistons (1) extend.
RA Removing and installing, sealing/replacing left VANOS adjustment unit (S62)
BMW AG - TIS
21.02.2013 15:26
Issue status (12/2007) Valid only until next DVD is issued
Copyright
Page - 5 -