
5 Series E39 M5 (S62) SAL
Remove left and right stabilizer.
Installation:
Replace self-locking nut. Tightening Torque,
refer to Technical Data 31 35 11AZ.
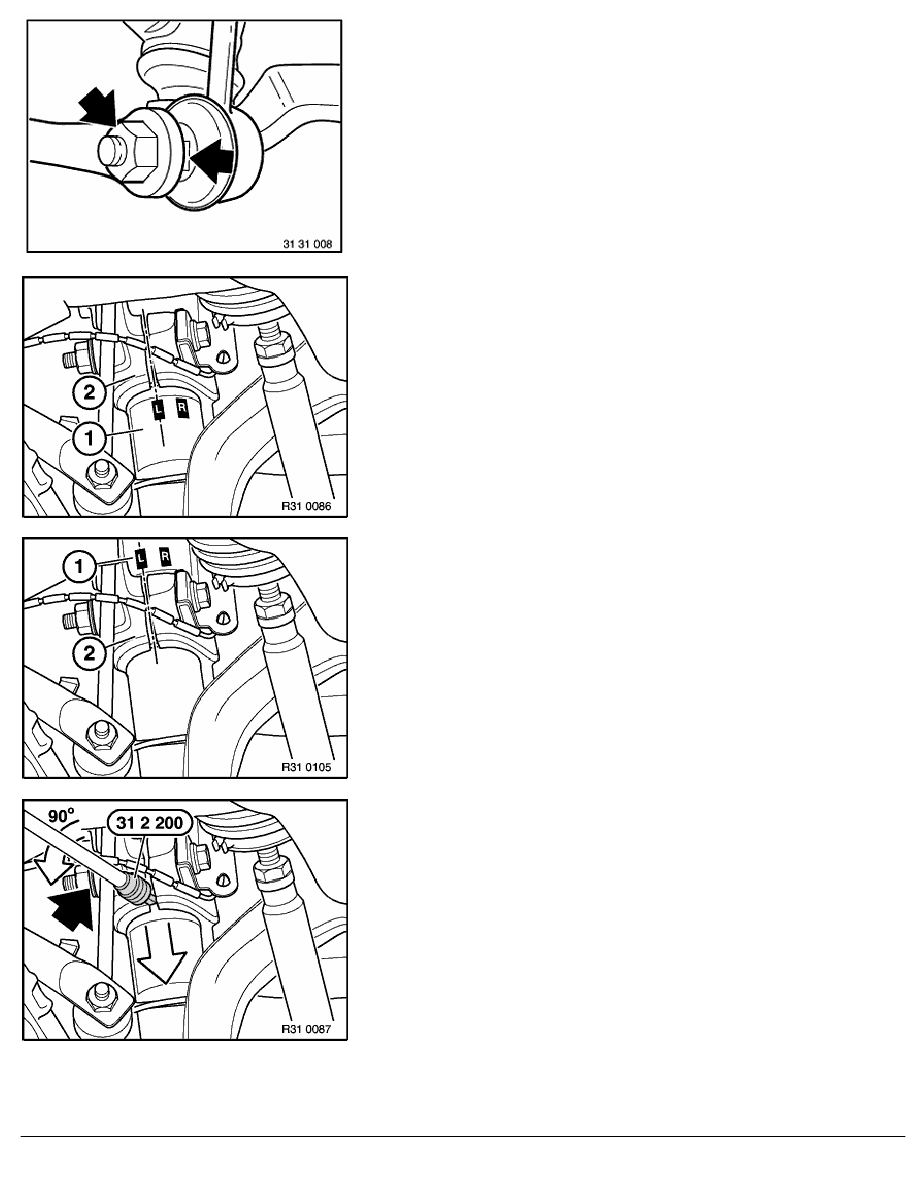
Mark the installation position of the spring strut tube (1) in the
swivel bearing (2) with paint - never mark with scribing tool.
Marking is not required if the factory mark is still identifiable.
R = installation position of right spring strut tube
L = installation position of left spring strut tube
Version with factory marking above the swivel bearing.
Unfasten nut.
If necessary, expand the swivel bearing with special
tool 31 2 200 and press downwards.
Installation:
Press swivel bearing up to stop and note the mark indicating
the installation position.
Replace self-locking nut. Tightening Torque,
refer to Technical Data 31 21 4AZ.
RA Removing and installing/replacing front stabilizer (high)
BMW AG - TIS
21.02.2013 21:26
Issue status (12/2007) Valid only until next DVD is issued
Copyright
Page - 3 -