
7 Series E38 L7 (M73) SAL
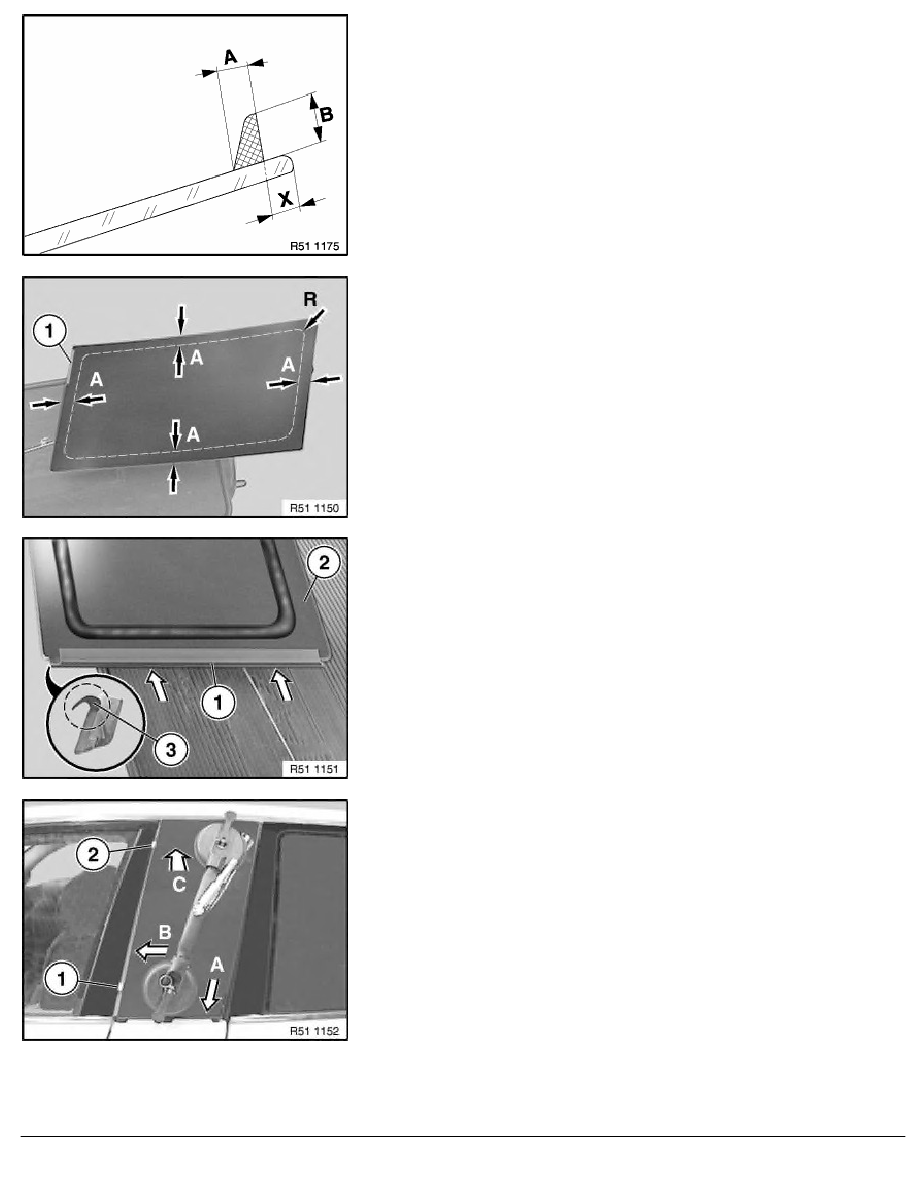
Shape of glue bead:
(A) 8
±
1 mm
(B) 11
-2
mm
Caution!
Apply adhesive bead swiftly (and uniformly) and install side
window. Skin forms after 10 minutes.
Maintain distance (X) to edge of side window (measurements
(A) and (R) in next work step).
Maintain distance (A) of adhesive bead at top, side and bottom
along edge of side window.
Maintain with radius (R) in corners.
(A) = 19
±
1 mm
(R) = 25 mm
Note:
Field of view (1) is at bottom.
Push seal (1) at bottom onto side window (2).
Note:
Sealing lip (3) is outside.
Carefully position side window first at bottom (A), press against
spacer (1) (B), then at top against spacer (2) and press into place
(C).
Note:
Remove spacers (1) and (2).
RA Removing and installing/replacing trim (side window) on door pillar (center door
BMW AG - TIS
22.02.2013 05:41
Issue status (12/2007) Valid only until next DVD is issued
Copyright
Page - 12 -