
Century Estate Wagon V6-260 4.3L DSL (1984)
Steering Gear: Service and Repair
Manual Rack and Pinion Assembly
REMOVE AND INSTALL MANUAL RACK AND PINION ASSEMBLY
Remove And Install Manual Rack And Pinion
REMOVE
1. Remove driver's side sound insulator.
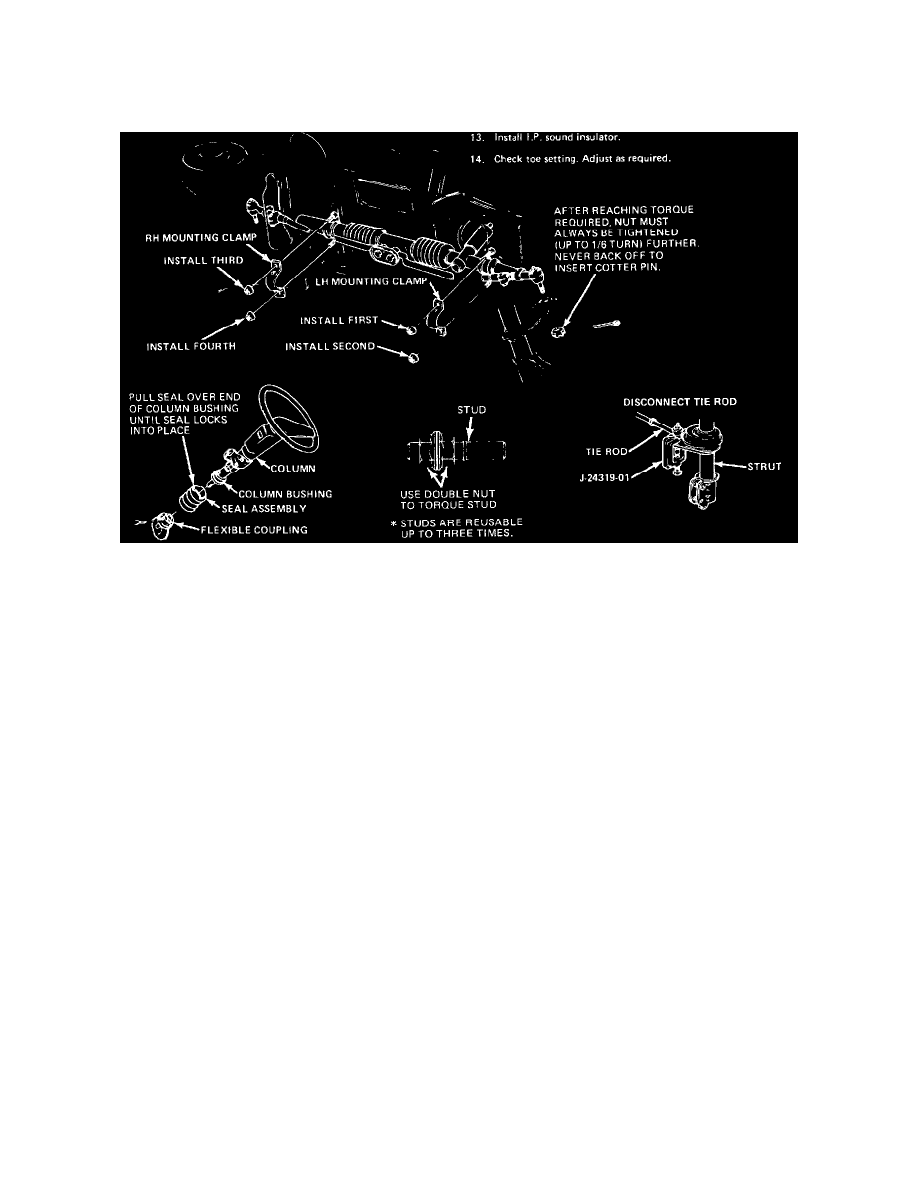
2. From under I/P, pull the seal assembly down from the steering column and remove she upper pinch bolt from She flexible coupling.
3. Remove air cleaner and remove windshield washer jar attaching screws. Set washer jar aside.
4. Raise car.
5. Remove both front wheel and tire assemblies.
6. Disconnect both tie rods from the struts using J-2431901.
7. Lower car.
8. Remove R.H. mounting clamp. Tie rod may have to be moved up for clearance to remove clamp.
9. Remove L.H. mounting clamp.
10. Move gear assembly forward slightly and remove the lower pinch bolt from the flexible coupling, then separate the coupling from the rack
assembly.
11. Remove dash seal from rack assembly.
12. Raise car.
13. Remove splash shield from left inner fender.
14. Turn left knuckle and hub assembly to the full left turn position and remove rack and pinion assembly through the access hole in the left inner
fender.
INSTALL
NOTE: If studs backed Out during mounting clamp removal, it will be necessary to reinstall them before positioning gear assembly back into the car.
Double nut the stud so that the stud can be torqued to 20 Nm (15 FT. LBS.) max.
1. Install the rack and pinion assembly through the access hole in the left inner fender.
2. Install splash shield on left inner fender.
3. Place the rack assembly into position and install the dash seal onto the rack assembly.
4. Use a screwdriver to slightly spread the clamp areas of the flexible coupling.
5. Have a helper inside the car guide the flexible coupling onto the stub shaft and onto the steering column. Install both pinch bolts and torque to:
-
Coupling to stub shaft 40 Nm (29 ft. lbs.).
-
Coupling to column 41 Nm (30 ft. lbs.).
6. Install the L.H. mounting clamp. Do not tighten.
7. Install the R.H. mounting clamp.