
LaCrosse V6-3.8L (2009)
9. Remove the power steering gear mounting bolts and nuts (1, 4).
10. Separate the steering gear from the frame (cradle).
11. Clean the LH steering gear mounting surfaces (the areas that interface with the mounting bracket on the frame (cradle)) and the steering gear
mounting bracket on the frame (cradle) (the areas that interface with the steering gear). These surfaces must be free from grease.
Important:
Use only recommended gasket maker, other products may not adhere as well.
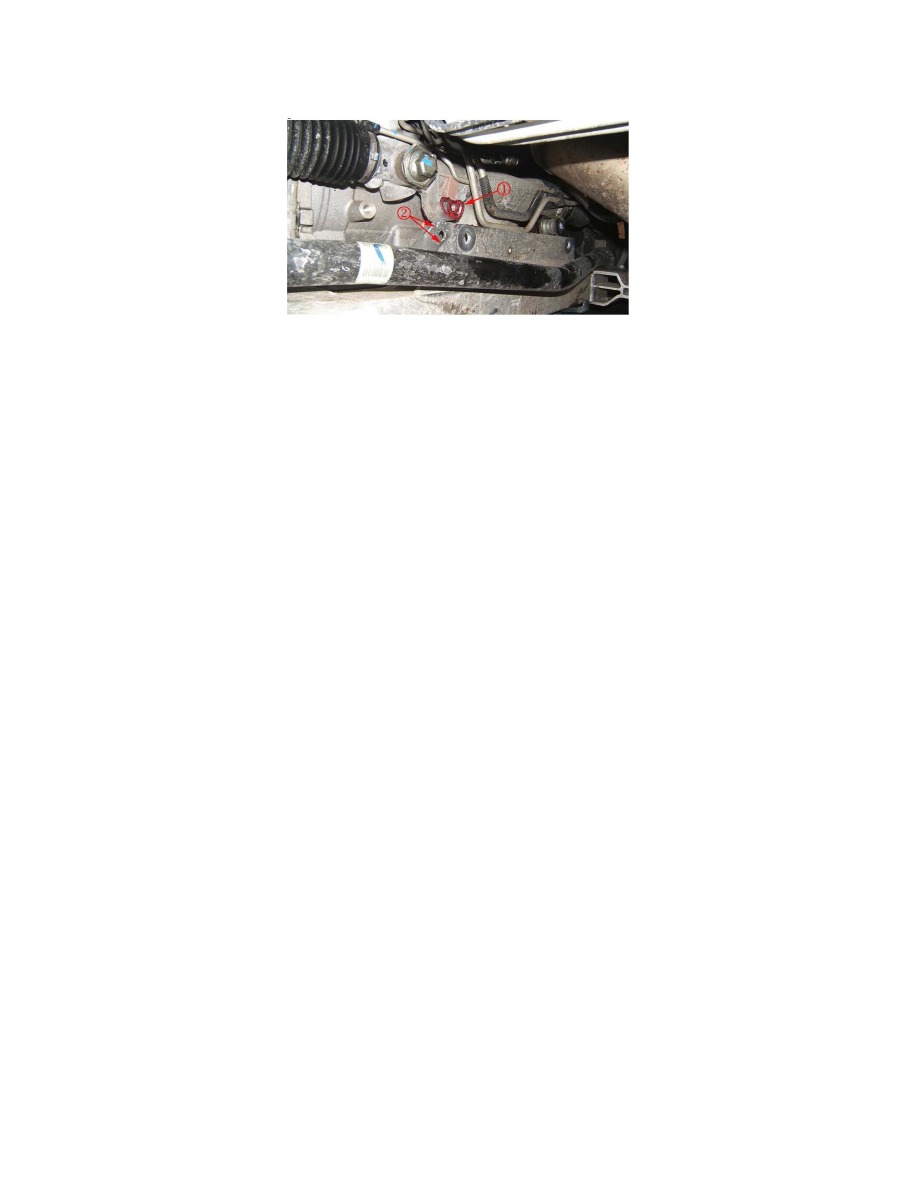
12. Apply gasket maker, GM P/N 01052943 (Loctite(R) 518*)(in Canada, use 10953491) to the left side steering gear mounting surfaces (1) on the gear.
13. Apply primer Loctite(R) 7649* to the inside surfaces (2) of the left side frame (cradle) bracket.
14. Apply threadlocker, GM P/N 12345382 (Loctite(R) 242*) (in Canada, use 10953489) to the steering gear mounting bolts.
Important:
Once the power steering gear is assembled to the frame (cradle), the bolts need to tightened within five minutes.
15. Reassemble the power steering gear to the frame (cradle).
16. Install the power steering gear mounting bolts and nuts.
Tighten
For Allure or LaCrosse, tighten the bolts to 60Nm (42 lb ft) plus 180 degrees.
Tighten
For Impala, tighten the bolts to 90Nm (66 lb ft).
Tighten
For Grand Prix, tighten the bolts to 60Nm (42 lb ft) plus 180 degrees.
17. Raise the frame (cradle) into position.
18. Install the rear frame (cradle) bolts.
Tighten
Tighten the bolts to 160Nm (118 lb ft).
19. Remove the jackstands.
Important:
During the installation of the intermediate steering shaft, ensure that the steering shaft is seated before you install the pinch bolt. The two mating shafts
may disengage if the pinch bolt is inserted into the coupling before the steering shaft installation.