
CTS V6-3.2L VIN N (2003)
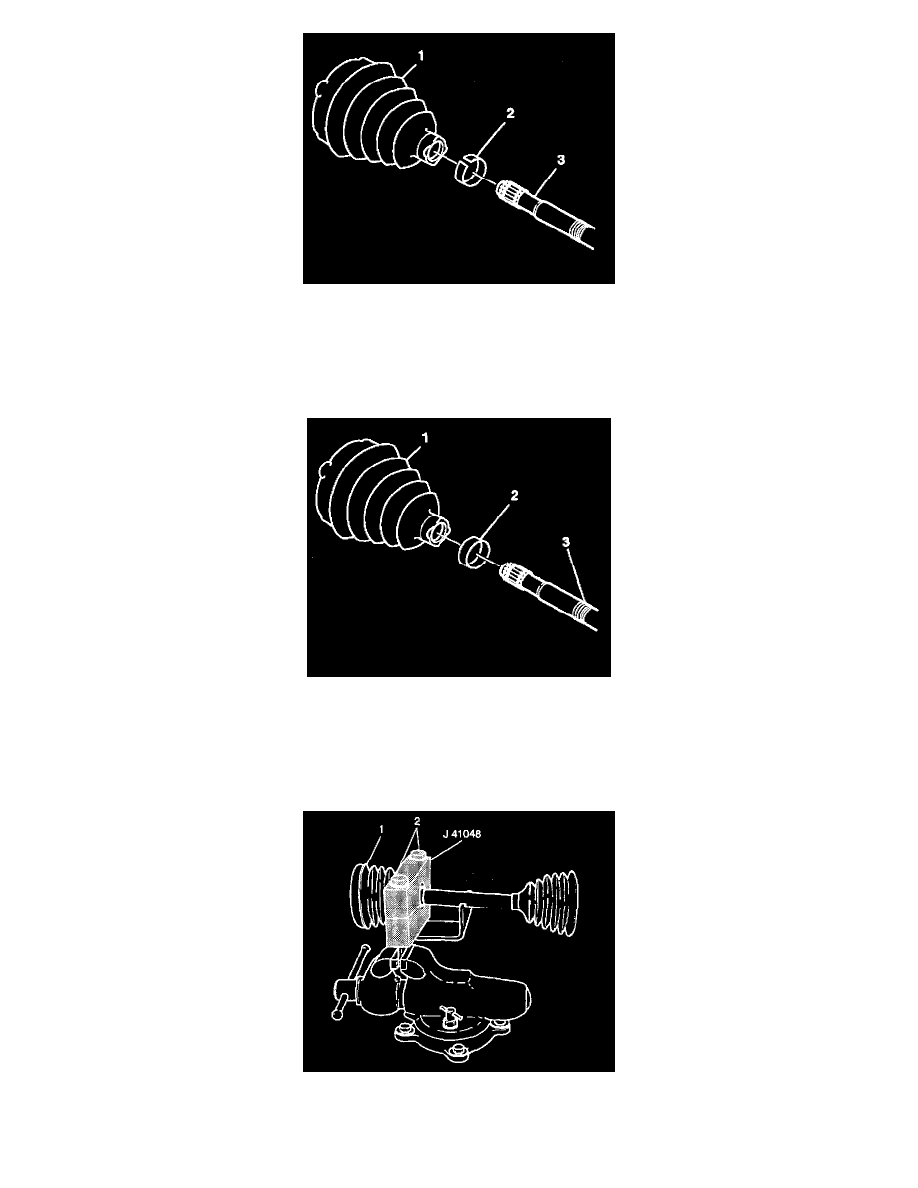
9. Remove the inner boot (1) and the swage ring (2) from the halfshaft bar (3). Discard the boot and swage ring.
10. Use a parts brush and solvent to carefully clean, flush, and drain the joint. Allow the components to completely dry.
11. Use a wire brush to remove any rust in the boot mounting grooves on the halfshaft bar and the cross groove joint boot adapter.
12. Inspect the cross groove joint assembly for visible damage or wear. Replace the cross groove joint assembly if necessary.
Installation Procedure
1. Install the new swage ring (2) on the neck of the new inner boot (1). Do not swage.
2. Slide the inner boot onto the halfshaft bar and position the neck of the inner boot into the boot groove (3) on the halfshaft bar. The largest groove
below the sight groove on the halfshaft bar is the boot groove.
Notice: Do not cut through the wheel drive shaft inboard seal during service. Cutting through the seal may damage the sealing surface of the housing
and the tripot bushing. Damage to the sealing surface may lead to water and dirt intrusion and premature wear of the constant velocity joint.
3. Position the inboard end of the halfshaft assembly (1) using J41048.