
CTS V6-3.2L VIN N (2003)
Constant Velocity Joint: Service and Repair
Wheel Drive Shaft Inner Joint and Seal Replacement
Wheel Drive Shaft Inner Joint and Seal Replacement
Tools Required
^
J8059 Snap Ring Pliers
^
J41048 Drive Axle Swage Ring Clamp
Removal Procedure
1. Remove the halfshaft from the vehicle.
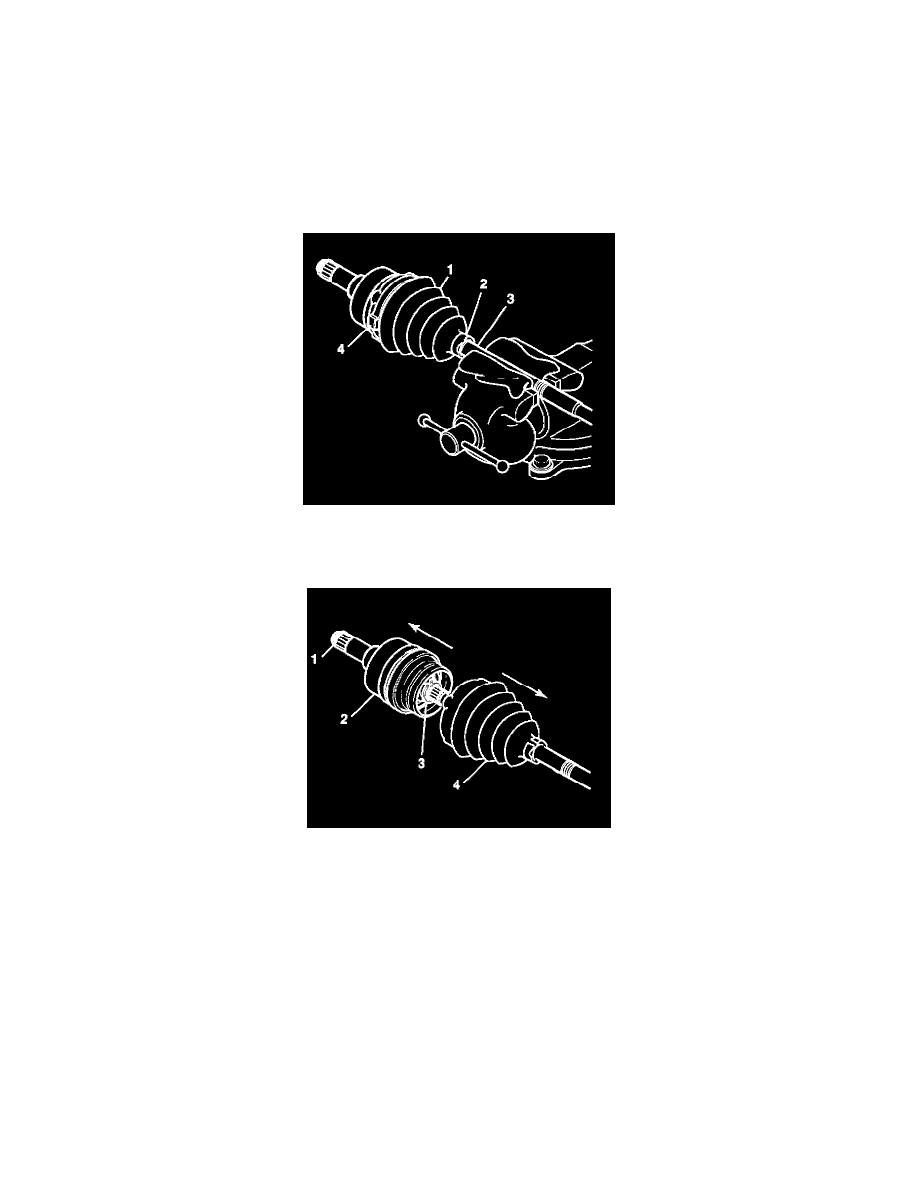
2. Wrap a towel around the halfshaft bar (3) and clamp horizontally in a vise.
3. Cut large boot retaining clamp (4) from boot (1) with a pair of side cutters. Discard the retaining clamp.
4. Use a hand grinder to cut through the halfshaft bar swage ring (2).
5. Slide the boot (4) along the halfshaft bar away from the cross groove joint (2) and wipe away any grease from the face of the cross groove joint
assembly.
6. Spread the ears of the cross groove joints race retaining ring (3) using J8059. Discard the retaining ring.
Important: The cross groove joint shank must be parallel to the halfshaft bar prior to its removal. Never allow the inner race or cage to rotate within
the outer race when the cross groove joint is separated from the halfshaft bar.
The cross groove joint design uses precision machining and selected dimensional component fits to achieve proper assembly and operation. Due to its
complexity, it should not be disassembled during service.
7. Remove the cross groove joint assembly (2) from the halfshaft bar.
Keep the cross groove joint's inner race and cage straight and level relative to the outer race, push the inner race and cage to the bottom of the
outer race bore to displace the grease.
8. Remove the transmission retaining ring (1) from the cross groove joint assembly using J8059. Discard the transmission retaining ring (1).