CTS V6-3.2L VIN N (2003)

Constant Velocity Joint Boot: Service and Repair
Wheel Drive Shaft Outer Joint and Seal Replacement
Wheel Drive Shaft Outer Joint and Seal Replacement
Tools Required
^
J41048 Drive Axle Swage Ring Clamp
^
J8059 Snap Ring Pliers
^
J35910 Drive Axle Seal Clamp Pliers
Disassembly Procedure
1. Remove the large seal retaining clamp from the CV joint with a side cutter. Discard the seal retaining clamp.
Notice: Do not cut through the wheel drive shaft inboard seal during service. Cutting through the seal may damage the sealing surface of the housing
and the tripot bushing. Damage to the sealing surface may lead to water and dirt intrusion and premature wear of the constant velocity joint.
2. Use a hand grinder to cut through the swage ring in order to remove the swage ring.
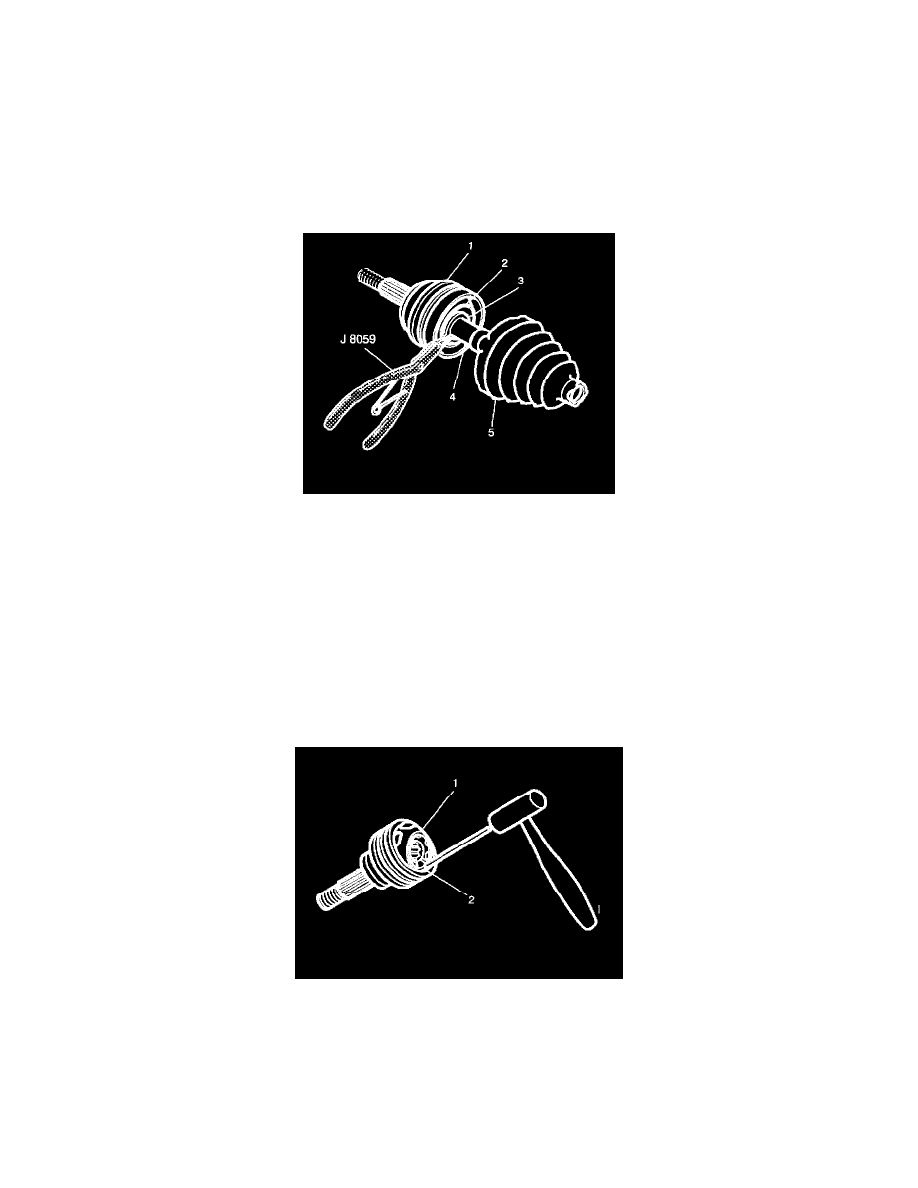
3. Separate the halfshaft outboard seal from CV joint outer race (1) at large diameter.
4. Slide the seal (5) away from joint along halfshaft bar (4).
5. Wipe the grease from the face of the CV joint inner race (2).
6. Spread the ears on the race retaining ring (3) with J8059.
7. Remove the CV joint assembly (1) from the halfshaft bar (4).
8. Remove the halfshaft outboard seal (5) from the halfshaft bar (4).
9. Discard the old outboard seal.
10. Place a brass drift against the CV joint cage (1).
11. Tap gently on the brass drift with a hammer in order to tilt the cage (1).
12. Remove the first chrome alloy ball (2) when the CV joint cage (1) tilts.
13. Tilt the CV joint cage (1) in the opposite direction to remove the opposing chrome alloy ball (2).
14. Repeat this process to remove all six of the balls.
