
CTS RWD V8-6.2L SC (2009)
Hose/Line HVAC: Service and Repair
Condenser Tube Replacement
Condenser Tube Replacement
Special Tools
J 39400-A - Halogen Leak Detector
Removal Procedure
1. Recover the refrigerant. Refer to Refrigerant Recovery and Recharging (See: Heating and Air Conditioning/Service and Repair/Refrigerant
Recovery and Recharging).
2. Remove the air cleaner assembly. Refer to Air Cleaner Assembly Replacement (See: Filters/Air Cleaner Housing/Service and Repair).
3. Remove the A/C quick connect fitting at the liquid line. Refer to Air Conditioning Line/Tube Connector Removal/Replacement (See: Air
Conditioning Line/Tube Connector Removal/Replacement).
4. Raise and support the vehicle. Refer to Lifting and Jacking the Vehicle (See: Vehicle Lifting/Service and Repair).
5. Remove the front air deflector. Refer to Front Bumper Fascia Air Deflector Replacement (See: Body and Frame/Bumper/Front Bumper/Front
Bumper Cover / Fascia/Service and Repair/Front Bumper Fascia Air Deflector Replacement).
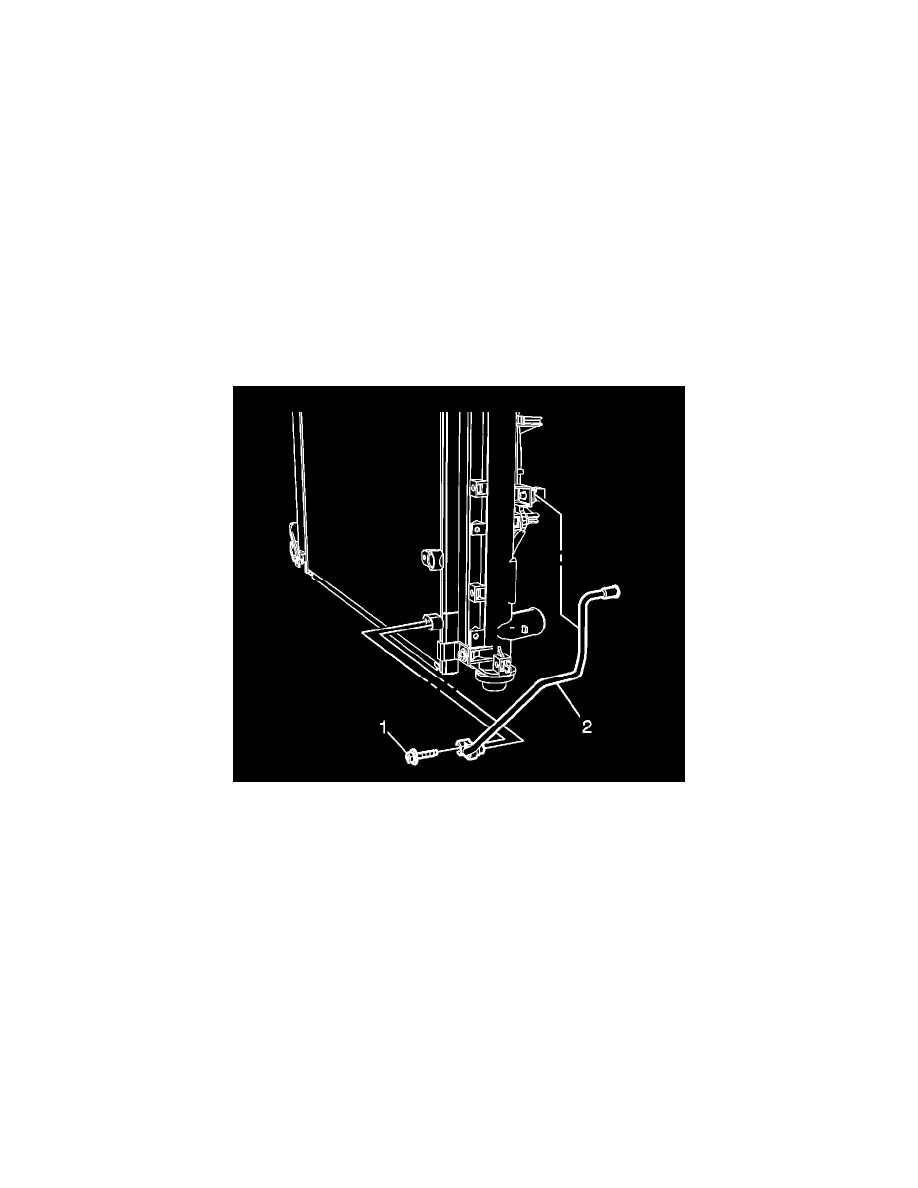
6. Remove the condenser tube to condenser retaining bolt (1).
7. Disconnect the condenser tube from the fan shroud retainer clip.
8. Disconnect the condenser tube (2) from the condenser.
9. Disconnect the condenser tube from the liquid line.
10. Remove the condenser tube.
11. Remove and discard the O-rings.
Installation Procedure
1. Install the new O-rings to the condenser tube. Refer to O-Ring Replacement (See: Heating and Air Conditioning/Coupler HVAC/A/C Coupler
O-ring/Service and Repair).
2. Install the condenser tube.
3. Connect the condenser tube to the liquid line.