
CTS Sedan AWD V6-3.0L (2010)
10953488), or equivalent, to the propeller shaft to the flange bolt. Ensure that there are no gaps in the threadlocker along the length of the filled
area of the bolt. Allow the threadlocker to cure approximately 10 minutes before installation.
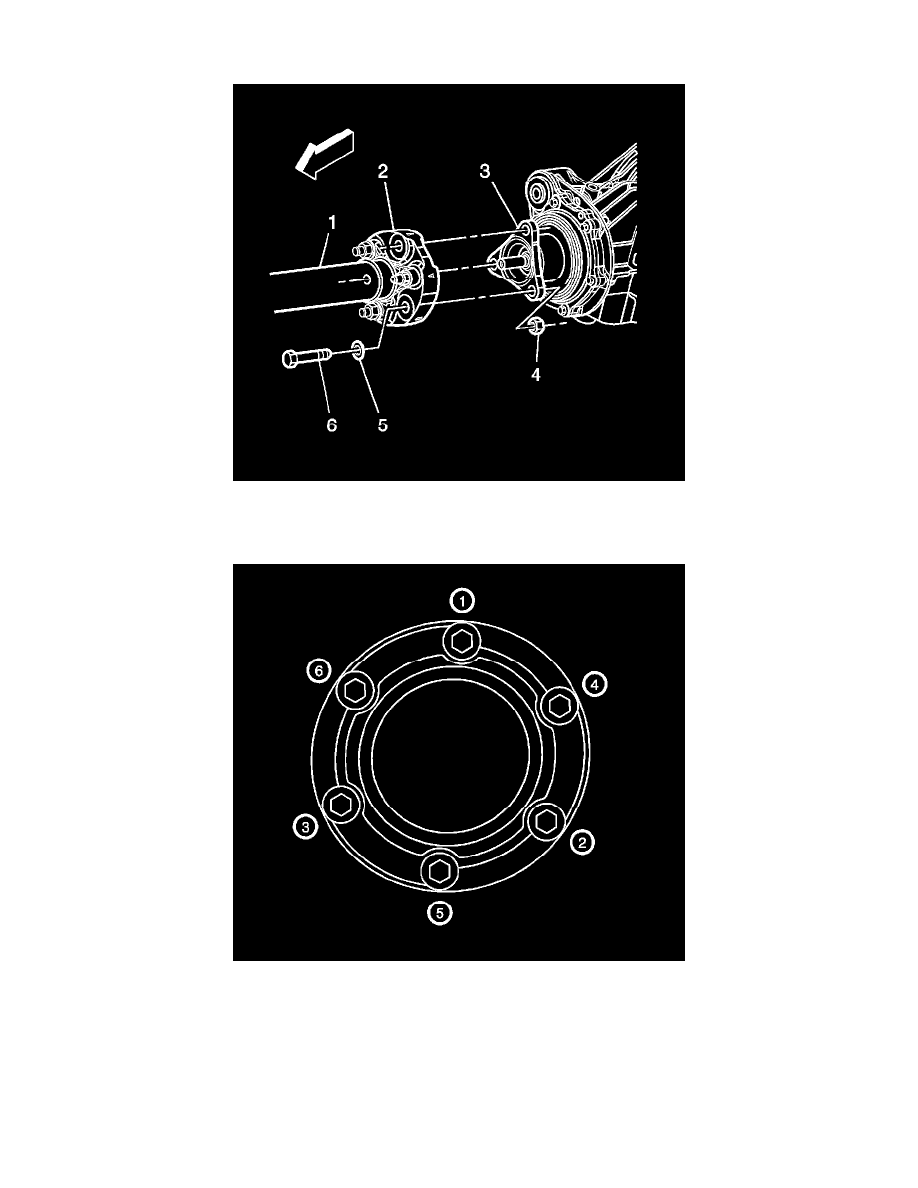
7. Install the rear propeller shaft (1) coupler (2) on the differential flange (3).
8. Install the bolt (6), and the washer (5).
9. Install the propeller shaft coupler-to-differential flange nuts (4) and tighten to 85 Nm (63 lb ft)..
Note: If reusing the propeller shaft to flange nuts and bolts, refer to step 5 for the proper application of the thread locker.
10. Install the propeller shaft CV joint to transfer case flange bolts and tighten in sequence (1-6) to 40 Nm (29 lb ft).
11. Install the floor pan mid tunnel insulator.
12. Install the exhaust system. Refer to Exhaust System Replacement (LSA) (See: Engine, Cooling and Exhaust/Exhaust System/Service and
Repair/Exhaust System Replacement)Exhaust System Replacement (LF1) (See: Engine, Cooling and Exhaust/Exhaust System/Service and
Repair/Exhaust System Replacement)Exhaust System Replacement (Single) (See: Engine, Cooling and Exhaust/Exhaust System/Service and
Repair/Exhaust System Replacement (Single))Exhaust System Replacement (LLT) (See: Engine, Cooling and Exhaust/Exhaust System/Service
and Repair/Exhaust System Replacement).
13. Lower the vehicle.