CTS Sedan AWD V6-3.0L (2010)

Note: Failure to install the shims could lead to an improper driveshaft angle and could cause damage to the other propeller shaft components.
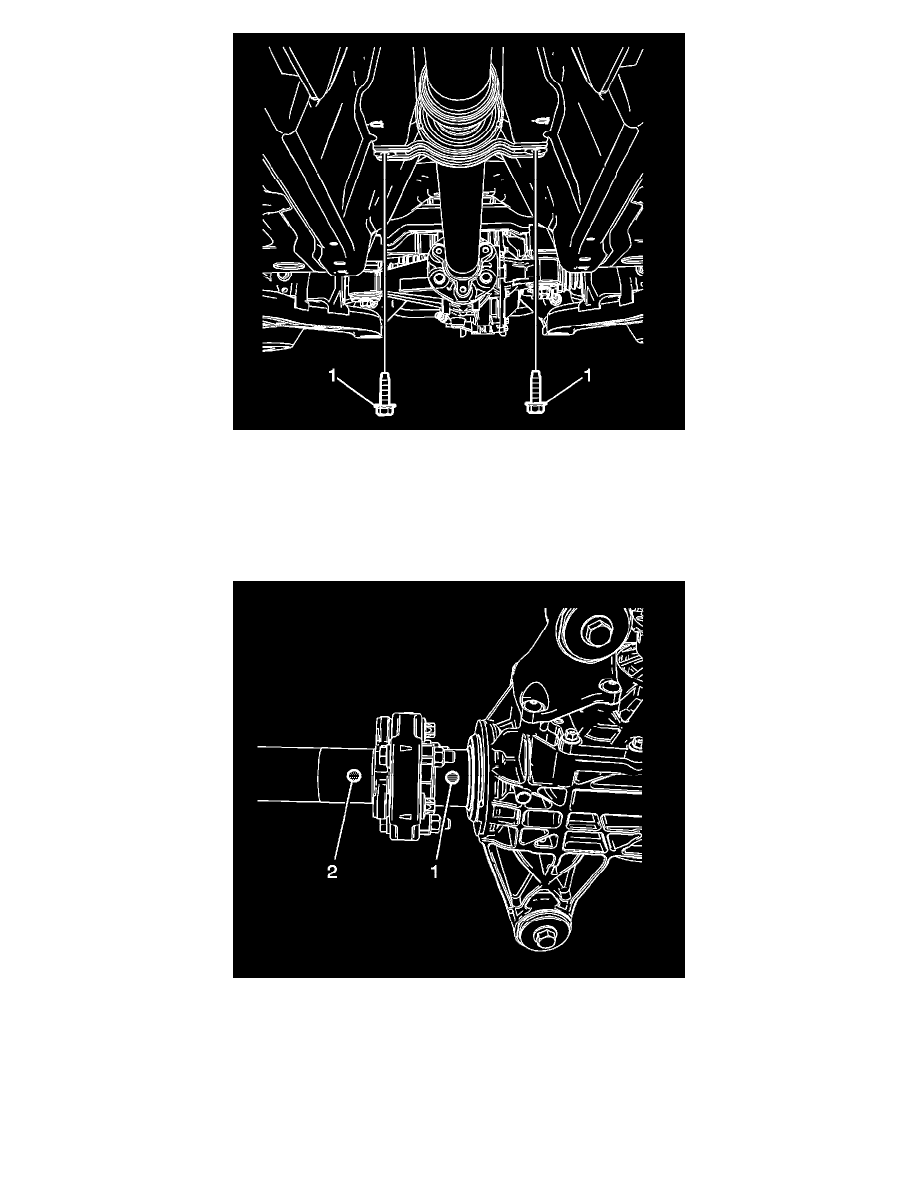
3. Install the propeller shaft center support bearing and the shims, if equipped.
Caution: Refer to Fastener Caution (See: Service Precautions/Vehicle Damage Warnings/Fastener Caution).
4. Install the mounting bolts (1) for the center support bearing. Tighten the support bearing bolts to 50 Nm (37 lb ft).
Note: Align the yellow and orange dots on the propeller shaft and the drive flange. Failure to do so could cause a drive line vibration and possible
damage to the propeller shaft.
5. Align the orange paint mark (1) on the rear differential with the one yellow paint mark (2) on the propeller shaft.
Note: If reusing the propeller shaft-to-flange nuts and bolts, to ensure proper adhesion and fastener retention, the threads must be free of debris
prior to the application of threadlocker.
6. Thoroughly clean the threads using denatured alcohol, or equivalent, and allow to dry. Apply threadlocker GM P/N 12345493 (Canadian P/N
