
CTS Wagon RWD V6-3.6L (2010)
Shift Solenoid: Service and Repair
Gear Select/Skip Shift Solenoid Replacement
Gear Select/Skip Shift Solenoid Replacement
Special Tools
DT-49293 - Gear Select/Skip Shift Solenoid Remover/Installer
Removal Procedure
1. Raise and suitably support the vehicle. Refer to Lifting and Jacking the Vehicle (See: Maintenance/Vehicle Lifting/Service and Repair).
2. Remove the exhaust system. Refer to Exhaust System Replacement (LSA) (See: Engine, Cooling and Exhaust/Exhaust System/Service and
Repair/Exhaust System Replacement)Exhaust System Replacement (LF1) (See: Engine, Cooling and Exhaust/Exhaust System/Service and
Repair/Exhaust System Replacement)Exhaust System Replacement (Single) (See: Engine, Cooling and Exhaust/Exhaust System/Service and
Repair/Exhaust System Replacement (Single))Exhaust System Replacement (LLT) (See: Engine, Cooling and Exhaust/Exhaust System/Service
and Repair/Exhaust System Replacement).
3. Remove the propeller shaft Refer to Rear Propeller Shaft Replacement (RPO LSA) (See: Transmission and Drivetrain/Drive/Propeller Shafts,
Bearings and Joints/Drive/Propeller Shaft/Service and Repair)Rear Propeller Shaft Replacement (RPO LLT/LF1with MX7 or MN6) (See:
Transmission and Drivetrain/Drive/Propeller Shafts, Bearings and Joints/Drive/Propeller Shaft/Service and Repair)Rear Propeller Shaft
Replacement (RPO LLT, LF1 with MXO) (See: Transmission and Drivetrain/Drive/Propeller Shafts, Bearings and Joints/Drive/Propeller
Shaft/Service and Repair).
4. Support the transmission with a suitable jack.
5. Remove the transmission support retaining fasteners from the vehicle body. Refer to Transmission Support Replacement (Manual except CTS-V)
(See: Body and Frame/Frame/Cross-Member/Rear Cross-Member/Service and Repair)Transmission Support Replacement (Automatic RWD
except CTS-V) (See: Body and Frame/Frame/Cross-Member/Rear Cross-Member/Service and Repair)Transmission Support Replacement
(Automatic CTS-V) (See: Body and Frame/Frame/Cross-Member/Rear Cross-Member/Service and Repair)Transmission Support Replacement
(Manual CTS-V) (See: Body and Frame/Frame/Cross-Member/Rear Cross-Member/Service and Repair)Transmission Support Replacement
(Automatic AWD) (See: Body and Frame/Frame/Cross-Member/Rear Cross-Member/Service and Repair).
6. Slightly lower the transmission to gain access to the solenoid. Refer to Transmission Rear Mount Replacement (See: Transmission and
Drivetrain/Manual Transmission/Transaxle/Transmission Mount/Service and Repair/Tremec 6-Speed - Manual Transmission).
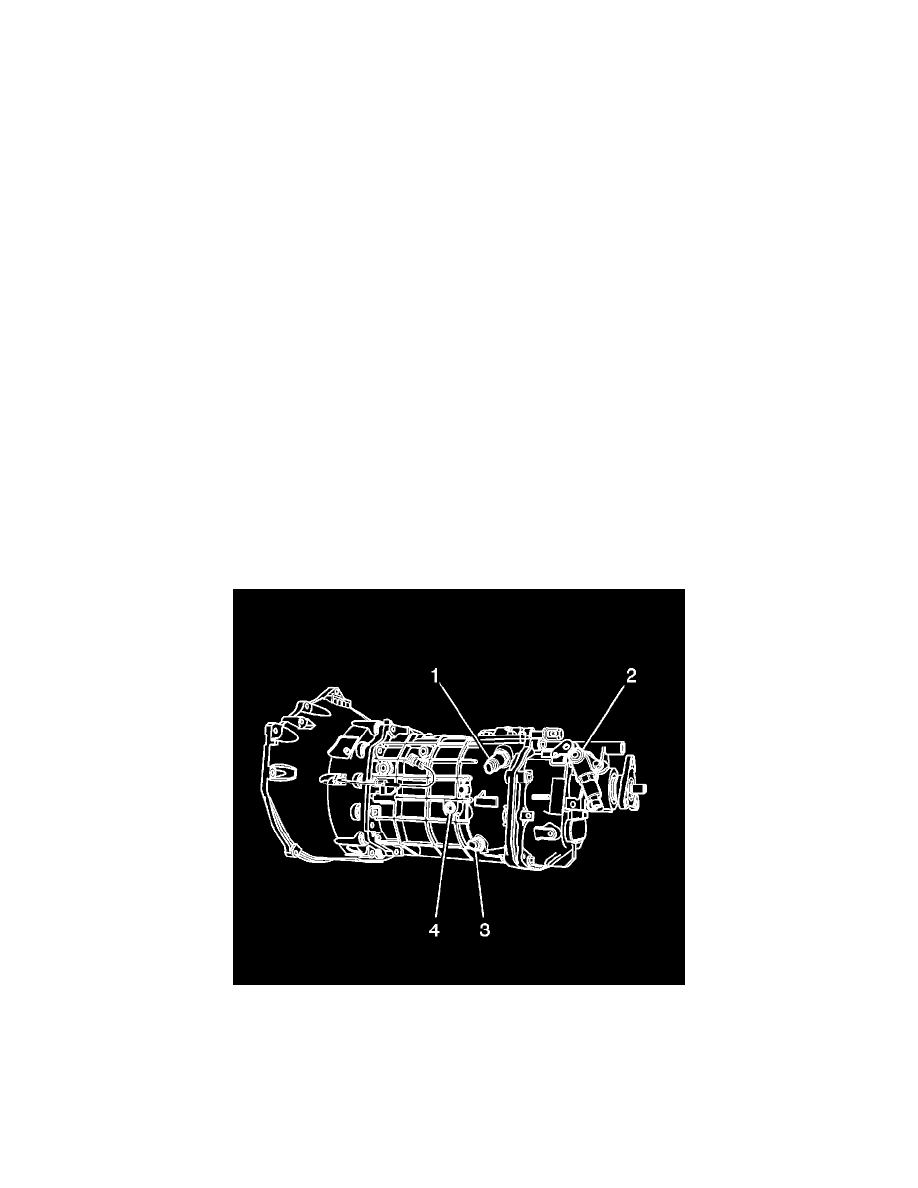
7. Disconnect the solenoid electrical connector (1).
8. Using the DT-49293 or equivalent, loosen the retaining bolt, then remove the bolt and the solenoid.
Installation Procedure