SRX RWD V8-4.6L VIN A (2006)

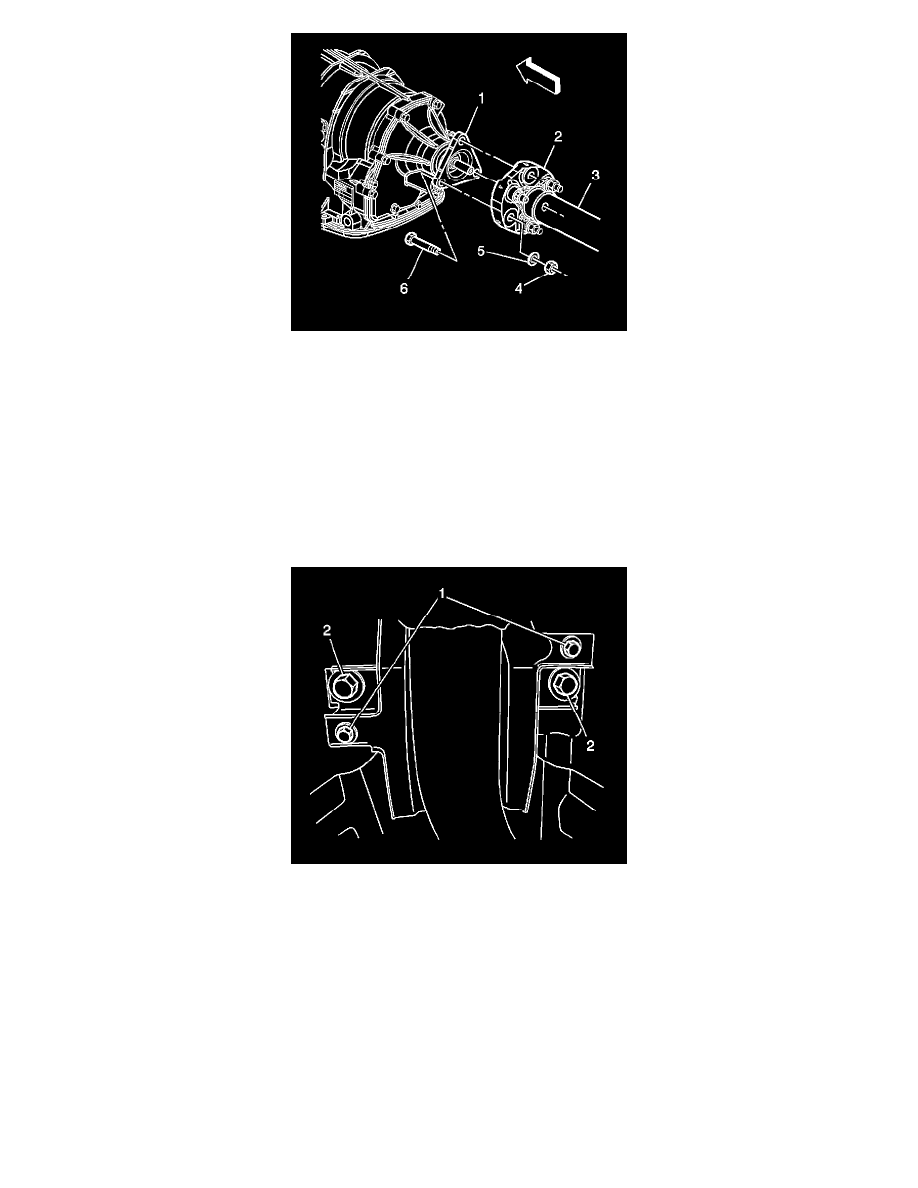
10. Push the front propeller shaft (3) to the rear of the vehicle and install the propeller shaft coupler (2) to the transmission flange (1).
11. Important:
If reusing the propeller shaft-to-flange nuts and bolts, to ensure proper adhesion and fastener retention, the threads must be free of debris prior to
the application of threadlocker.
Thoroughly clean the threads using denatured alcohol, or equivalent, and allow to dry. Apply threadlocker GM P/N 12345493 (Canadian P/N
10953488), or equivalent, to the propeller shaft to the flange bolt. Ensure that there are no gaps in the threadlocker along the length of the filled
area of the bolt. Allow the threadlocker to cure approximately 10 minutes before installation.
12. Install the front propeller shaft coupler-to-transmission flange bolts (6) to the transmission flange (1) and propeller shaft coupler (2).
13. Install the propeller shaft coupler-to-transmission flange washers (5) and nuts (4).
^
Tighten the propeller shaft coupler-to-transmission flange bolts and nuts to 85 Nm (63 ft. lbs.).
14. Install the center support bearing to the vehicle underbody.
Important:
Ensure that the shim packs on the support bearing are installed in their original positions.
Raise the support device in order to hold the support bearing in position.
15. Install the center support bearing bolts (2) to the studs on the vehicle underbody.
^
Tighten the support bearing bolts to 50 Nm (37 ft. lbs.).
16. Remove the support device from under the support bearing.
17. Install the exhaust system.
18. Lower the vehicle.
