
SRX RWD V8-4.6L VIN A (2006)
13. Inspect the propeller shaft coupler for the following conditions:
^
Splitting of the coupler
^
Deep cracking. Minor superficial cracking of the coupler is acceptable.
^
Looseness at the propeller shaft mounting bolts
^
Distorted or missing mounting bolt bushings
14. If any of the above conditions are found, the propeller shaft requires replacement.
Installation Procedure
1. Using a clean shop towel clean the following:
^
The differential flange centering pin
^
The transmission flange centering pin
^
The front propeller shaft centering bushing
^
The rear propeller shaft centering bushing
2. Apply a small amount of lubricant GM P/N 1051344 (Canadian P/N 993037), or equivalent, to the front and rear propeller shaft centering
bushings.
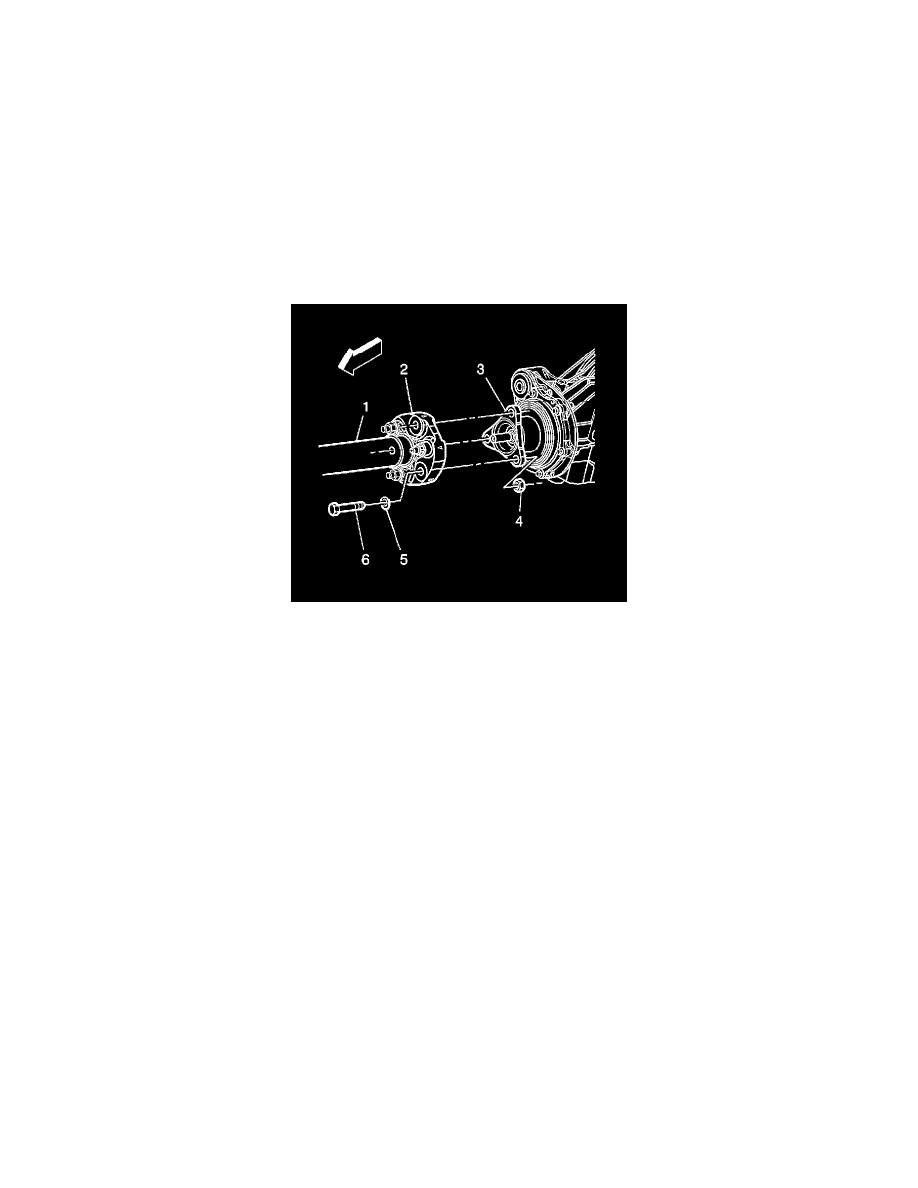
3. Inspect the propeller shaft to flange nuts (4), bolts (6) and washers (5). Replace if damaged or worn.
4. Install the rear propeller shaft coupler (2) to the differential flange (3).
5. Rest the support bearing on the support device.
6. Important:
If reusing the propeller shaft-to-flange nuts and bolts, to ensure proper adhesion and fastener retention, the threads must be free of debris prior to
the application of threadlocker.
Thoroughly clean the threads using denatured alcohol, or equivalent, and allow to dry. Apply threadlocker GM P/N 12345493 (Canadian P/N
10953488), or equivalent, to the propeller shaft to the flange bolt. Ensure that there are no gaps in the threadlocker along the length of the filled
area of the bolt. Allow the threadlocker to cure approximately 10 minutes before installation.
7. Install the propeller shaft coupler-to-differential flange washers (5) to the propeller shaft coupler-to-differential flange bolts (6).
8. Install the propeller shaft coupler-to-differential flange bolts (6) and washers (5) to the differential flange (3) and propeller shaft coupler (2).
9. Notice:
Refer to Fastener Notice in Service Precautions.
Install the propeller shaft coupler-to-differential flange nuts (4).
^
Tighten the propeller shaft coupler-to-differential flange bolts and nuts to 85 Nm (63 ft. lbs.).