
C 3500 HD Truck 2WD V8-8.1L VIN G (2002)
Brake Rotor/Disc: Service and Repair
Burnishing Pads and Rotors
Burnishing Pads and Rotors
Caution: Road test a vehicle under safe conditions and while obeying all traffic laws. Do not attempt any maneuvers that could jeopardize
vehicle control. Failure to adhere to these precautions could lead to serious personal injury and vehicle damage.
Burnishing the brake pads and brake rotors is necessary in order to ensure that the braking surfaces are properly prepared after service has been
performed on the disc brake system.
This procedure should be performed whenever the disc brake rotors have been refinished or replaced, and/or whenever the disc brake pads have been
replaced.
1. Select a smooth road with little or no traffic.
2. Accelerate the vehicle to 48 km/h (30 mph).
Important: Use care to avoid overheating the brakes while performing this step.
3. Using moderate to firm pressure, apply the brakes to bring the vehicle to a stop. Do not allow the brakes to lock.
4. Repeat steps 2 and 3 until approximately 20 stops have been completed. Allow sufficient cooling periods between stops in order to properly
burnish the brake pads and rotors.
Brake Rotor Replacement- Front
Brake Rotor Replacement- Front
Removal Procedure
1. Raise and suitably support the vehicle. Refer to Vehicle Lifting.
2. Remove the tire and wheel assembly.
Notice: Support the brake caliper with heavy mechanic's wire, or equivalent, whenever it is separated from it's mount and the hydraulic flexible brake
hose is still connected. Failure to support the caliper in this manner will cause the flexible brake hose to bear the weight of the caliper, which may
cause damage to the brake hose and in turn may cause a brake fluid leak.
3. Remove the caliper from the mounting bracket and support the caliper with heavy mechanic's wire or equivalent. DO NOT disconnect the
hydraulic brake flexible hose from the caliper.
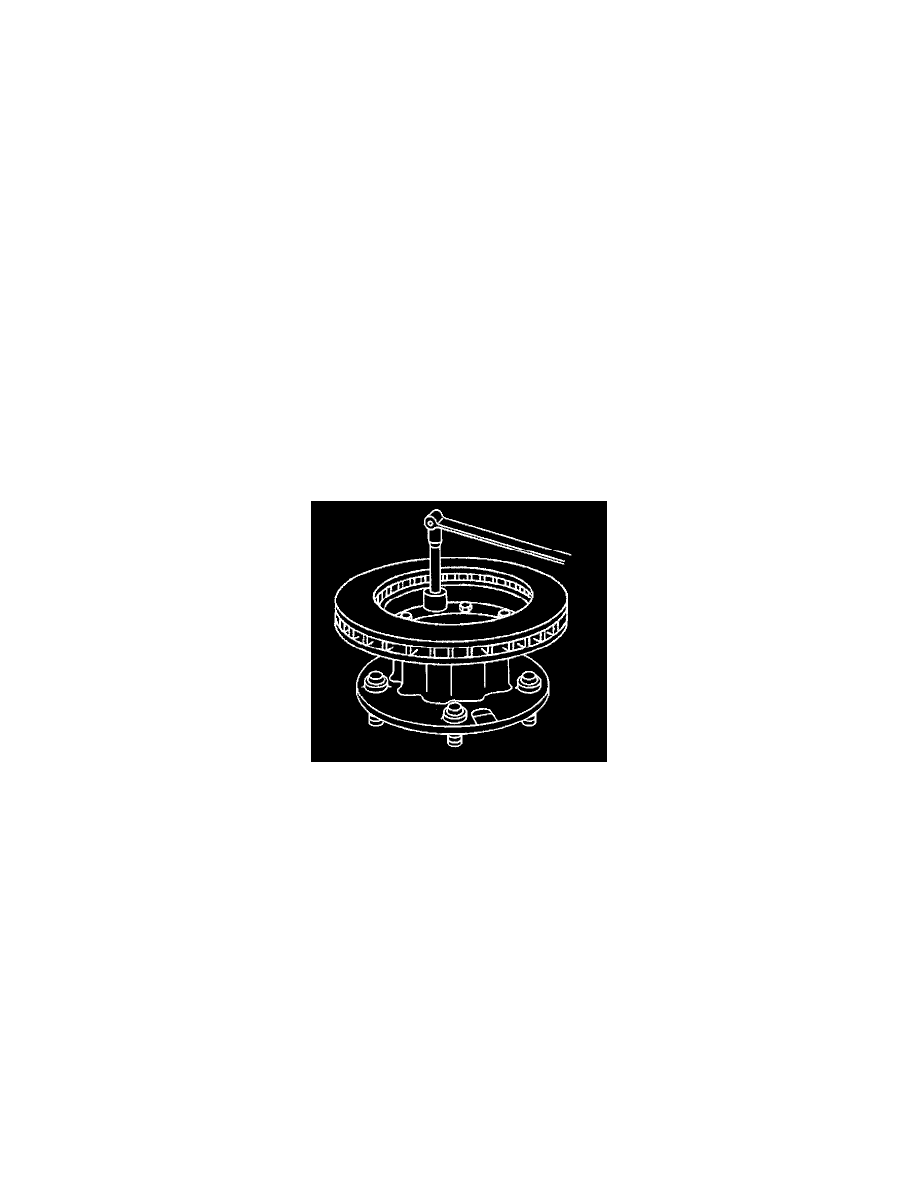
4. Remove the hub and brake rotor assembly.
5. Remove the bolts that mount the front brake rotor to the hub.
6. Remove the brake rotor from the hub.
Installation Procedure
Notice: Any new rotor must have the protective coating removed from the friction surfaces before being placed in service. Use Goodwrench Brake
Parts Cleaner, GM P/N 123777981 (Canadian P/N 10953463), or the equivalent, and wipe the surface clean with clean cloths. Do not use gasoline,
kerosene, or other oil base solvents which may leave an oily residue. This residue is damaging to the brake lining and is flammable.