
C 3500 HD Truck 2WD V8-8.1L VIN G (2002)
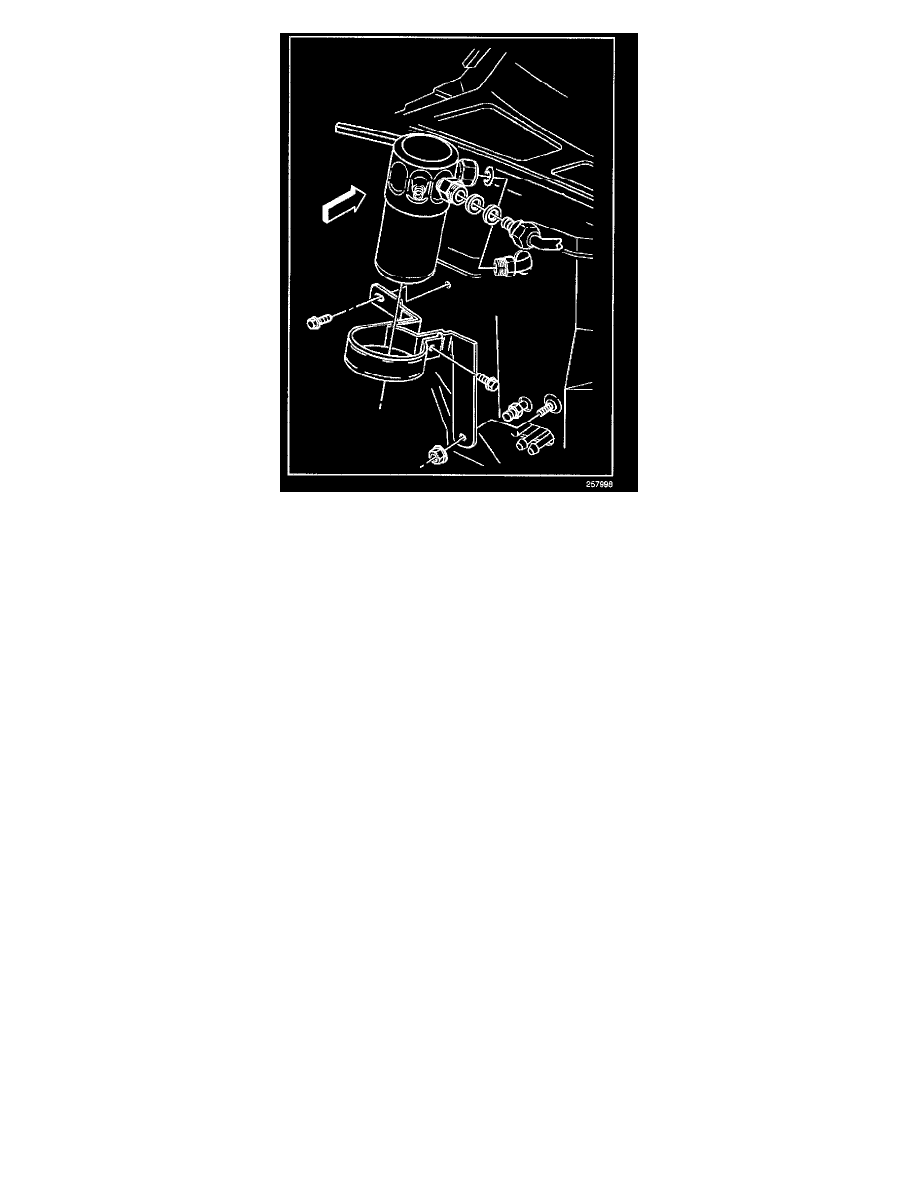
1. Install the upper and lower accumulator insulators.
2. Install the accumulator.
NOTE: Refer to Fastener Notice in Service Precautions.
3. Install the accumulator bracket screw.
Tighten
Tighten the screw to 9 N.m (80 lb in).
4. Coat the new O-ring seals with 525 viscosity refrigerant oil.
5. Install the new O-ring seals.
6. Install the accumulator nut to the evaporator.
Tighten
Tighten the nut to 20 N.m (15 lb ft).
7. Install the compressor hose assembly nut to the accumulator.
8. Install the low pressure cycling switch to the accumulator.
9. Connect the electrical connector to the low pressure cycling switch.
10. Evacuate and recharge the system. Refer to Refrigerant Recovery and Recharging.
11. Leak test the fittings of the component using the J 39400-A.