
Camaro V8-6.2L (2010)
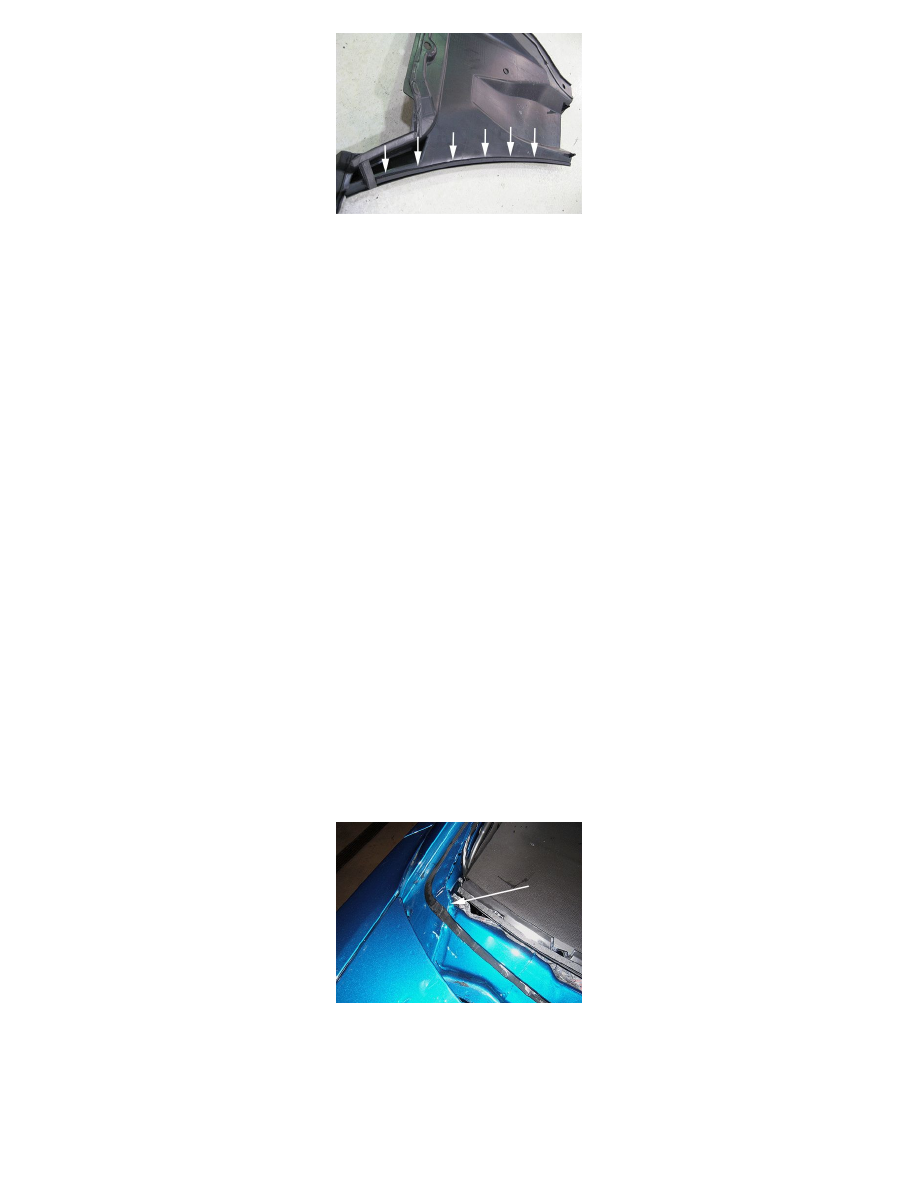
1. With the air inlet grille panels removed from the vehicle, apply a 4 mm x 10 mm (3/8 in x 5/32 in) closed cell adhesive-backed foam shim
stock as shown. For this application use Kent Industries Part # P46485*, or the equivalent.
2. Reinstall the air inlet grille panels. Refer to Air Inlet Grille Panel Replacement in SI.
3. Road test the vehicle and verify that the condition has been corrected.
4. If the condition is not corrected by the above steps, continue with this procedure.
Important
The following steps involve removing and reinstalling the windshield glass. If the repairing dealership doesn't have the proper tools
and the ability to perform this operation, it is recommended to sublet the glass removal and reinstallation to a qualified automotive
glass service.
Important
Before cutting out a stationary window, apply a double layer of masking tape around the perimeter of the painted surfaces and the
interior trim.
Warning
When working with any type of glass or sheet metal with exposed or rough edges, wear approved safety glasses and gloves in order to reduce the chance
of personal injury.
1. Open the hood.
2. Remove the air inlet grille panels. Refer to Air Inlet Grille Panel Replacement in SI.
3. Remove the inside rearview mirror. Refer to Inside Rearview Mirror Replacement in SI.
4. Remove the remote control door receiver antenna. Refer to Remote Control Door Lock Receiver Replacement in SI.
5. Remove the windshield side garnish moldings. Refer to Windshield Side Garnish Molding Replacement in SI.
Warning
If broken glass falls into the defroster outlets, it can be blown into the passenger compartment and cause personal injury.
6. From the inside of the vehicle, cut the windshield mounting urethane using an Equalizer(R) Express(R) Stingray* 120-volt tool equipped with
a Part # BFE-1400 blade, or the equivalent. Follow the tool manufacturer's instructions for the safe and proper operation of this equipment.
7. Remove the windshield glass from the vehicle.
8. Inspect the window opening for high spots at the joint where the side frames meet the upper plenum.