
Cruze L4-1.4L Turbo (2011)
6. Lubricate the piston rings, piston, inner cylinder bore surface and a piston ring compressor with clean engine oil.
7. Install the piston ring compressor in order to compress the piston rings.
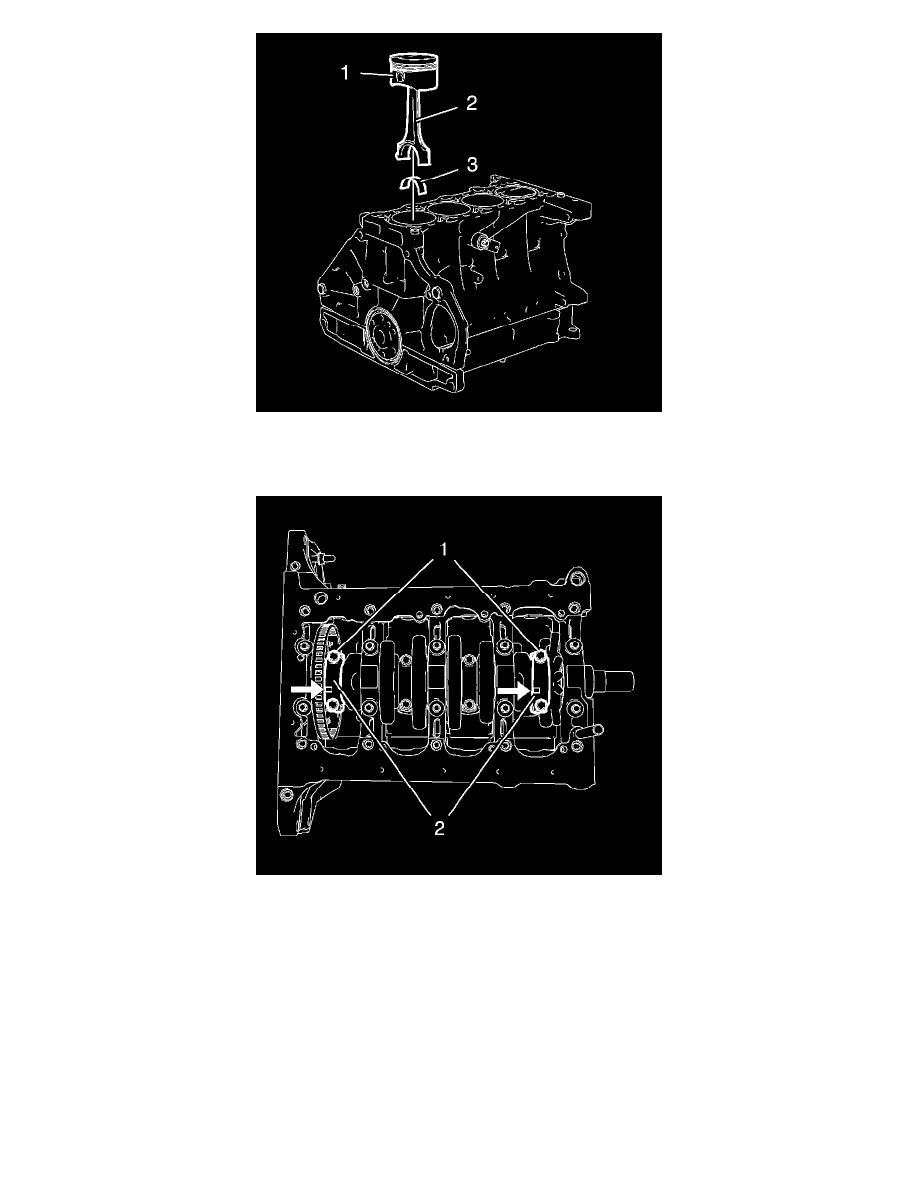
8. Install the pistons (1) in compound with connecting rods (2) and upper connecting rod bearings (3) to the engine block and to the crankshaft.
Note: The flarings (arrows) on the connecting rod bearing caps must point to the transmission side. The connecting rod bearing caps must be
installed in their original position.
9. Install the 2 connecting rod bearings and the 2 connecting rod bearing caps (2) of cylinder 1 and 4.
Caution: Refer to Fastener Caution (See: Service Precautions/Vehicle Damage Warnings/Fastener Caution).
10. Install the 4 connecting rod bearing cap bolts (1) and tighten in the following sequence:
1. Tighten the connecting rod bearing cap bolts to 25 Nm (18 lb ft).
2. Tighten the connecting rod bearing cap bolts an additional 25°. Use EN-470-B - wrench.
11. Rotate the crankshaft 180°.