Equinox AWD V6-3.4L (2008)

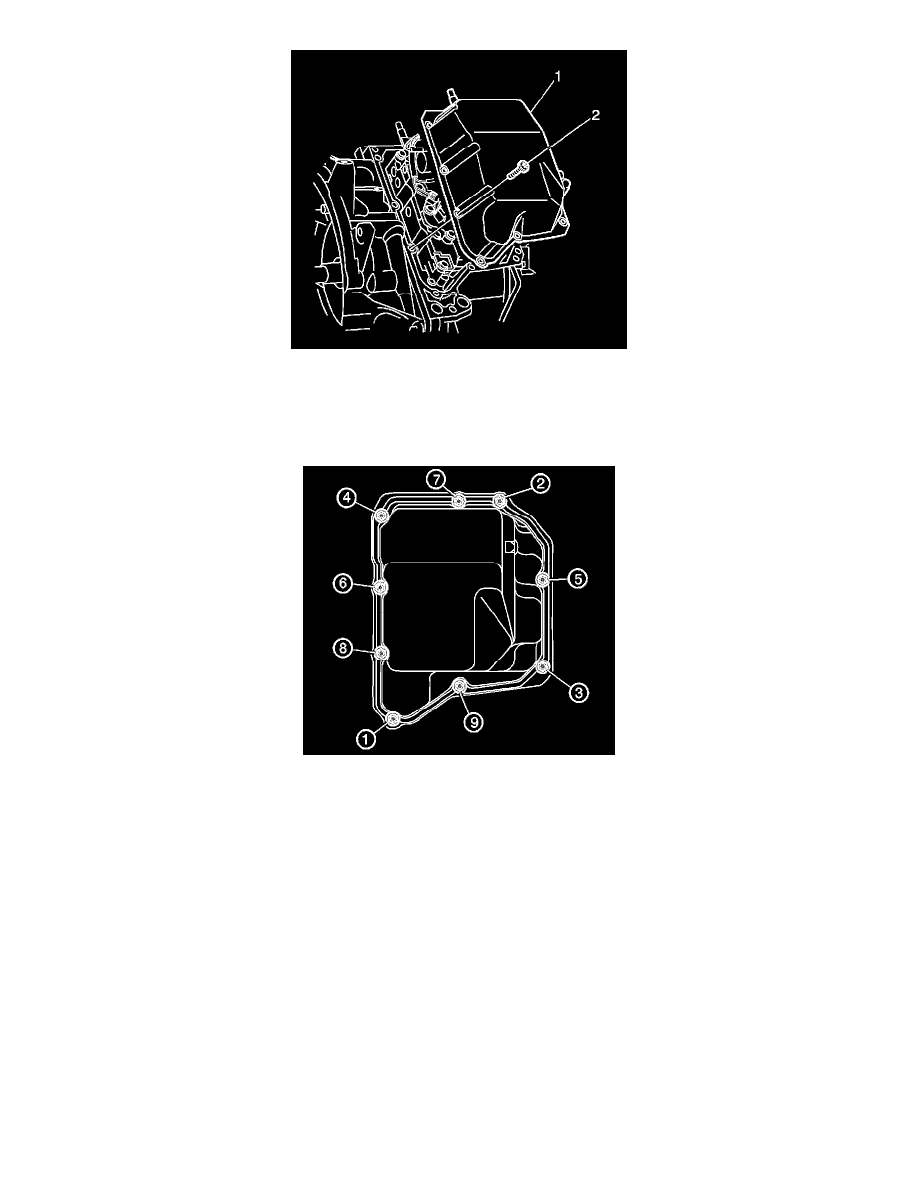
3. Install the control valve body cover (1) onto the transaxle case.
Important: Use LOCTITE(TM) 242 thread sealer on ALL bolt threads.
4. Install the control valve body cover bolts (2) hand tight.
Notice: Refer to Fastener Notice .
5. Tighten the control valve body cover bolts in the sequence shown.
Tighten the bolts to 13 N.m (115 lb in).
6. Install the transaxle oil cooler lines and seals to the transaxle. Refer to Fluid Cooler Pipe Seal Replacement (See: Fluid Line/Hose/Service and
Repair) .
7. Install the front engine mount. Refer to Engine Front Mount Replacement .
8. Install the left splash shield. Refer to Engine Splash Shield Replacement .
9. Install the left front wheel and the tire assembly. Refer to Tire and Wheel Removal and Installation (See: Maintenance/Wheels and Tires/Service
and Repair) .
10. Lower the vehicle.
11. Check the transaxle fluid level. Refer to Transmission Fluid Check (See: Testing and Inspection/Component Tests and General
Diagnostics/AF33-5 - Automatic Transaxle/Transmission Fluid Check) .
Control Valve Body Replacement
Control Valve Body Replacement
Removal Procedure
