
HHR L4-2.4L (2010)
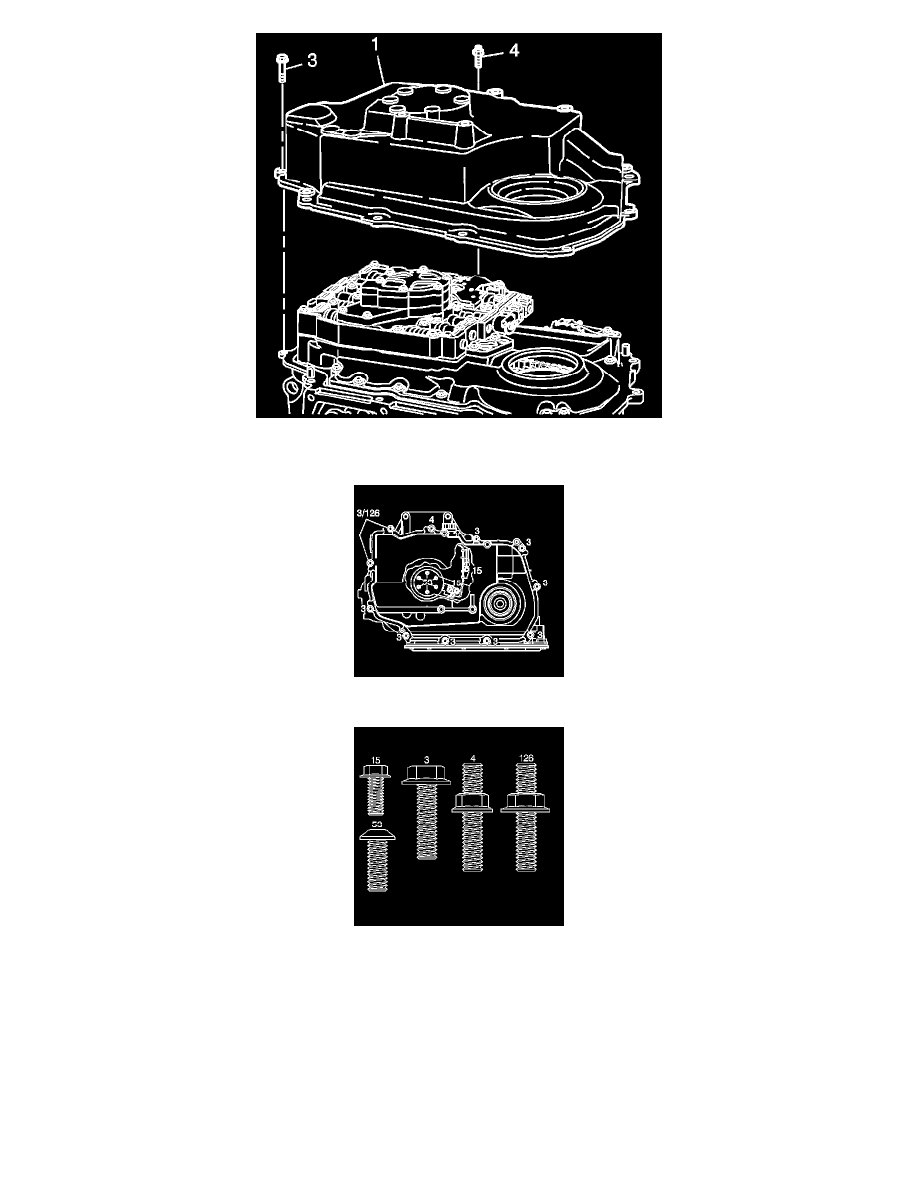
6. Install the side cover assembly onto the transmission case.
7. Install the 11 side cover bolts (3) or studs (4) (model dependent).
8. Refer to the graphic in order to find the correct installation points of the bolts and the stud.
Caution: Refer to Fastener Caution (See: Service Precautions/Vehicle Damage Warnings/Fastener Caution).
9. Hand start the bolts and tighten the side cover bolts and stud to 28 Nm (22 lb ft).
10. Lower the vehicle.
11. Raise the engine with the engine support fixture.
12. Install the left transmission mount. Refer to Transmission Mount Replacement - Left Side (See: Transmission Mount/Service and
Repair/Transmission Mount Replacement - Left Side).
13. Raise the vehicle.
14. Install the left wheel drive shaft to the transmission. Refer to Wheel Drive Shaft Replacement (See: Drive Axles, Bearings and Joints/Axle Shaft
Assembly/Service and Repair).
15. Install the frame. Refer to Frame Replacement ().
16. Install the front tires and wheels. Refer to Tire and Wheel Removal and Installation (See: Maintenance/Wheels and Tires/Service and Repair).