
Metro L3-061 1.0L VIN 6 TBI (1998)
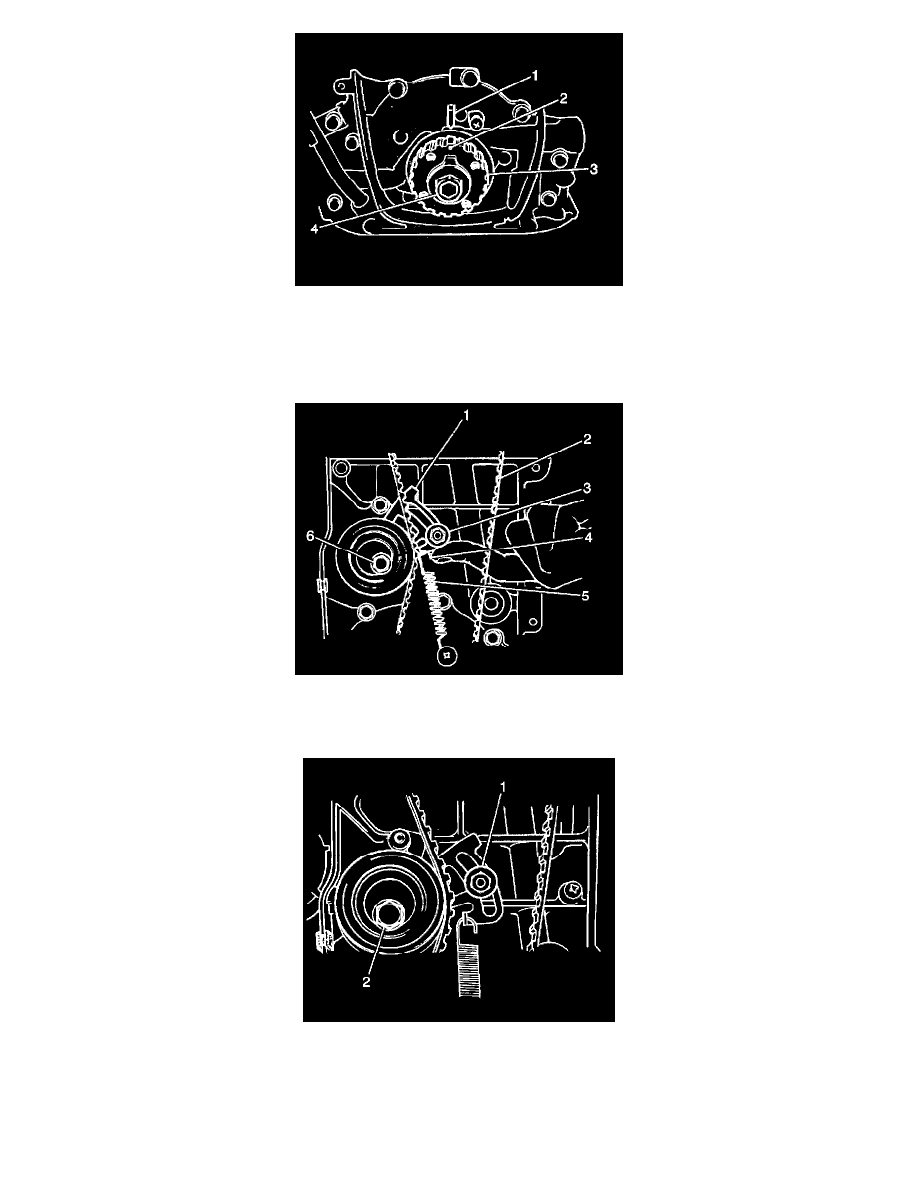
3. Ensure that the punch mark on the crankshaft timing gear (2) is aligned with the arrow mark on the oil pump case (1).
IMPORTANT:
^
Match the arrow mark on the timing belt with the rotating direction of the crankshaft, when installing the timing belt.
^
With the timing belt in this position, the number one piston is at top dead center of the compression stroke.
4. Push up on the tensioner plate (1) and install the timing belt (2) on the two pulleys in such a way that the drive side of the belt is free from any
slack.
5. Install the tensioner spring (5) and the spring damper (4). Hand tighten the tensioner stud only.
6. Turn the crankshaft one and a half rotations clockwise after installing the timing belt. This will take up slack in the timing belt.
7. Tighten the timing belt tensioner stud (1).
^
Tighten the timing belt tensioner stud to 11 Nm (97 inch lbs.).
8. Install the timing belt tensioner bolt (2).
^
Tighten the timing belt tensioner bolt to 27 Nm (20 ft. lbs.).