
Suburban 3/4 Ton 4WD V8-6.0L VIN U (2004)
1. Inspect all of the parts for unusual wear, cracks, or other damage. Replace the CV joint assembly if necessary.
2. Put a light coat of the recommended grease on the inner (6) and the outer race (8) grooves.
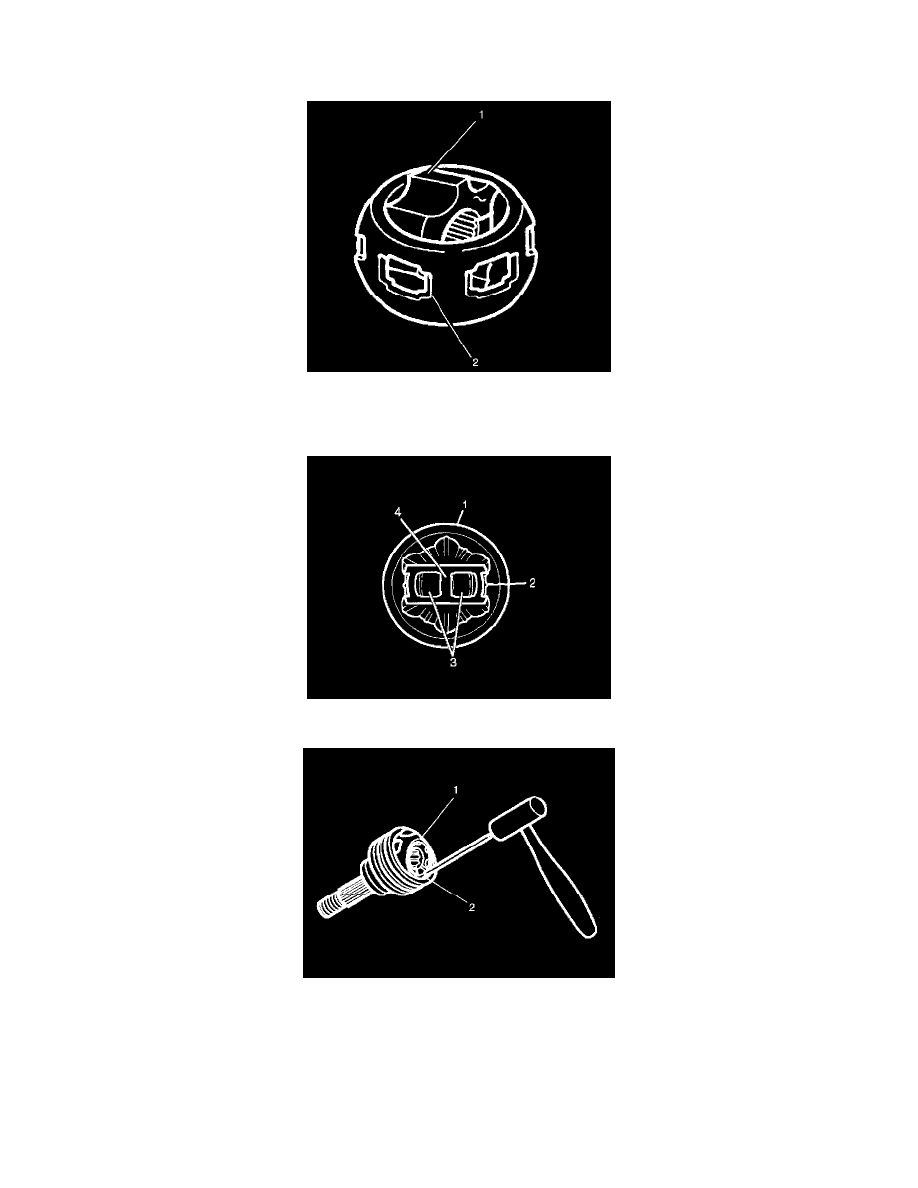
3. Hold the inner race (1) at 90 degrees to the centerline of the cage (2).
4. Align the lands of the inner race (1) with the windows of the cage (2).
5. Insert the inner race (1) into the cage (2), by rotating the inner race (1) downward.
6. Insert the cage (4) and inner race into the outer race (1).
7. Place a brass drift against the CV joint cage (1).
8. Tap gently on the brass drift with a hammer in order to tilt the cage (1).
9. Install the first chrome alloy ball (2) when the CV joint cage (1) tilts.
10. Tilt the CV joint cage (1) in the opposite direction to install the opposing chrome alloy ball (2).
11. Repeat this process in order to install all six of the balls.