
Tracker 2WD L4-1.6L VIN 6 (2000)
Brake Pedal Assy: Service and Repair
Automatic Transmission
Removal Procedure
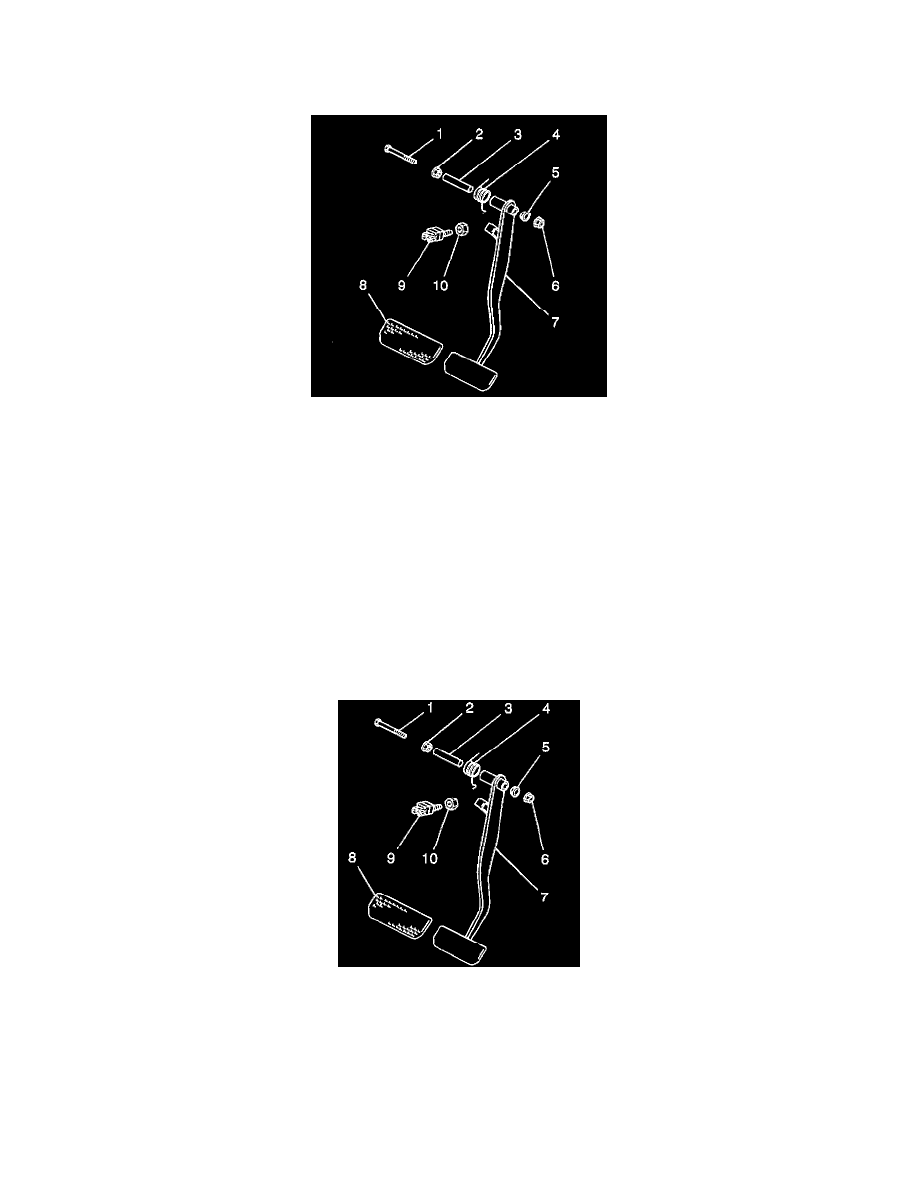
1. Disconnect the stoplamp switch (9).
2. Remove the brake pedal push rod clevis pin retainer.
3. Remove the brake pedal push rod clevis pin.
4. Remove the nut (6) from the brake pedal pivot pin bolt (1).
5. Remove the brake pedal pivot pin bolt (1) from the brake pedal bracket.
6. Remove the brake pedal (7) from the bracket.
7. Remove the return spring (4) from the brake pedal.
8. Remove the bushings (2,5) and the spacer (3) from the brake pedal.
Inspection Procedure
1. Inspect the bushings and the spacer for wear. Replace if necessary.
2. Inspect the return spring for distortion or weakness. Replace if necessary.
3. Inspect the brake pedal for distortion or damage. Replace if necessary.
4. Inspect the brake pedal pivot pin bolt for wear or damage. Replace if necessary.
Installation Procedure
1. Apply Lubricated Lubricant, GM P/N 1052196, or the equivalent, to the spacer (3) and the bushings (2,5).
2. Install the spacer and the bushings to the brake pedal (7).
3. Apply Lubriplate Lubricant, GM P/N 1052196, or the equivalent, to the return spring (4).
Important: Do not hook the return spring on the brake pedal lever before installing the pedal to the bracket.
4. Install the return spring (4) to the brake pedal (7).
5. Install the brake pedal (7) and the pivot pin bolt (1) to the bracket.