
Tracker 2WD L4-1.6L VIN 6 (2000)
Timing Belt: Service and Repair
Timing Belt Replacement
TIMING BELT REPLACEMENT
Removal Procedure
Battery Disconnect Caution
Caution: Before servicing any electrical component, the ignition key must be in the OFF or LOCK position and all electrical loads must be OFF
unless instructed otherwise in these procedures. If a tool or equipment could easily come in contact with a live exposed electrical terminal, also
disconnect the negative battery cable. Failure to follow these precautions may cause personal injury and/or damage to the vehicle or its components.
1. Disconnect the negative battery cable.
2. Remove the crankshaft pulley. Refer to Crankshaft Pulley Replacement.
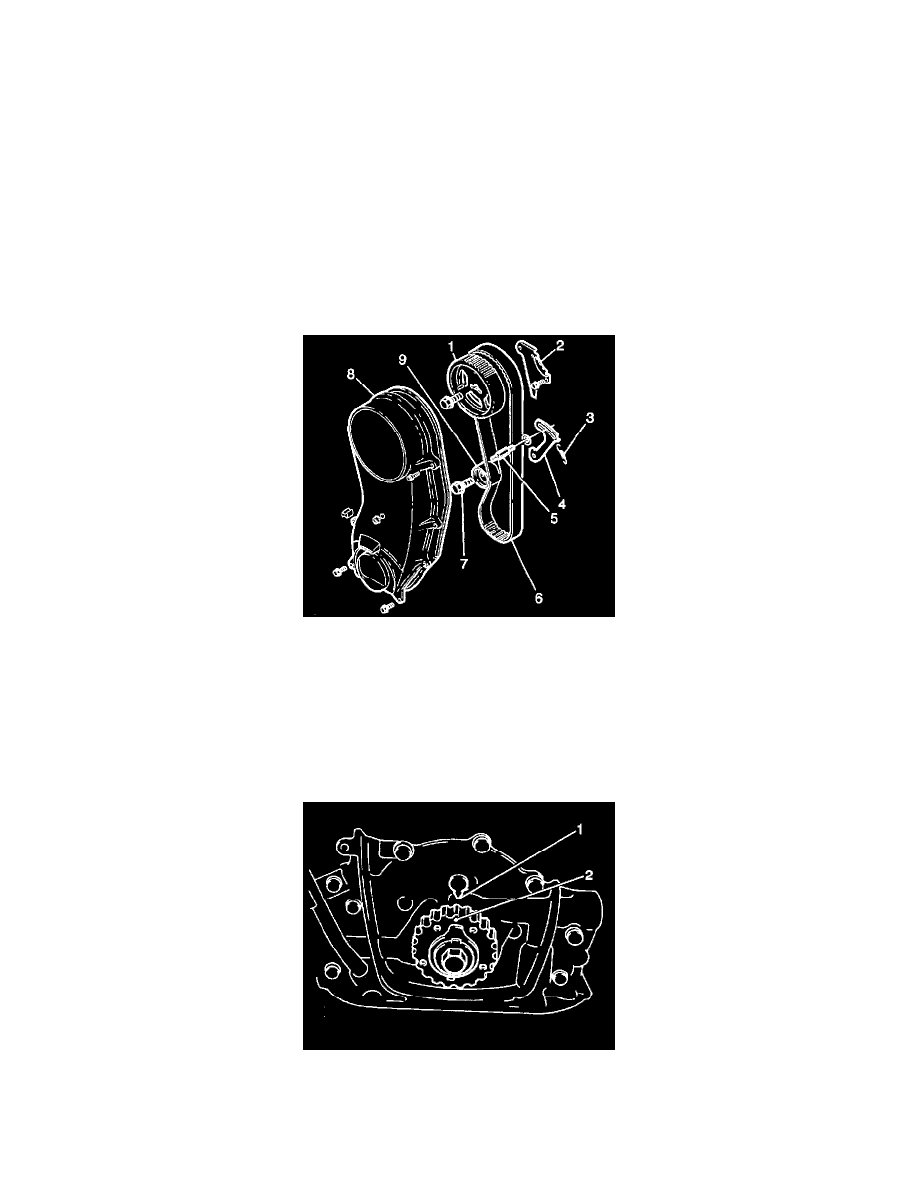
3. Disconnect the wiring harness conduit from the timing belt cover (8).
4. Remove the following from the engine:
^
Eight timing belt cover bolts
^
One timing belt cover nut
^
The timing belt cover (8)
Important: There are two sets of timing marks which must be aligned in order to ensure correct engine timing belt installation. A mark on the
camshaft timing belt gear designated as E must be aligned with the notch on the cylinder head cover. The mark on the crankshaft timing belt gear
should also be aligned with the arrow on the oil pump housing. Ensure alignment of both sets of marks prior removing the timing belt to ensure correct
timing belt installation and engine timing.
5. Ensure the alignment of the lower timing marks on the oil pump housing (2) and the crankshaft timing belt gear (1). If the timing marks are not
aligned, rotate the crankshaft clockwise until the timing marks are aligned.