
PT Cruiser L4-2.4L (2008)
CAUTION: The strut assembly-to-knuckle attaching bolts (2) are serrated and must not be turned during removal. Hold the bolts stationary in
the knuckle while removing the nuts, then tap the bolts out using a pin punch.
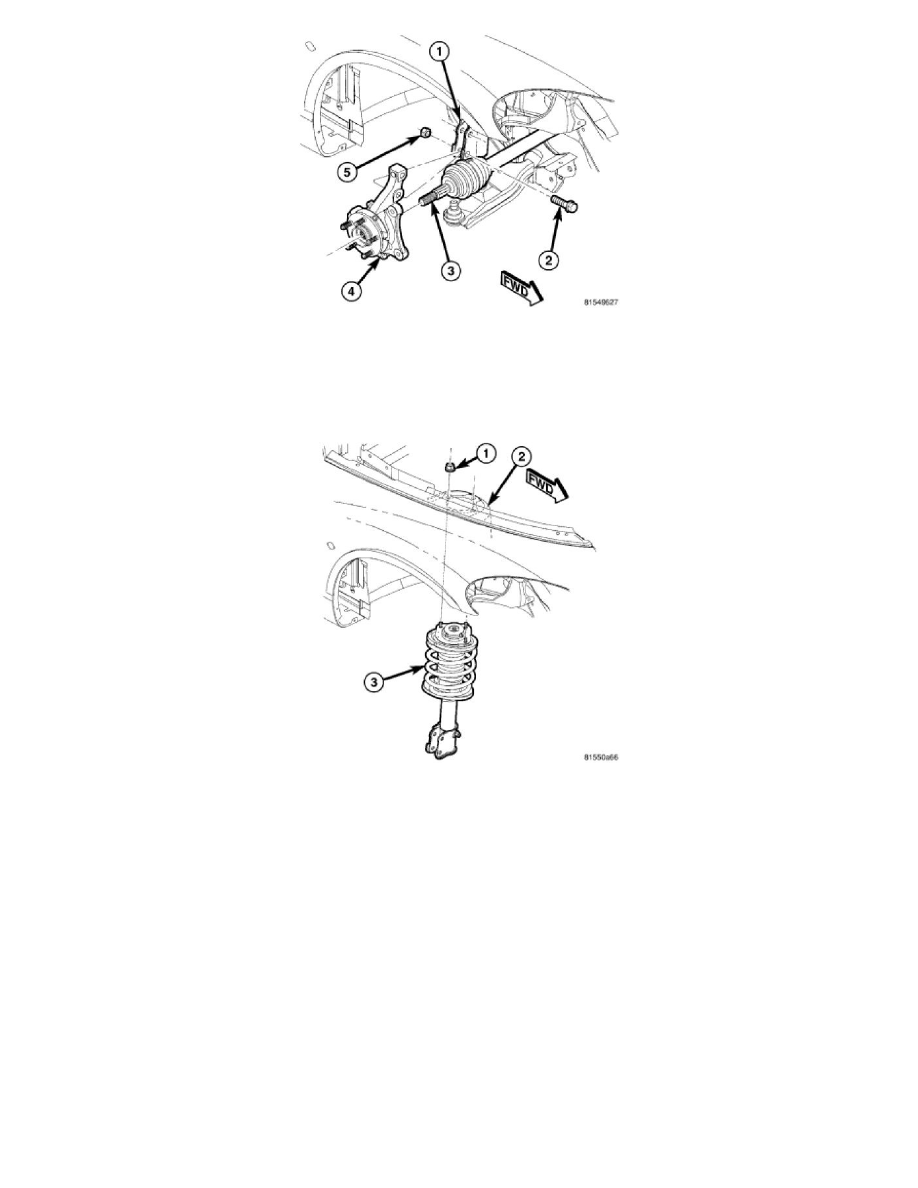
5. While holding the bolt heads stationary, remove the two nuts (5) from the bolts (2) attaching the strut (1) to the knuckle (4).
6. Remove the two bolts (2) attaching the strut (1) to the knuckle (4) using a pin punch.
7. Lower the vehicle just enough to open the hood, but without letting the tires touch the floor.
8. Remove the three nuts (1) attaching the strut assembly upper mount to the strut tower (2).
9. Remove the strut assembly (3) from the vehicle.
10. For disassembly, See: Disassembly.
Disassembly
DISASSEMBLY
NOTE: The Strut assembly must be removed from the vehicle for it to be disassembled and assembled. See: Removal
For the disassembly and assembly of the strut assembly, use strut spring compressor, teamPSE tool 223-7400, or the equivalent, to compress the coil
spring. Follow the manufacturer's instructions closely.
WARNING: Do not remove the strut shaft nut before the coil spring is compressed. The coil spring is held under pressure and must be
compressed, removing spring tension from the upper mount and pivot bearing, before the shaft nut is removed.
1. If both struts are being serviced at the same time, mark both the coil spring and strut assembly according to which side of the vehicle the strut is
being removed from.