
PT Cruiser L4-2.4L (2008)
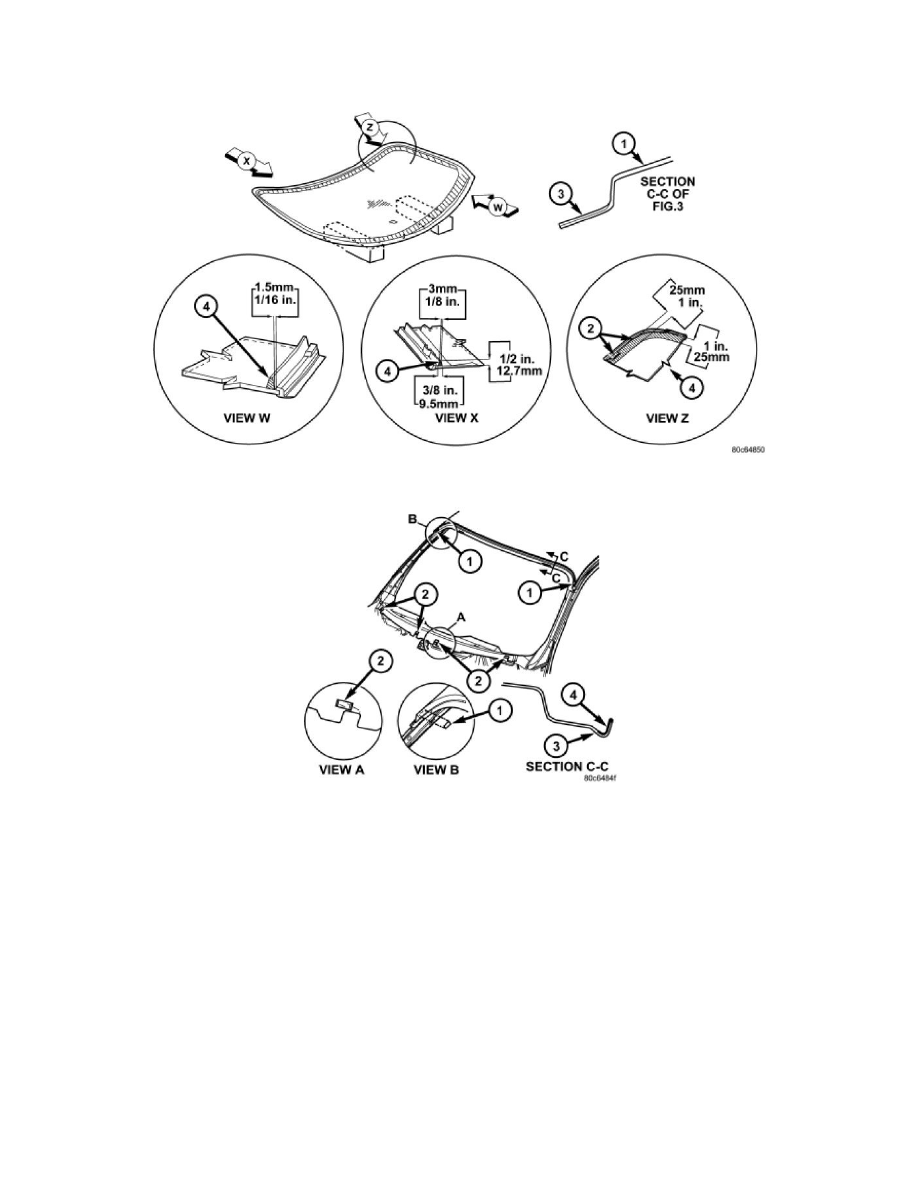
9. Apply Glass Prep adhesion promoter 25 mm (1 in.) wide around perimeter of windshield and wipe with clean/dry lint-free cloth until no streaks
are visible.
10. Apply Glass Primer 25 mm (1 in.) wide around perimeter of windshield. Allow at least three minutes drying time.
11. Apply a bead of urethane (4) on windshield glass as indicated.
12. With the aid of a helper, position the windshield over the windshield opening and install encapsulation locator pin then load encapsulation hooks
onto the roof panel hooks (3).
13. Push windshield into opening until no gap encapsulation lays evenly along roof panel and there is no gapping of encapsulation squeak tape to the
windshield opening
14. Clean excess urethane (4) from exterior with Mopar, Super clean or equivalent.
15. Apply tape to windshield assembly as required if gap exists around windshield opening.
16. After urethane has cured, remove tape strips and water test windshield to verify repair.
17. Install cowl covers.
18. Install inside rear view mirror.
19. Allow urethane to cured for 10-12 hours. Remove tape strips and water test windshield.
Convertible
CONVERTIBLE
CAUTION: Open the left front door glass before installing windshield to avoid pressurizing the passenger compartment. If a door is slammed
before urethane bonding is cured, water leaks can result.
Allow the urethane at least 24 hours to cure before returning the vehicle to use.
To avoid stressing the replacement windshield, the urethane bonding material on the windshield fence should be smooth and consistent to the
shape of the replacement windshield. The support spacers should be cleaned and properly installed on weld studs or repair screws at bottom of