
B350 1 Ton Van V8-360 5.9L (1994)
A.
Inspect Air Conditioning Compressor:
1.
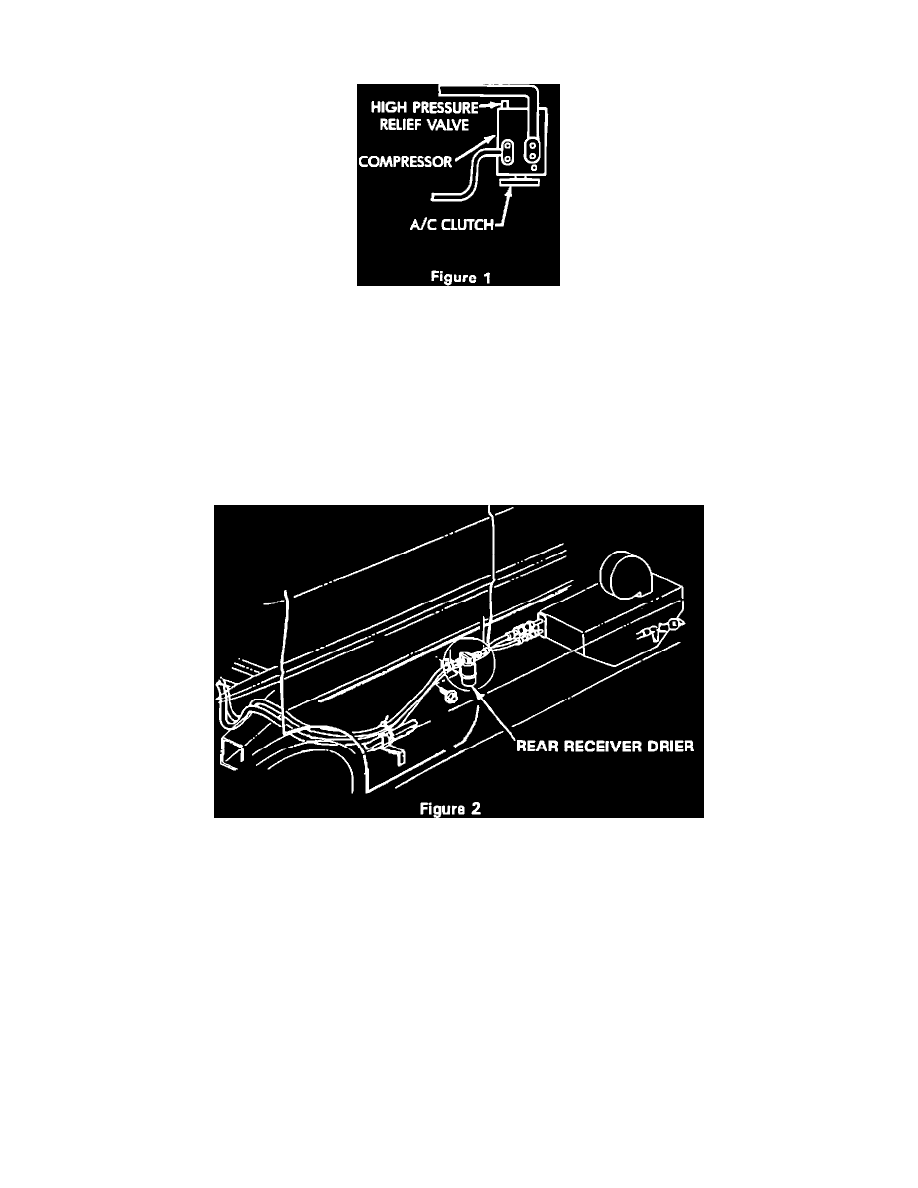
Inspect the pressure relief valve on the back of the A/C compressor (Figure 1). If the valve is aluminum (silver), proceed to Section B. If the
valve is brass, the vehicle was built with the proper compressor and no further action is necessary.
B.
Replace Receiver Drier(s):
1.
Discharge and evacuate the air conditioning system using an R12 refrigerant recycling device. Refer to the operating instructions provided
with the recycling equipment for proper operation. Discard any compressor oil collected.
2.
Remove the front receiver drier.
3.
Install the provided receiver drier using the supplied gaskets. Tighten to 23 N-m (200 in.lbs).
4.
If the vehicle is equipped with auxiliary air conditioning remove the rear receiver drier (Figure 2) and install a new rear receiver drier (PN
52004220). Tighten the compression fittings to 23 N-m (200 in.lbs).
5.
Slowly add 6 oz. of Mopar R12 Oil (PN 4318057) or equivalent (8 oz. for vehicles with auxiliary A/C), to the system through the suction
port on the compressor.
6.
Evacuate the A/C system for at least 5 minutes with 26-28 inches of vacuum (-88 to -95 kPag). Turn off vacuum and observe for 2 minutes.
Vacuum should remain constant. If vacuum drops, check system for leaks and repair as necessary.
7.
Charge the system with R12 refrigerant, following the instructions with the R12 refrigerant recycling equipment.
8.
Start the vehicle and verify proper operation of the air conditioning system.
Completion Reporting and Reimbursement
Claims for vehicles which have been serviced must be submitted on the DIAL System. Claims submitted will be used by Chrysler to record notification
service completions and provide dealer payments.