
Challenger SRT-8 V8-6.1L (2009)
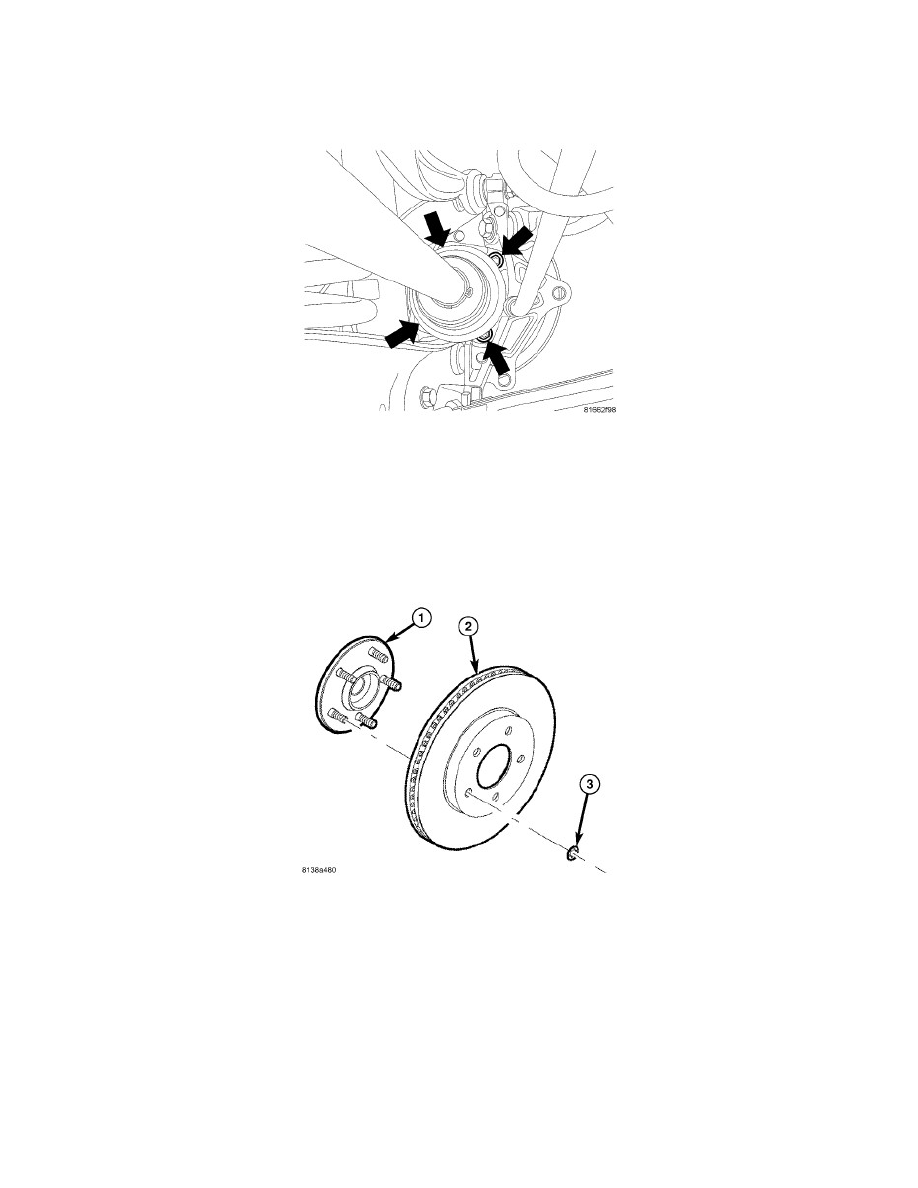
NOTE: Hub and bearing mounting bolt holes are not evenly spaced. Upper mounting holes (2) are not as far apart as lower mounting holes
(1). Make note of this before installing hub and bearing.
2. Slide hub and bearing onto half shaft. Insert hub and bearing through parking brake adapter and knuckle, lining up mounting bolt holes with bolts.
NOTE: Make sure suspension is jacked up as requested during removal to ease access to lower hub and bearing mounting bolts.
NOTE: Use a 3/8 inch drive wobble extension along with a Torx(R) socket to slip past half shaft outer C/V joint and install two top and lower
front mounting bolts. Use a standard 3/8 inch drive universal joint along with a Torx(R) socket to install lower rear mounting bolt.
3. Carefully start all four mounting bolts into hub and bearing. Using a cross pattern, tighten each hub and bearing mounting bolt a turn or two at a
time, slowly drawing hub and bearing into mounted position. Periodically, push in on end of half shaft to give as much room as possible for tools
on mounting bolts. Tighten mounting bolts to 68 Nm (50 ft. lbs.) torque.
NOTE: Inspect disc brake pads and parking brake shoes before brake rotor installation. See: Brakes and Traction Control/Disc Brake
System/Brake Pad/Service and Repair/Procedures/Brake Pads - Inspection
4. Clean hub face (1) to remove any dirt or corrosion where rotor mounts.
5. Install brake rotor (2) over studs on hub and bearing (1).