
Grand Caravan V6-3.3L VIN E Flex Fuel (2007)
9. Remove the nut that secures the suction line and liquid line fittings to the A/C expansion valve.
10. Disconnect the suction line and liquid line fittings from the expansion valve and remove and discard the seals.
11. Install plugs in, or tape over the opened suction line and liquid line fittings and both expansion valve ports.
12. Remove the suction line from the retaining bracket located at the top of the dash panel.
13. If the vehicle is equipped with the rear heating-A/C system, go to STEP 14. If the vehicle does not have the rear heating-A/C system, go to STEP
19.
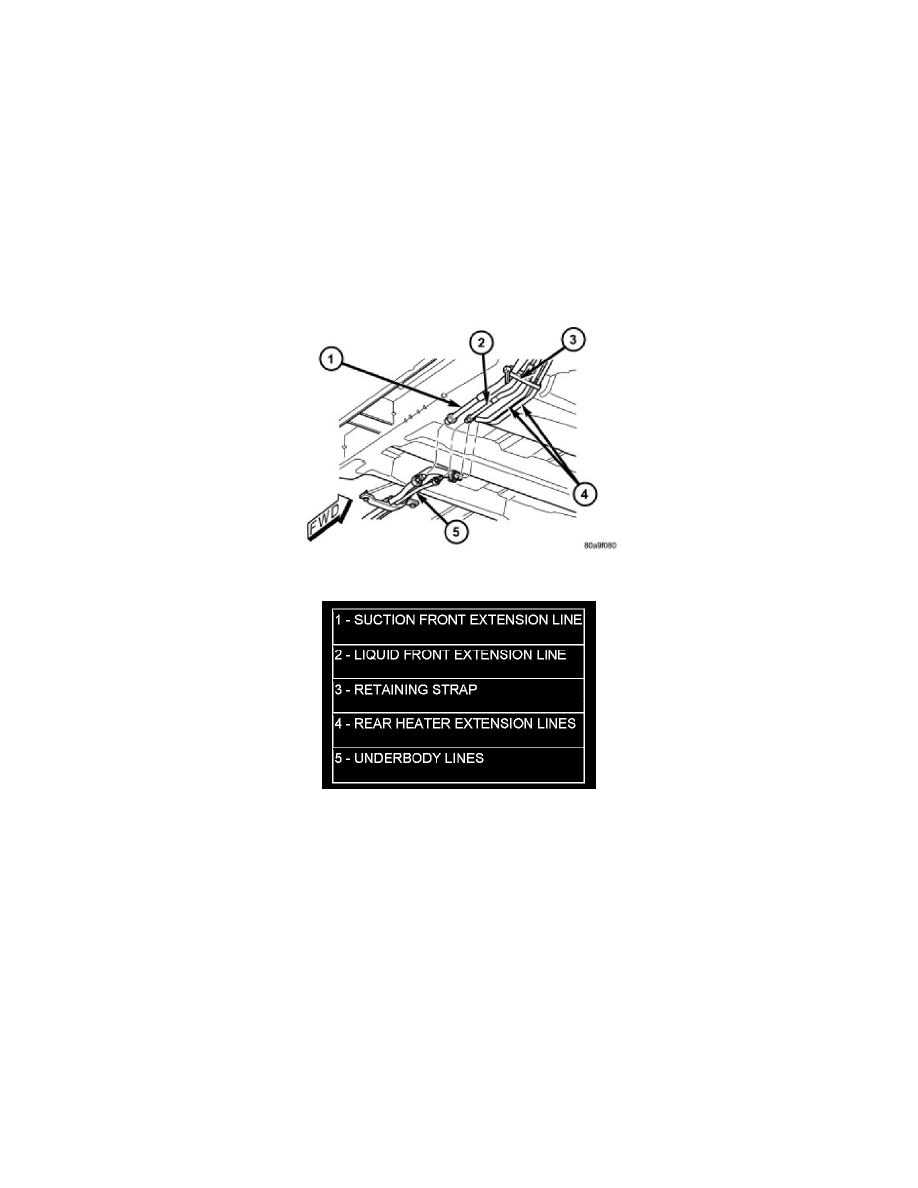
14. Raise and support the vehicle.
15. Cut the tie strap located just forward of the connections between the underbody plumbing and the engine compartment plumbing for the rear
heating-A/C system (Figure 2).
Figure 2 Underbody A/C Line Connections
16. Disconnect the suction line extension fitting from the underbody suction line fitting for the rear A/C system and remove and discard the O-ring
seal.
17. Install plugs in, or tape over the opened suction line fittings.
18. Lower the vehicle.
19. Remove the suction line from the engine compartment.
Installation
INSTALLATION
1. Position the suction line into the engine compartment.
2. Remove the tape or plugs from the suction line and liquid line fittings and both expansion valve ports.
3. Lubricate new rubber O-ring seals with clean refrigerant oil and install them on the suction line and liquid line fittings.
4. Reconnect the liquid line and suction line fittings to the expansion valve.
5. Install the nut that secures the suction line and liquid line fittings to the expansion valve. Tighten the nut to 23 Nm (17 ft.lbs.).