
Grand Caravan V6-3.3L VIN E Flex Fuel (2007)
Tie Rod End: Service and Repair
Installation
INSTALLATION
NOTE: The following procedures cover both inner and outer tie rod installation. The inner tie rod must be installed before the outer tie rod can
be installed.
INNER TIE ROD
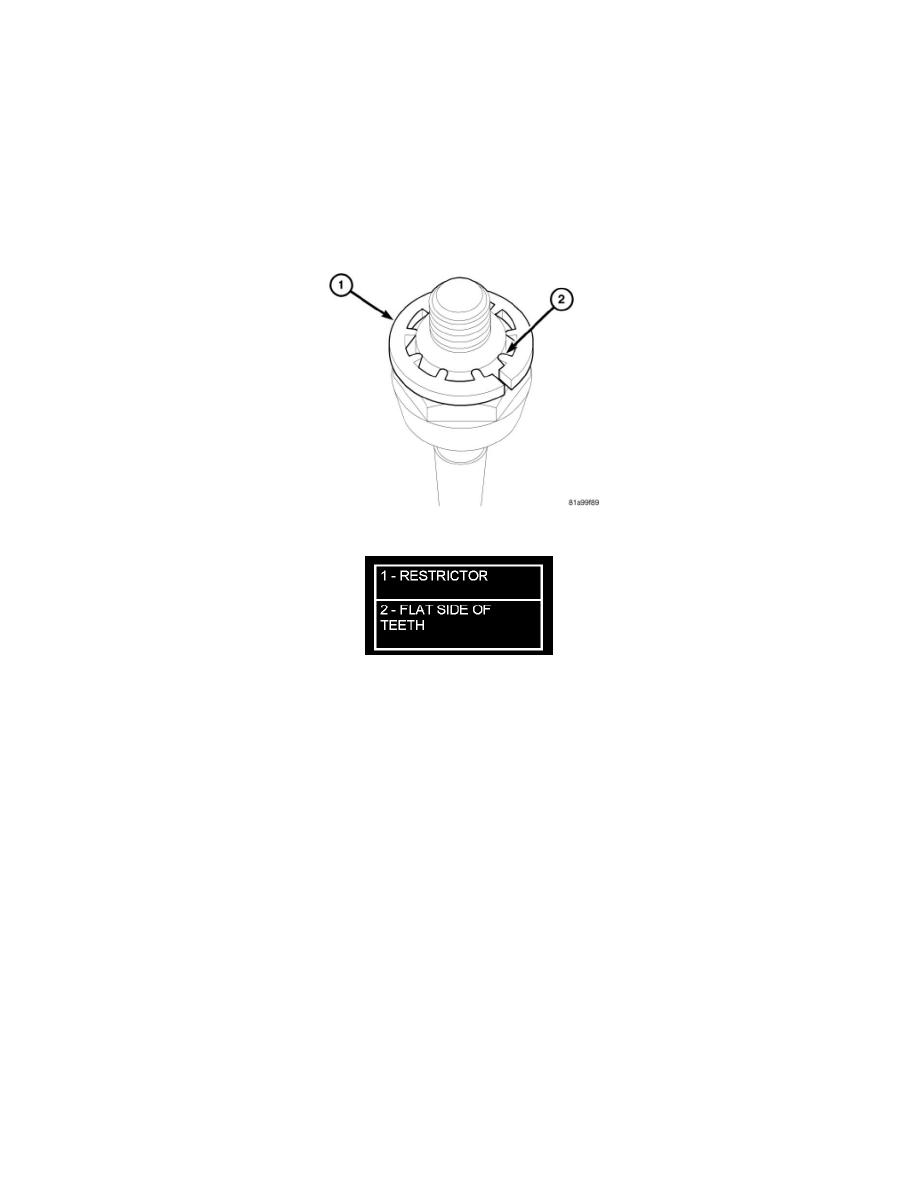
1. Install travel restrictor, flat side of teeth facing out, on inboard end of inner tie rod ball joint (Figure 1).
2. Apply Mopar(R) Lock & Seal Adhesive or equivalent medium thread locker adhesive to inboard end threads of inner tie rod.
Figure 1 Travel Restrictor On Inner Tie Rod
CAUTION: Place an appropriate size wrench on the exposed section of the rack gear to resist rotation and prevent damage to the gear
mechanism during inner tie rod installation. Do not use a tool that could damage the rack gear.
3. Install inner tie rod onto gear using appropriate inner tie rod installer tool or crows foot wrench (Figure 4). While holding rack gear stationary
using an appropriate size wrench placed on exposed section of rack gear, tighten inner tie rod to 78 Nm, (58 ft. lbs.).
4. Apply a small amount of Mopar(R) Lubriplate or equivalent uniformly to groove in inner tie rod shaft where bellows mounts. This allows for toe
adjustment without twisting bellows.
5. Place new transfer tube clamp over transfer tube past where bellows will mount.
6. Loosely place new clamp over large end of bellows.
7. Slide new bellows with clamp over end of inner tie rod and onto gear body and transfer tube.
8. Push small end of bellows past groove machined into inner tie rod, then pull it outward until ridge inside bellows engages groove.
9. Install clamp securing bellows to transfer tube (Figure 6).
10. Using crimping pliers, crimp bellows clamp at gear body. (Figure 2)