
Grand Caravan V6-3.8L (2009)
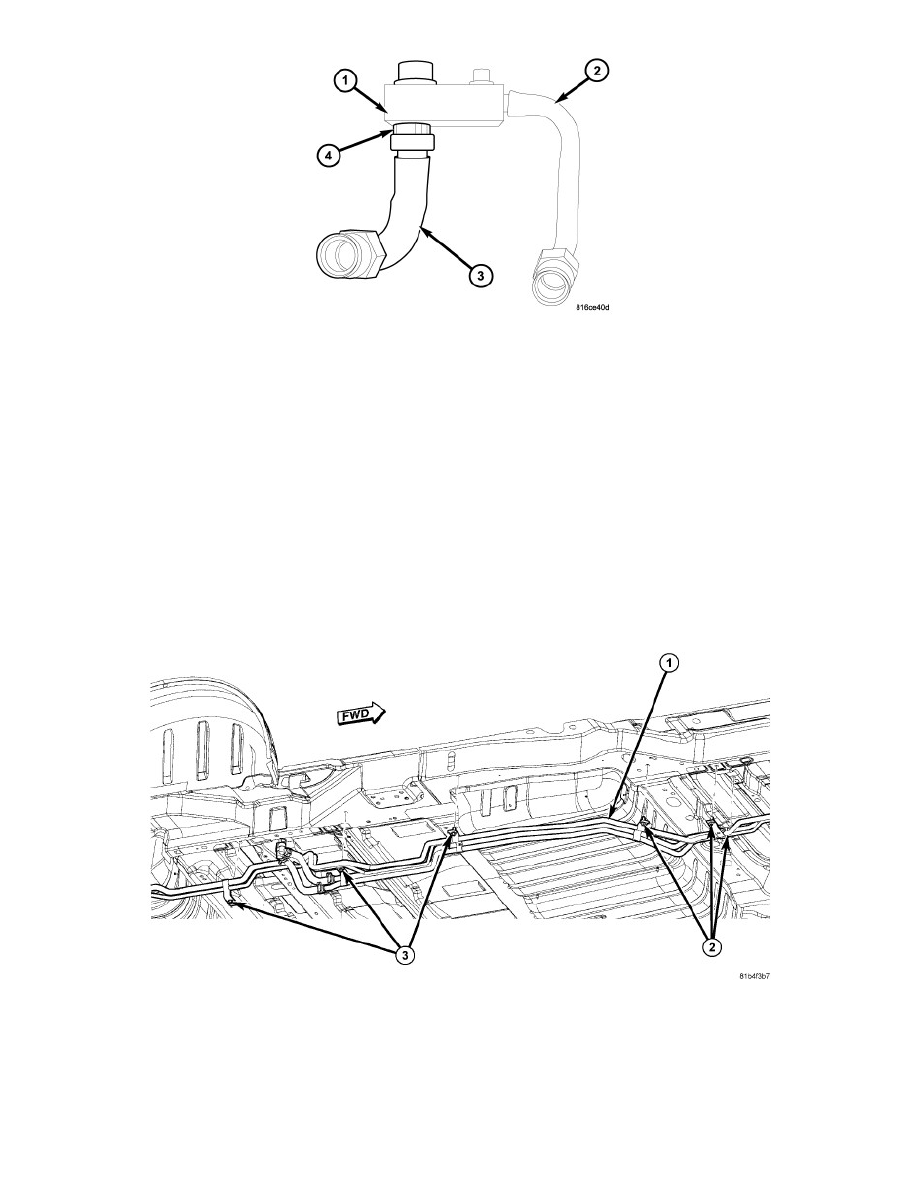
20. If required, place the extension lines and sealing plate (1) on a workbench, remove the nylon retaining clip (4) that secures the suction extension
line (3) to the sealing plate and remove the suction line from the sealing plate.
A/C Underbody Lines - Installation
INSTALLATION
CAUTION: Be certain to adjust the refrigerant oil level when servicing the A/C refrigerant system See: Heating and Air Conditioning/Service
and Repair/Refrigerant Oil Level. Failure to properly adjust the refrigerant oil level will prevent the A/C system from operating
as designed and can cause serious A/C compressor damage.
NOTE: When replacing multiple A/C system components, refer to the Refrigerant Oil Capacities chart to determine how much oil should be
added to the refrigerant system See: Heating and Air Conditioning/Service and Repair/Refrigerant Oil Level.
NOTE: Replacement of the refrigerant line O-ring seals is required anytime an underbody refrigerant line is disconnected. Failure to replace
the rubber O-ring seals may result in a refrigerant system leak.
1. Position the underbody lines (1) underneath the vehicle body and install the six retaining screws (2 and 3). Tighten the screws securely.
CAUTION: Use care not to damage the ABS wire lead or the brake line when installing the brake line bracket.
2. Install the rear brake line bracket, brake line and ABS wire lead onto the rear frame rail.
3. Install the right rear shock mount onto the rear frame rail and remove the jack stand from under the rear axle.
4. Reposition the exhaust system and connect the four rubber exhaust hanger isolators.