
Journey FWD V6-3.5L (2009)
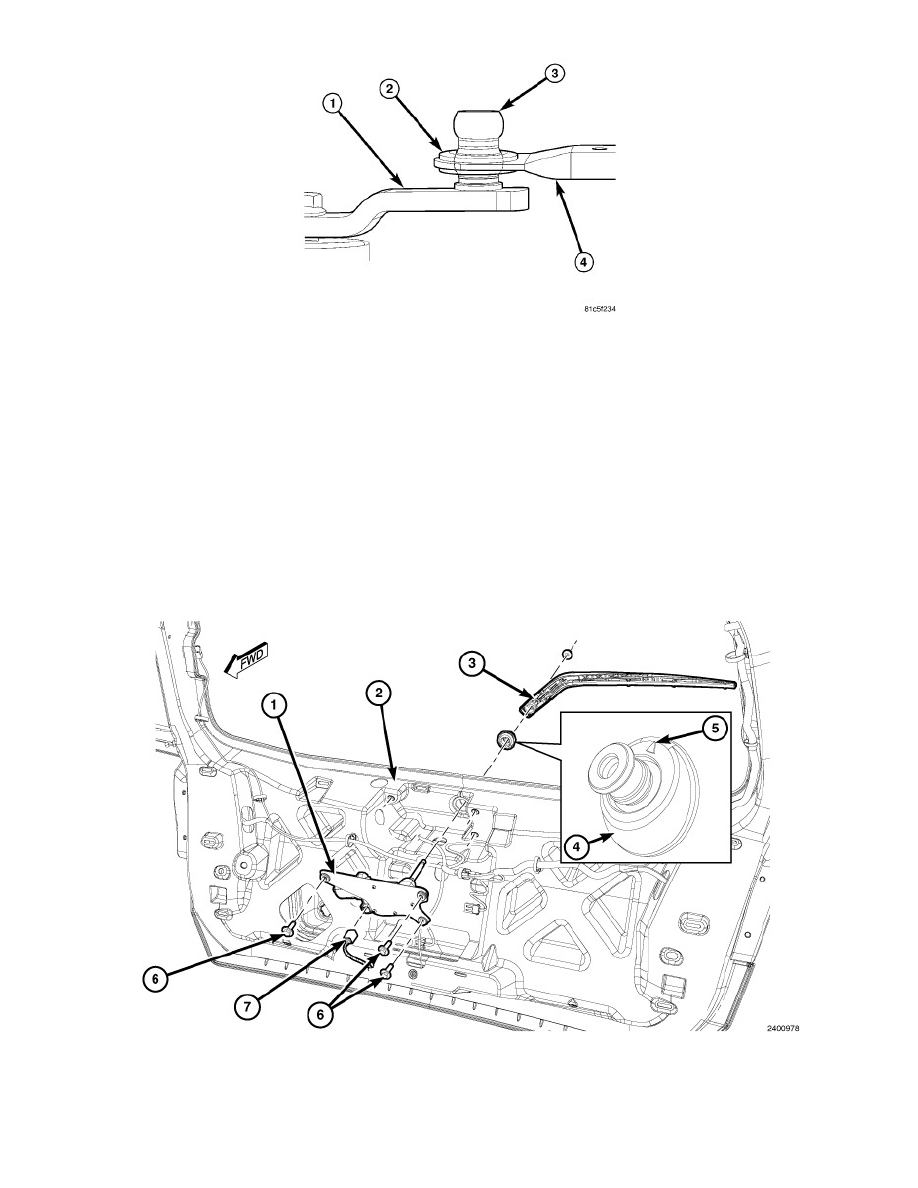
CAUTION: Carefully inspect the installed sleeve bushing (2) to be certain it is centered over the lower ball of the ball stud (3), and not trapped
between the lower ball and the crank arm (1). There should be a visible clearance between the lower surface of the sleeve bushing
and the crank arm. Refer to the accompanying illustration. The sleeve bushing must be able to swivel freely on the lower ball
during wiper operation. If the bushing is trapped between the lower ball and the crank arm, the bushing and the drive link (4)
may be damaged.
9. Position the socket bushing of the right wiper drive link over the ball stud on the crank arm. Place a short 19 millimeter or 3/4 inch socket over the
bushing as an installation tool. Then use large channel-lock pliers to apply enough pressure to the underside of the crank arm and the top of the
socket to snap the bushing onto the ball stud. Do not apply pressure directly to the plastic bushing.
10. Reinstall the inner and outer cowl plenum cover/grille panels. See: Body and Frame/Cowl/Cowl Moulding / Trim/Service and Repair/Cowl Panel
Inner Cover - Installation and See: Body and Frame/Cowl/Cowl Moulding / Trim/Service and Repair/Cowl Panel Outer Cover - Installation.
11. Reinstall both front wiper arms onto the wiper pivots. See: Wiper Arm/Service and Repair/Wiper Arm - Installation.
Rear
REAR
1. If the output shaft bezel and grommet (4) were removed from the outside of the liftgate, install the rubber bezel and grommet into the clearance
hole of the liftgate outer panel. Be certain the arrow (5) molded onto the grommet is oriented upward.
2. Position the rear wiper motor and bracket unit (1) onto the liftgate inner panel (2) as a unit.
3. Install and tighten the three screws (6) that secure the mounting bracket to the liftgate. Tighten the screws to 5 Nm (44 in. lbs.).
4. Reconnect the wire harness connector (7) to the motor connector receptacle.
5. Reinstall the trim panel onto the liftgate inner panel. See: Body and Frame/Doors, Hood and Trunk/Trunk / Liftgate/Trunk / Liftgate Interior Trim