
RAM 1500 Van V8-5.2L CNG VIN T (1999)
7. Remove the horizontal duct from the rear heater-A/C unit.Refer to: "Air Duct : Service and Repair : Horizontal Duct Replacement" See: Air
Duct/Service and Repair/Horizontal Duct Replacement
8. Remove the screw that secures the rear heater- A/C unit ground wire eyelet to the left side panel strainer behind the unit.
9. Remove the two screws that secure the bottom of the rear heater-A/C unit to the underbody panel.
10. Lift the rear heater-A/C unit upwards far enough for the plumbing to clear the hole in the underbody panel, then pull the unit away from the side
panel far enough to access and unplug the wire harness connector from the body wire harness near the front of the unit.
11. Remove the rear heater-A/C unit from the passenger compartment.
DISASSEMBLY
1. Lift the two relay wire harness connectors upward to disengage them from the mounting tabs on the rear of the rear heater-A/C unit housing.
2. Unplug the wire harness connectors from the rear heater-A/C unit blower motor and the rear mode control motor.
3. Disengage the blower motor cooling tube from the nipple on the lower housing of the rear heater-A/C unit.
4. Remove the control cable from the rear heater-A/C/C unit water valve. Refer to: "Heater Control Valve : Service and Repair : Rear Water
Valve" See: Heater Control Valve/Service and Repair/Rear Water Valve
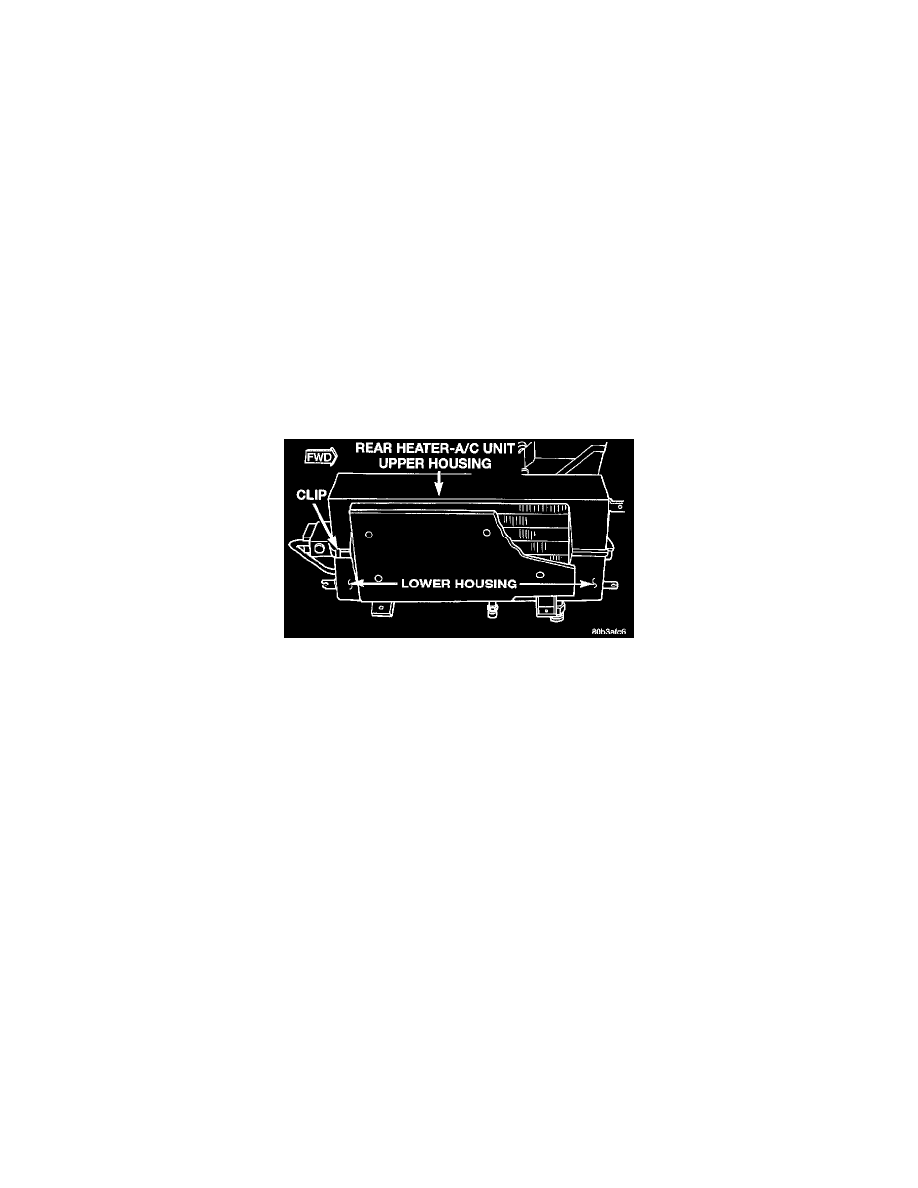
Rear Heat-A/C Unit Housing Clip
5. Remove the clip on the rear inboard corner of the rear heater-A/C unit that secures the upper housing to the lower housing.
6. Remove the six screws that secure the upper housing of the rear heater-A/C unit to the lower housing.
7. Remove the upper housing from the rear heater-A/C unit.
INSPECTION
Inspect the combination coil for bent fins or other damage. Remove any foreign material or other restrictions to air flow. Repair or replace any
faulty or damaged components as required. Clean any foreign material from all of the mating edges of the upper and lower rear heater-A/C unit
housing halves prior to reassembly.
ASSEMBLY
1. Position the upper housing over the lower housing of the rear heater-A/C unit. Be certain that the mating edges of the upper housing are engaged in
the channel on the edges of the lower housing.
2. Secure the upper housing to the lower housing of the rear heater-A/C unit with six screws. Tighten the mounting screws to 2.2 Nm (20 in. lbs.).
3. Reinstall the clip on the rear inboard corner of the rear heater-A/C unit that secures the upper housing to the lower housing.
4. Reinstall the control cable to the rear heater-A/C unit water valve. Refer to: "Heater Control Valve : Service and Repair : Rear Water Valve"
See: Heater Control Valve/Service and Repair/Rear Water Valve
5. Reinstall the blower motor cooling tube over the nipple on the lower housing of the rear heater-A/C unit.
6. Plug in the wire harness connectors for the rear heater-A/C unit blower motor and the rear mode control motor.