
RAM 3500 Truck 2WD L6-6.7L DSL Turbo (2010)
5. Install the instrument panel assembly See: Body and Frame/Interior Moulding / Trim/Dashboard / Instrument Panel/Service and Repair/Instrument
Panel - Installation.
6. If equipped with center floor console, install the floor console ductSee: Air Duct/Service and Repair/Floor Console Duct - Installation.
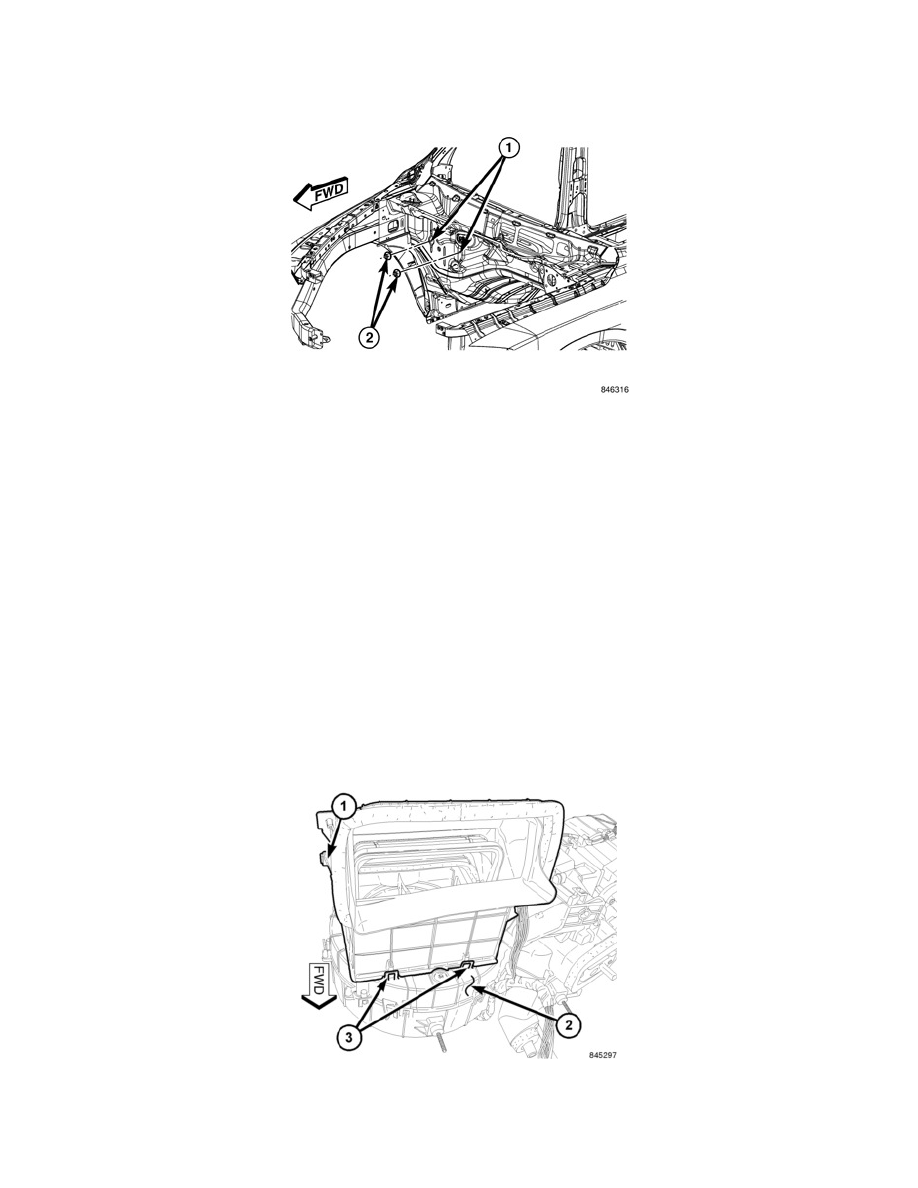
7. Install the two nuts (2) onto the two studs (1) that secure the HVAC housing to the engine compartment side of the dash panel. Tighten the nuts to
6.8 Nm (60 in. lbs.).
8. If removed, install the powertrain control module (PCM) See: Powertrain Management/Computers and Control Systems/Engine Control
Module/Service and Repair/Removal and Replacement/Powertrain Control Module - Installation.
9. Connect the heater hoses to the heater core tubes.
10. Connect the A/C liquid line and the A/C suction line to the A/C expansion valve See: Hose/Line HVAC/Service and Repair/A/C Liquid Line -
Installation.
11. Reconnect the negative battery cable.
12. If the heater core is being replaced, flush the cooling system See: Engine, Cooling and Exhaust/Cooling System/Service and Repair.
13. Refill the engine cooling system See: Engine, Cooling and Exhaust/Cooling System/Service and Repair.
14. Evacuate the refrigerant system See: Service and Repair/Refrigerant System Evacuate.
15. If the A/C evaporator is being replaced, add 60 milliliters (2 fluid ounces) of refrigerant oil to the refrigerant system. When replacing multiple A/C
system components, see the Refrigerant Oil Capacities chart to determine how much oil should be added to the refrigerant system See: Service and
Repair/Refrigerant Oil Capacity. Use only refrigerant oil of the type recommended for the A/C compressor in the vehicle.
16. Charge the refrigerant system See: Service and Repair/Refrigerant System Charge.
17. Initiate the Actuator Calibration function using a scan tool See: Testing and Inspection/Component Tests and General Diagnostics/HVAC System
Test.
Air Inlet Housing
AIR INLET HOUSING
NOTE: If the foam seal on the air inlet housing is deformed or damaged, it must be replaced.
1. Position the air inlet housing (1) onto the top of the HVAC housing (2).
2. Engage the two retaining tabs (3) that secure the front of the air inlet housing to the HVAC housing.