
RAM 3500 Truck 4WD L6-5.9L DSL Turbo VIN C (2002)
Rear Door Weatherstrip: Service and Repair
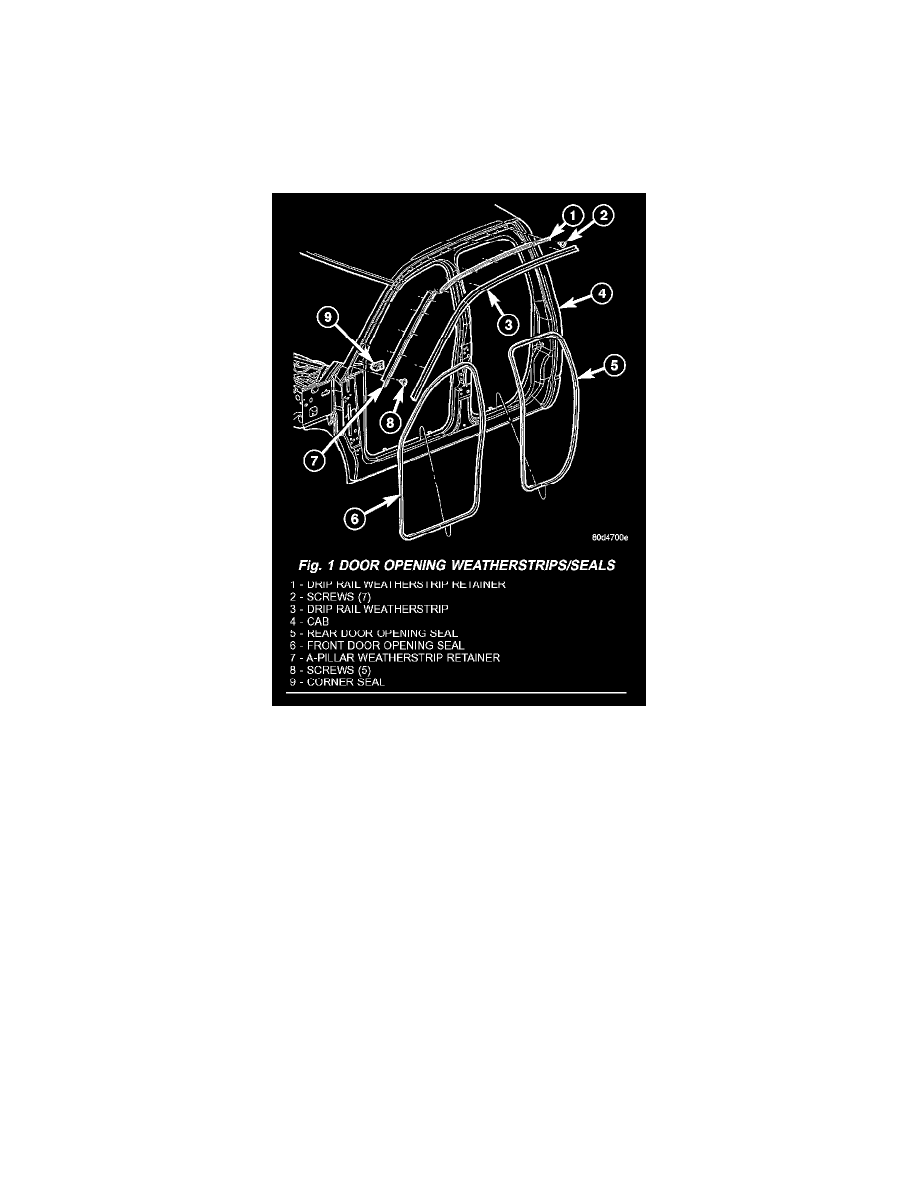
DOOR OPENING SEAL
REMOVAL
FRONT DOOR SEAL
1. Remove the cowl trim panel. Refer to Trim Panel.
2. Remove the lower b-pillar trim panel. Refer to Trim Panel.
Fig. 1
3. Separate the door opening seal from the door opening flange. (Fig. 1)
REAR DOOR SEAL
1. Remove the lower b-pillar trim panel. Refer to Trim Panel.
2. Remove the lower c-pillar trim. Refer to Trim Panel.
3. Separate the door opening seal from the door opening flange. (Fig. 1)
INSTALLATION
FRONT DOOR SEAL
1. Position the seal to the bottom of the door opening, with bulb facing outboard, starting the installation at the center of the lower flange. Press the
seal onto the sill flange and work around the perimeter of the door opening until fully seated. Work in one direction, smoothing the seal to avoid
puckers or wrinkles.
2. Install the lower b-pillar trim.
3. Install the cowl trim panel.
4. When installing a new weatherstrip on the front door opening, remove the tear strip starting at the splice and moving around the front of the door
to the back of the opening.
REAR DOOR SEAL
1. Position the seal to the bottom of the door opening, with bulb facing outboard, starting the installation at the center of the lower flange. Press the
seal onto the sill flange and work around the perimeter of the door opening until fully seated. Work in one direction, smoothing the seal to avoid
puckers or wrinkles.
2. Install the lower c-pillar trim.