
RAM 3500 Chassis Cab Truck 2WD L6-6.7L DSL Turbo (2010)
7. Verify that there is adequate clearance for the clutch field coil wire lead and connector (4) between the compressor housing and the pulley.
NOTE: When installing an original or a new clutch assembly, try the original shims first. When installing a clutch onto a compressor that
previously did not have a clutch, use the 1.0, 0.50 and 0.13 millimeter (0.040, 0.020 and 0.005 inch) shims from the clutch hardware
package which is provided with the new clutch.
8. Install the clutch shims onto the compressor shaft.
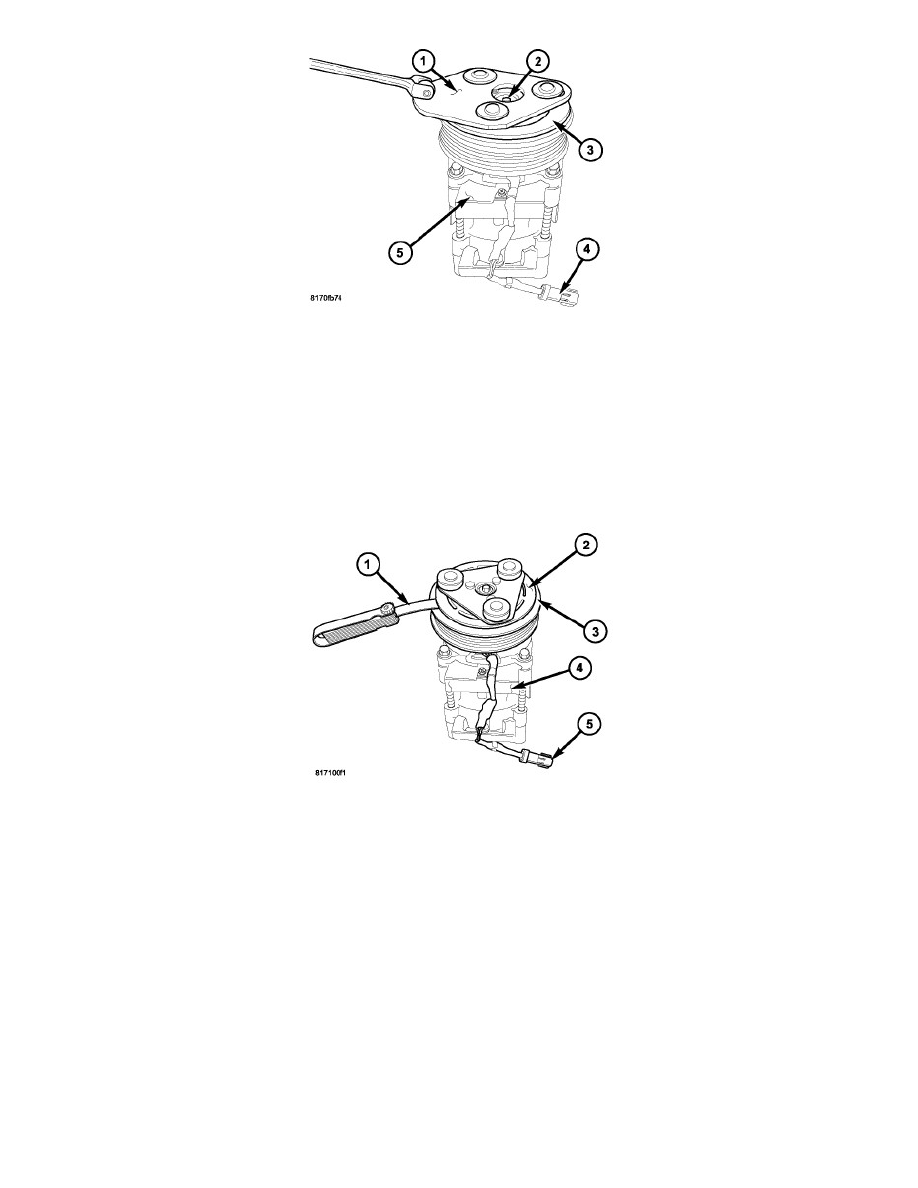
9. Using Compressor Clutch Holding Fixture 9351 (1), install the bolt (2) that secures the clutch plate (3) to the A/C compressor (5). Hold the clutch
plate stationary with the fixture and tighten the bolt to 15 Nm (133 in. lbs.).
10. Using a feeler gauge (1), check the air gap between the clutch plate (2) and the pulley and bearing assembly (3). If the air gap is not 0.35 to 0.75
millimeter (0.014 to 0.030 inch), add or subtract shims as required.
11. Position the A/C compressor (4) onto the mounting bracket and install the fasteners See: Service and Repair/A/C Compressor - Installation.
12. Connect the engine wire harness to the compressor clutch coil connector (5).
13. Lower the vehicle.
14. Install the accessory drive belt See: Engine, Cooling and Exhaust/Engine/Drive Belts, Mounts, Brackets and Accessories/Drive Belt/Service and
Repair/Serpentine Accessory Drive Belt - Installation.
15. Reconnect the negative battery cable.