
RAM 3500 Chassis Cab Truck 2WD L6-6.7L DSL Turbo (2010)
10. Remove the tape or plugs from the opened accumulator tube.
11. Lubricate new rubber O-ring seals with clean refrigerant oil and install them onto the accumulator tube fitting. Use only the specified O-rings as
they are made of a special material for the R-134a system. Use only refrigerant oil of the type recommended for the A/C compressor in the vehicle.
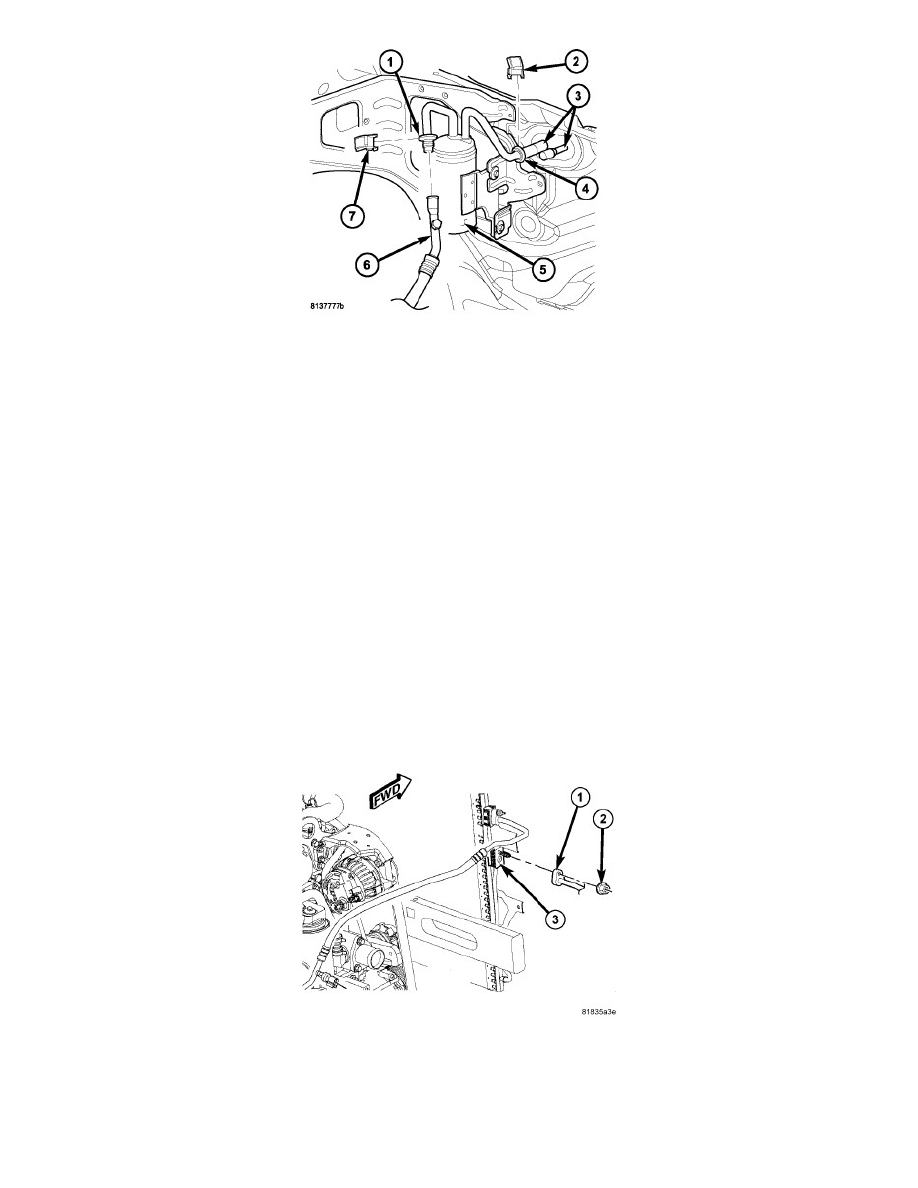
12. Connect the A/C suction line (6) to the spring-lock coupler (1) on the A/C accumulator (5) and install the secondary retaining clip (7) See: Heating
and Air Conditioning/Coupler HVAC/Service and Repair/Refrigerant Line Coupler - Installation.
13. Install the air filter housing cover (refer to ENGINE/AIR INTAKE SYSTEM).
14. Reconnect the negative battery cables.
15. Evacuate the refrigerant system See: Heating and Air Conditioning/Service and Repair/Refrigerant System Evacuate.
16. Adjust the refrigerant oil level See: Heating and Air Conditioning/Service and Repair/Refrigerant Oil Level.
17. Charge the refrigerant system See: Heating and Air Conditioning/Service and Repair/Refrigerant System Charge.
A/C Liquid Line - Removal
REMOVAL
WARNING: Refer to the applicable warnings and cautions for this system before performing the following operation See: Heating and Air
Conditioning/Service Precautions/Warning and See: Heating and Air Conditioning/Service Precautions/Caution . Failure to follow these
instructions may result in possible serious or fatal injury.
NOTE: The A/C liquid line is serviced in two sections.
FRONT SECTION
1. Disconnect and isolate the negative battery cable.
2. Recover the refrigerant from the refrigerant system See: Heating and Air Conditioning/Service and Repair/Refrigerant System Recovery.
3. Remove the passenger side battery See: Starting and Charging/Battery/Service and Repair/Removal and Replacement/Battery - Removal.
4. Remove the air seal from the right end of the A/C condenser (5) to gain access to the refrigerant line fittings.
5. Remove the nut (2) that secures the front section of the A/C liquid line (1) to the A/C condenser (3).
6. Disconnect the A/C liquid line from the A/C condenser and remove and discard the O-ring and gasket.