
Sprinter 2500 L5-2.7L DSL Turbo (2003)
Wiper Motor: Service and Repair
REMOVAL
1. Disconnect and isolate the battery negative cable.
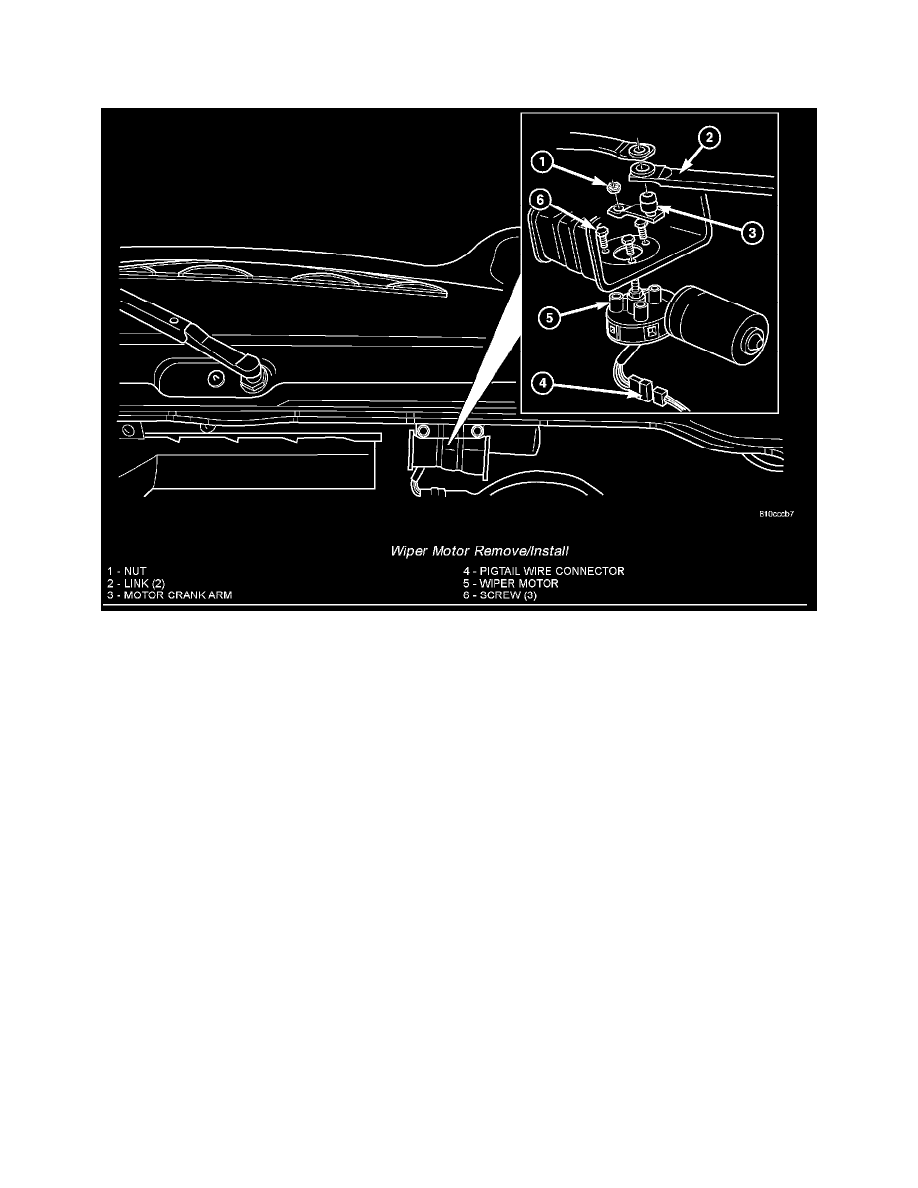
Wiper Motor Remove/Install
2. Disconnect the vehicle wire harness connector for the wiper motor from the motor pigtail wire connector.
3. Remove the nut that secures the motor crank arm to the wiper motor output shaft.
4. If this wiper motor is to be reinstalled, make an index mark between the wiper motor output shaft and the motor crank arm using a suitable marker.
5. Disengage the motor crank arm from the wiper motor output shaft.
6. Remove the three screws that secure the wiper motor to the wiper linkage module motor bracket.
7. Remove the wiper motor from the wiper linkage module motor bracket.
INSTALLATION
1. Position the wiper motor to the underside of the wiper linkage module motor bracket.
2. Install and tighten the three screws that secure the wiper motor to the wiper linkage module motor bracket. Tighten the screws to 12 N.m (105 in.
lbs.).
3. If this wiper motor is being reinstalled, position the motor crank arm on the wiper motor output shaft so that the index marks made during the
removal procedure are aligned. If this is a new wiper motor installation, the motor crank arm should be installed so that it is pointed toward the left
(driver) side of the vehicle and parallel with the two wiper drive links while both wiper blades are positioned on their alignment marks near the
lower edge of the windshield glass.
4. Install and tighten the nut that secures the motor crank arm to the wiper motor output shaft. Tighten the nut to 12 N.m (105 in. lbs.).
5. Reconnect the vehicle wire harness connector for the wiper motor to the motor pigtail wire connector.
6. Reconnect the battery negative cable.