
SRT-4 L4-2.4L Turbo VIN S (2004)
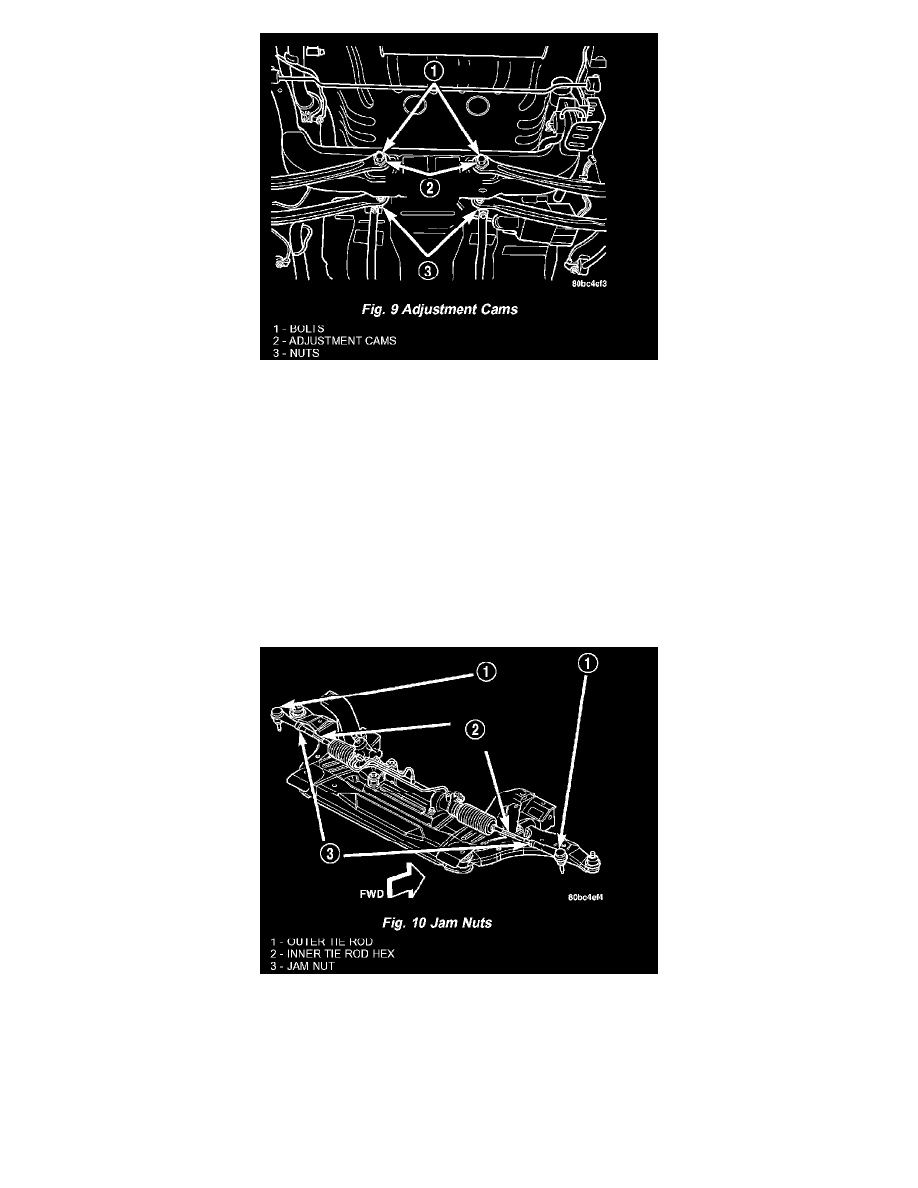
1. Loosen the nuts on the left and right rear lateral link attaching bolts at the rear crossmember as necessary to allow rotation of the rear toe
adjustment cams (Fig. 9).
CAUTION: When adjusting rear toe, the notches on the toe adjustment cams are not to be facing down. The notches in the adjustment cams are
only to be facing up or toward one side.
2. Rotate each toe adjustment cam until the preferred rear toe specification is obtained (Fig. 9). Refer to WHEEL ALIGNMENT
SPECIFICATIONS.
3. While holding the toe adjustment cams from turning, tighten the attaching bolt nuts. This will securely hold the adjustment cams in position.
Tighten the attaching bolt nuts to a torque of 88 Nm (65 ft. lbs.).
4. Proceed to FRONT TOE to set the front toe.
FRONT TOE
CAUTION: Do not twist the inner tie rod-to-steering gear rubber boots while turning the inner tie rod during the front toe adjustment.
1. Loosen the tie rod adjusting jam nuts (Fig. 10). Grasp each inner tie rod at its hex and rotate it one way or the other until the front wheel toe is set
to the preferred specification. Refer to WHEEL ALIGNMENT SPECIFICATIONS.
2. Tighten tie rod adjusting jam nuts to a torque of 75 Nm (55 ft. lbs.).
3. Make sure the inner tie rod-to-steering gear rubber boots are not twisted. If twisted, loosen the boot clamp at the inner tie rod and move the boot as
necessary.
4. Remove steering wheel clamp.
5. Remove the alignment equipment.
6. Road test the vehicle to verify the steering wheel is straight and the vehicle does not pull or wander.