
Stratus Sedan V6-2.7L VIN T FFV (2003)
^
Inspect the shock for any condition of rod binding over the full stroke of the shaft.
^
Check the upper mounting bracket for cracks, distortion and any sign of damage.
^
Inspect the upper mounting bracket-upper control bushings for deterioration.
^
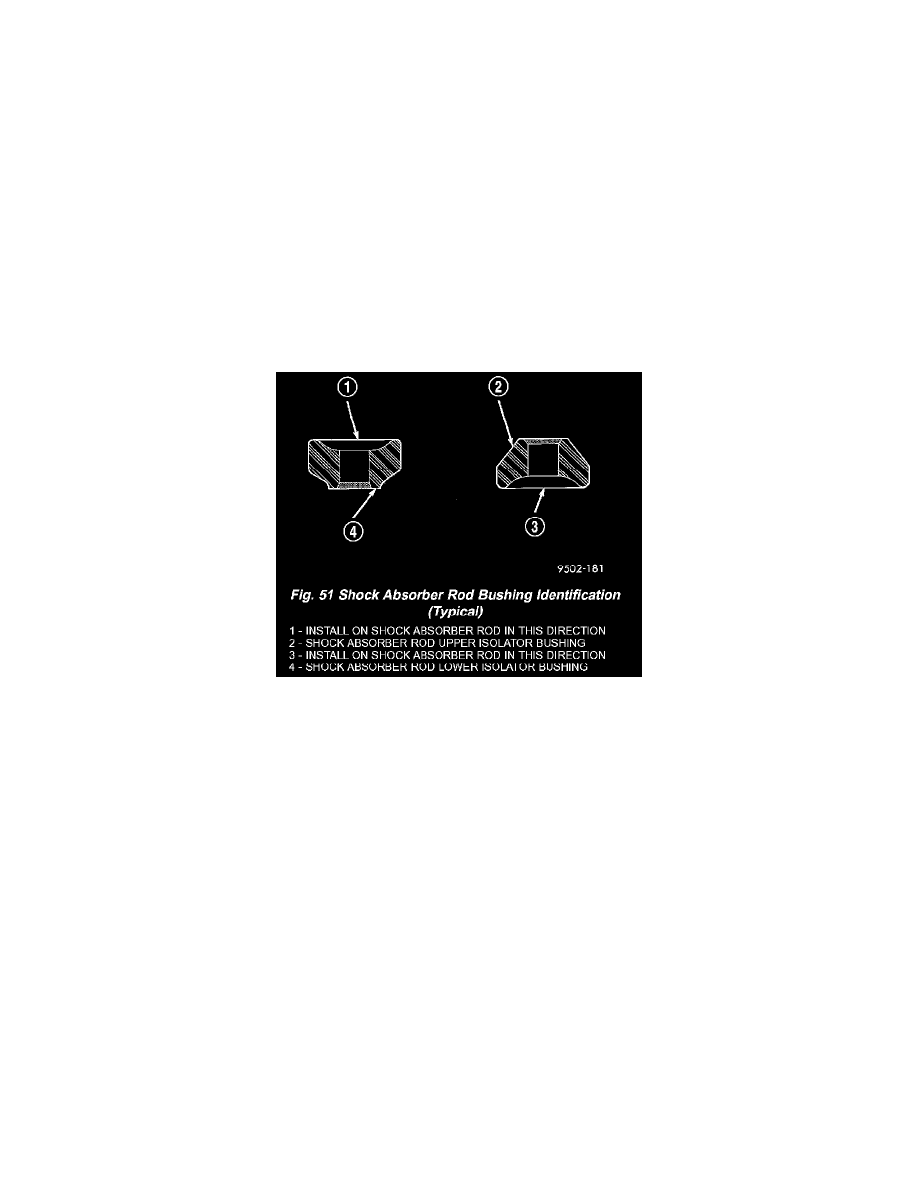
Check the upper and lower shock rod isolator bushings for severe deterioration.
^
Check the upper and lower spring isolators for severe deterioration.
^
Inspect the dust shield for rips and deterioration.
^
Inspect the jounce bumper for cracks and signs of deterioration.
^
Inspect the coil spring for any sign of damage to the coating.
ASSEMBLY - SHOCK ASSEMBLY
For the disassembly and assembly of the shock assembly, use strut spring compressor Pentastar Service Equipment (PSE) tool W-7200, or the
equivalent, to compress the coil spring. Follow the manufacturer's instructions closely.
NOTE: If the coil spring, upper mounting bracket, rod bushings, upper coil spring isolator, and upper control arm have been removed from the spring
compressor, proceed with the next step, otherwise, proceed with step 7.
NOTE: If installation of the upper control arm on the upper mounting bracket is necessary, Refer to Control Arm/Service and Repair.
1. Install the upper coil spring isolator on the upper (shock absorber/upper control arm) mounting bracket (Fig. 49).
CAUTION: The top and bottom shock absorber rod isolator bushings are unique to the position which they are installed on the rod. When installing
the bushings on the rod, attention must be paid to their location so they are installed correctly (Fig. 51).
2. Install the sleeve into the lower shock absorber rod isolator bushing (Fig. 49). Install the shock absorber rod lower isolator bushing and sleeve in
the bottom of the upper (shock absorber/upper control arm) mounting bracket as shown (Fig. 49). From the top, install the shock absorber rod
upper isolator bushing into the center of the upper mounting bracket over the sleeve protruding from the lower isolator bushing (Fig. 48). The
smaller end of each bushing is to face away from the upper mounting bracket once installed.
3. Place the lower end (smaller diameter) of the coil spring in the spring compressor supported by the lower hooks, following the manufacturer's
instructions. Position the coil spring lower end tip at the position it was at before coil spring removal from the compressor as noted in Step 8 of
DISASSEMBLY. Proper orientation of the spring in the compressor is necessary for proper alignment of all shock assembly components.
4. Install the upper (shock absorber/upper control arm) mounting bracket on top of the coil spring matching the coil spring tip to the built-in step in
the isolator on the upper mounting bracket. Position the upper control arm ball joint so it lies directly below the front upper hook as shown (Fig.
45).
5. Position the upper hooks on top of the upper mounting bracket as shown (Fig. 45).
6. Compress the coil spring.
7. Install the lower spring isolator on the lower spring seat of the shock absorber (Fig. 50). When installing the spring isolator, be sure the isolator
sets in the notch made for the lower coil spring end.