
Medallion L4-2165cc 2.2L (1988)
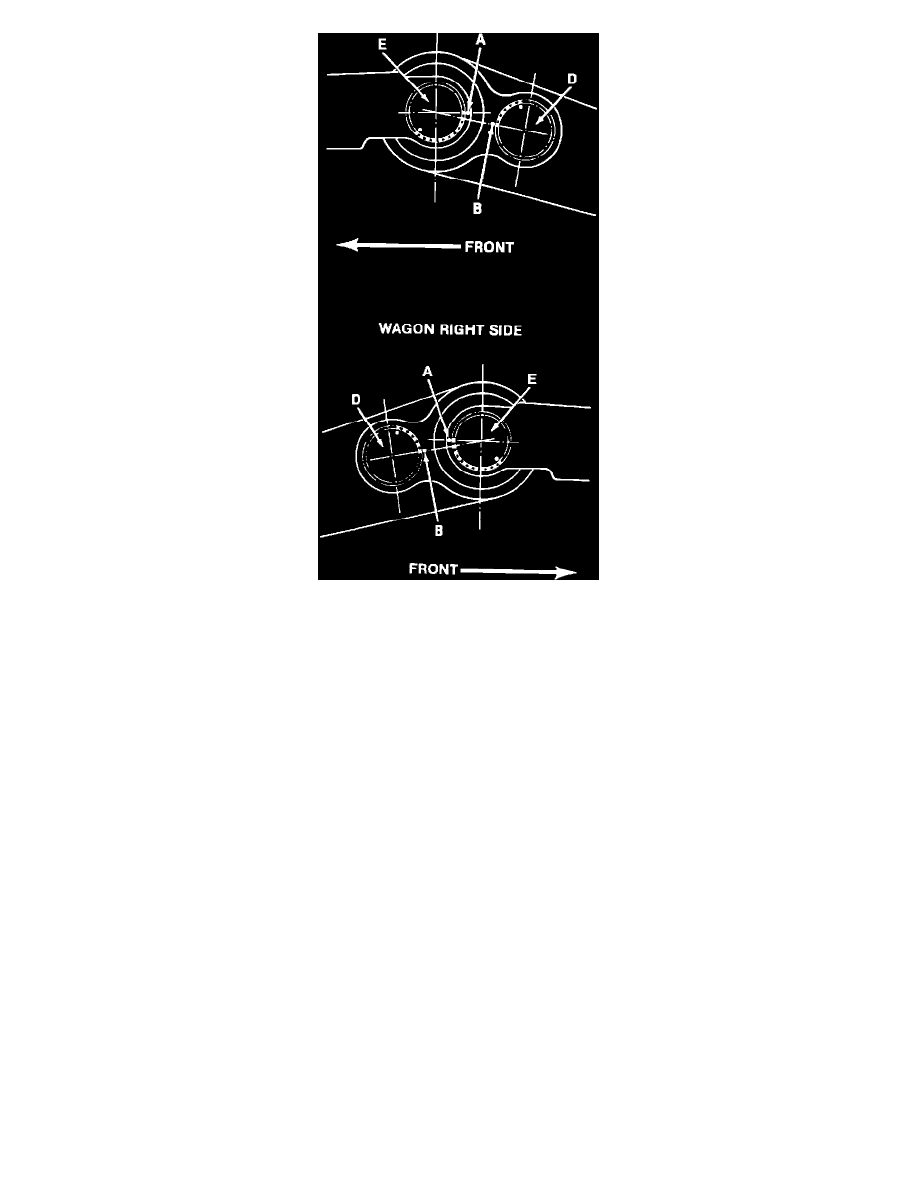
Fig. 13 Positioning anti-sway & suspension bars (torsion bar installation 1 to 3 bar). Wagon models
9. On wagon models, proceed as follows:
a. The anti-sway (stabilizer) bar (D) is positioned 5 teeth up from the mark (B) made previously.
b. The suspension bar (E) is positioned 10 teeth down from the initial position mark (A). Do not use a hammer to drive in torsion bars (other
than brass) as damage to the splines will result.
10. When the bars are properly aligned, push into place. A brass hammer may be used for this purpose.
11. Remove threaded rod.
12. Install tire and wheel assemblies.
13. Lower vehicle.
14. Check and adjust vehicle height as required.
All Four Bars
Before installing torsion bars, the rear trailing arms must be properly positioned. To accomplish this, proceed as follows:
1. Tools Sus.Lm, Sus.Lm. 01 and T.Ar. 1056 are required.
2. Refer to steps 1 through 7 under "1 To 3 Bars".