
Talon AWD L4-1997cc 2.0L DOHC Turbo VIN F SMFI (1997)
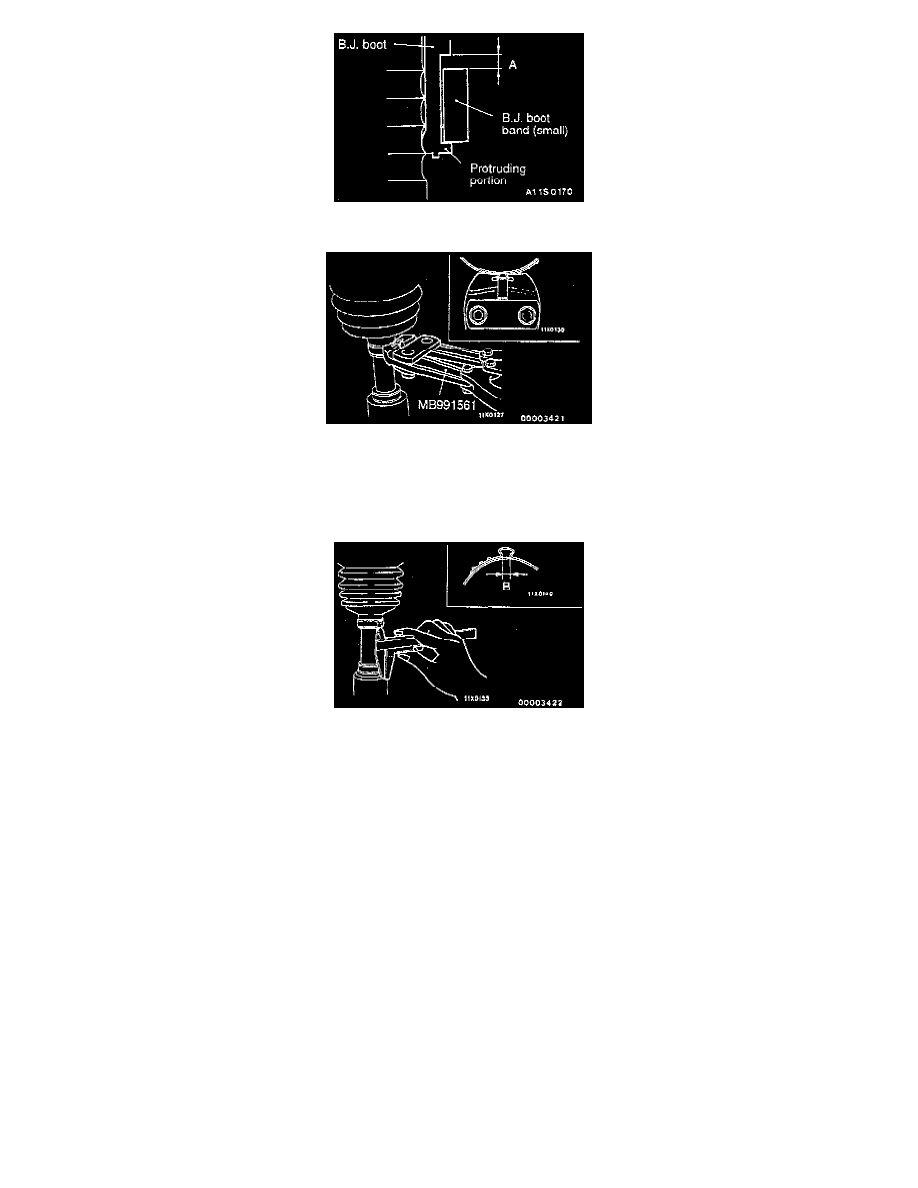
5. Place the boot band (small) along the protruding portion, and install it so that there is some clearance (A) along the other side.
6. Use the special tool to crimp the B.J. boot band (small).
CAUTION:
1. Hold the drive shaft perpendicularly, and use the special tool to crimp the B.J. boot band securely.
2. Crimp the B.J. boot band until the special tool touches the stopper.
7. Check that the crimped width (B) is within 2.4 - 2.8 mm (0.094 - 0.110 inch).
a. When more than 2.8 mm (0.110 inch):
-
Readjust the dimension (W) of step (4) to the value calculated by the following equation, and repeat step (6).
-
W = 5.5 mm (0.217 inch) - B
-
Example: If (B) is 2.9 mm (0.114 inch), (W) is 2.6 mm (0.102 inch).
b. When less than 2.4 mm (0.094 inch):
-
Remove the B.J. boot band, readjust the dimension (W) of step (5) to the value calculated by the following equation, and use a new B.J.
boot band to repeat steps (5) to (6).
-
W = 5.5 mm (0.217 inch) - B
-
Example: If (B) is 2.3 mm (0.091 inch), (W) is 3.2 mm (0.126 inch).
8. Check that the B.J. boot band is secured correctly. If the band is secured incorrectly, repeat steps (6) to (8) to replace it.